Unit 2 - Abstraction
Abstraction Form - The relationship between Photography and Abstraction is captivating. Unlike other visual forms of art that being with a blank field that has to be filled by the artist, Photography creates a world full of information. The regular job of the Photographer is to select and capture a small chunk of reality in an almost conscientious manor. Some may argue that Photography and Art are essentially abstract and that photographs are adaptations of existence. In the early years of Photography, a small collective of artists understood this accepted this attitude of the medium and accentuated the abstract aspects of photographs.
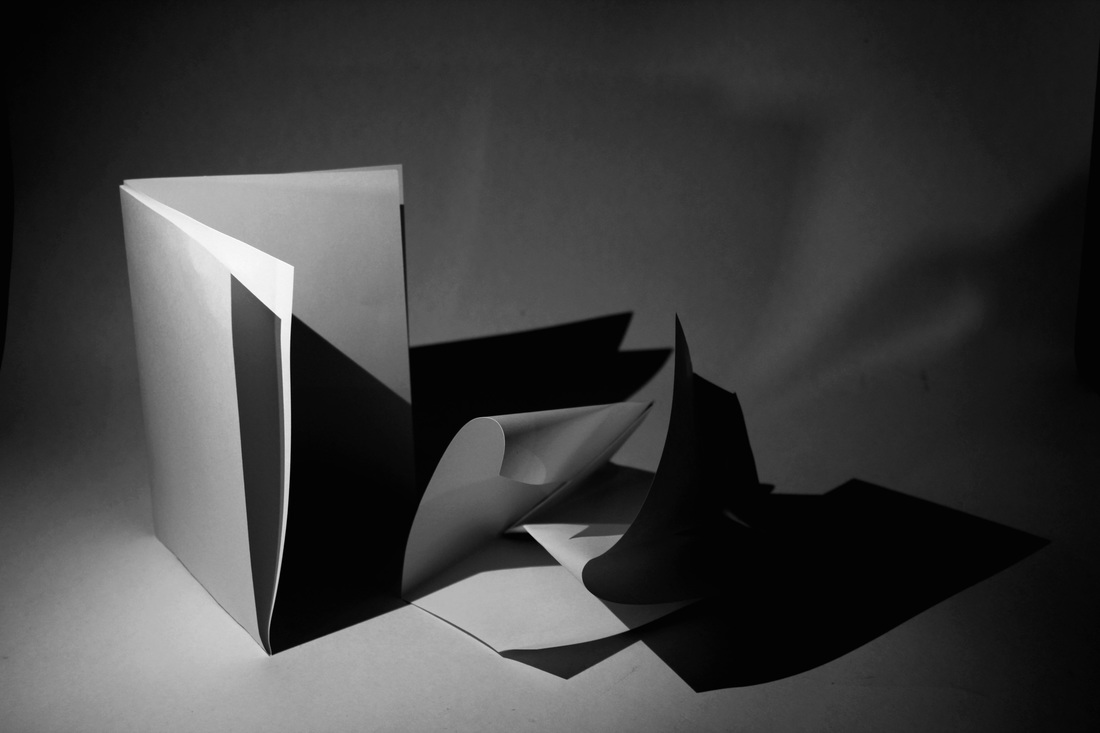
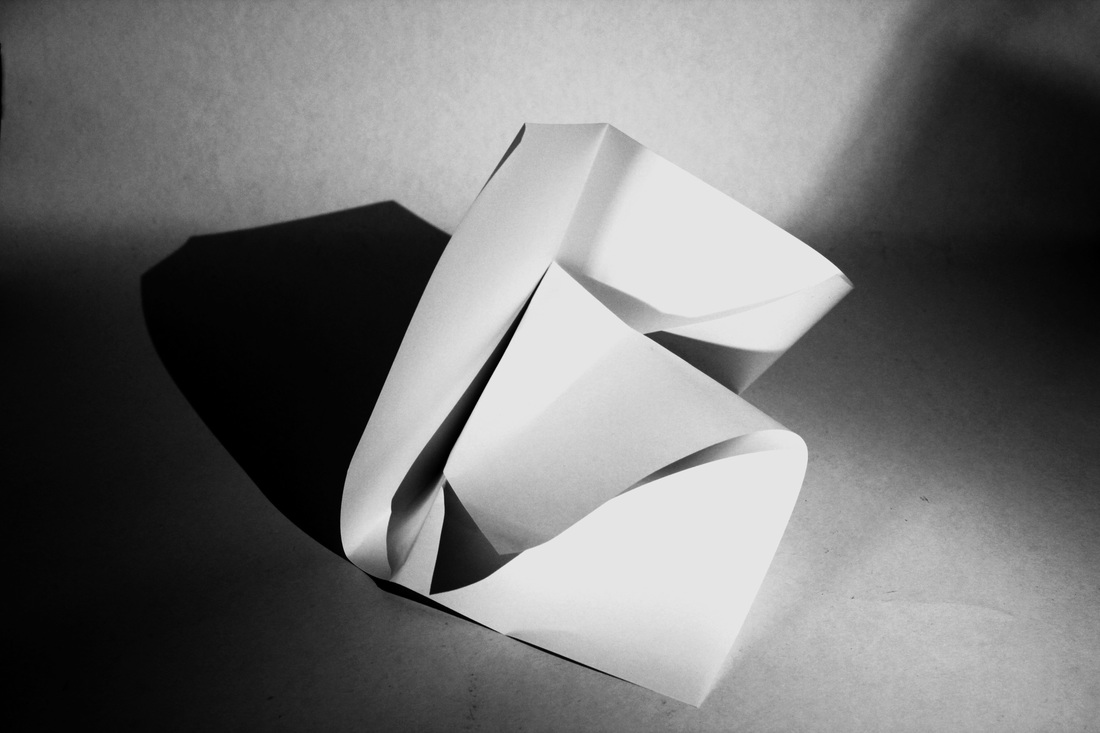
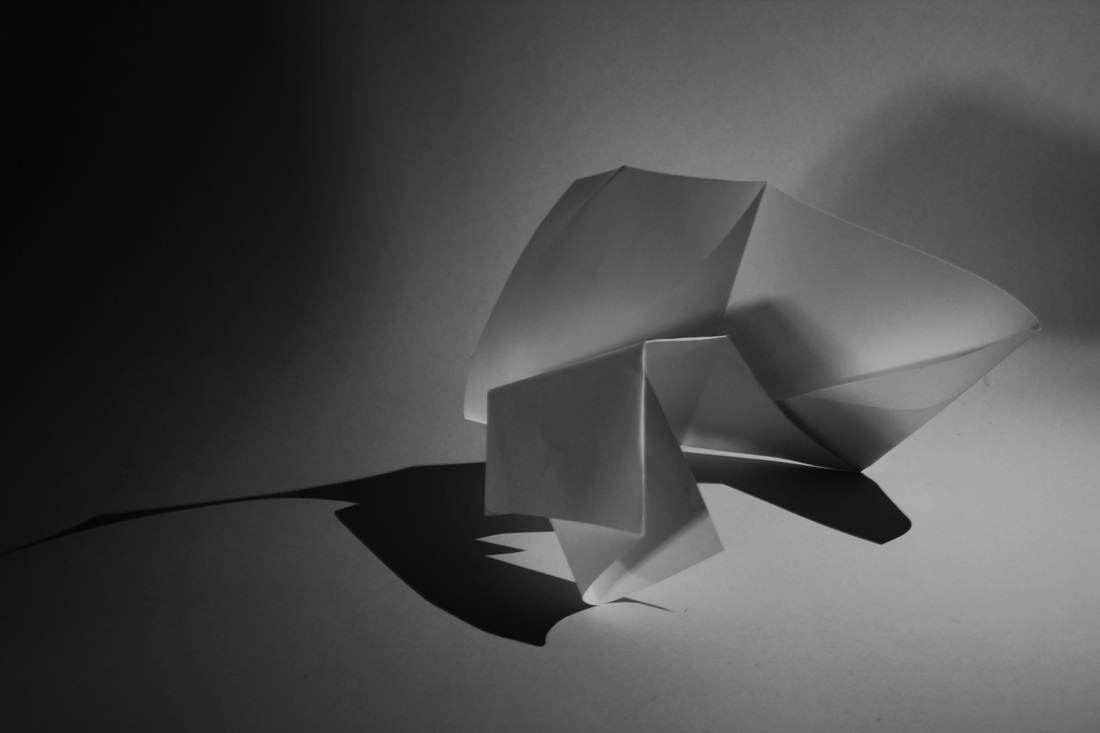
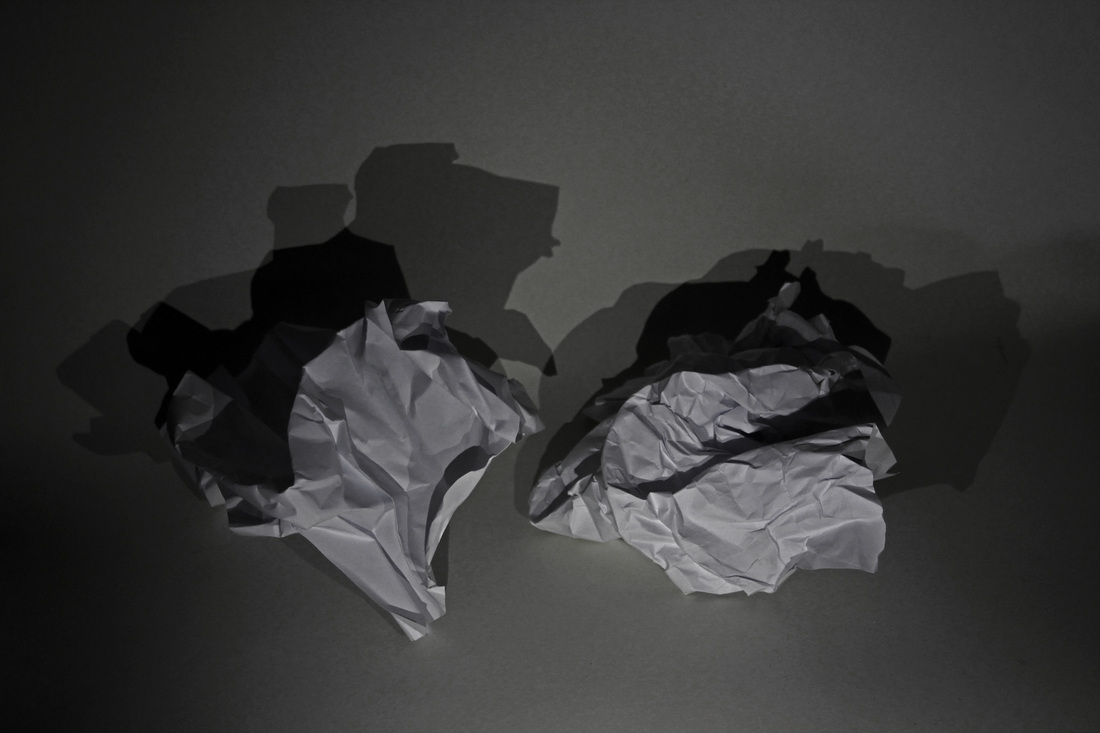
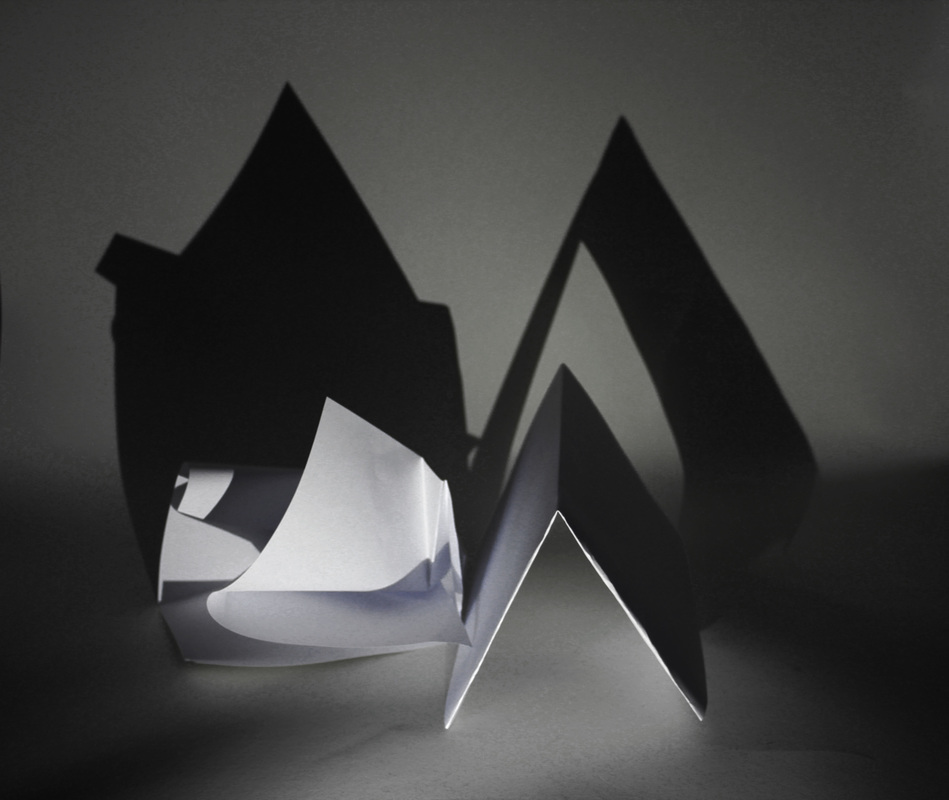
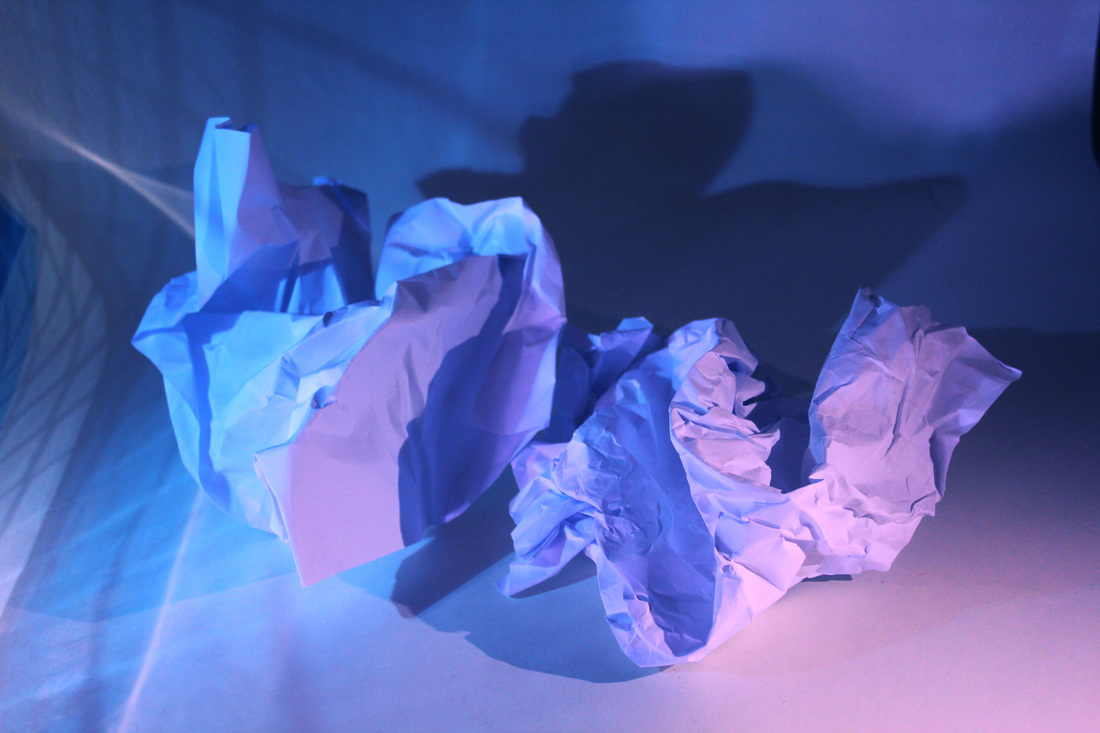
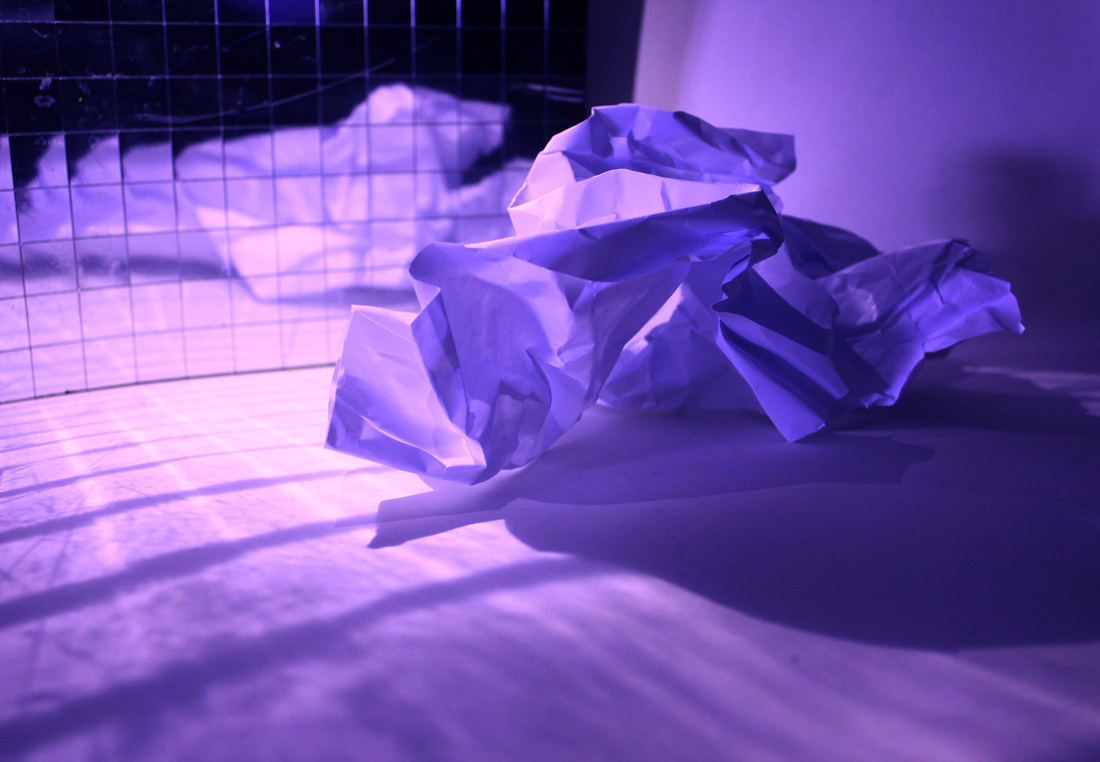
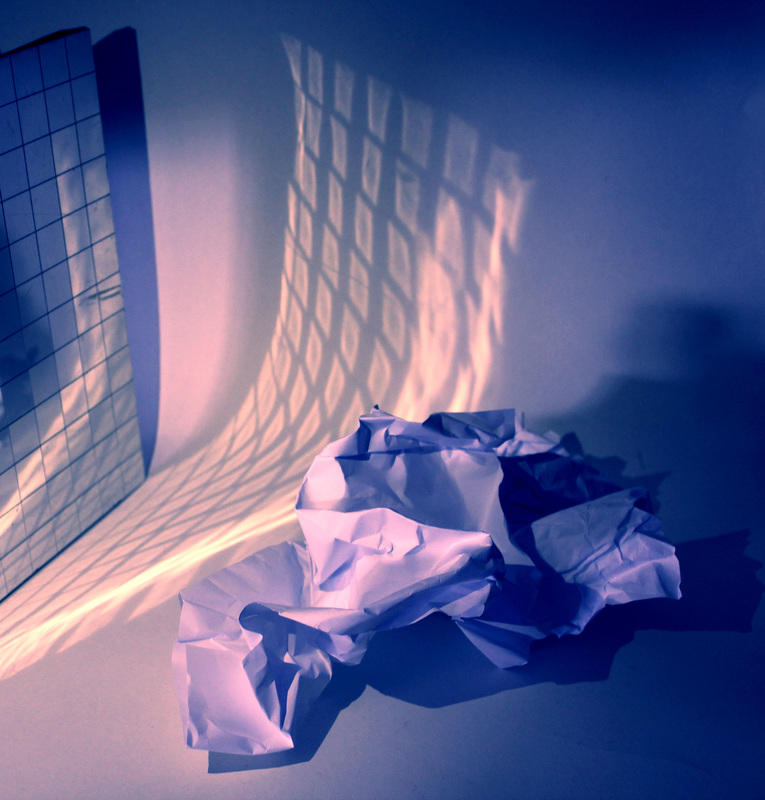
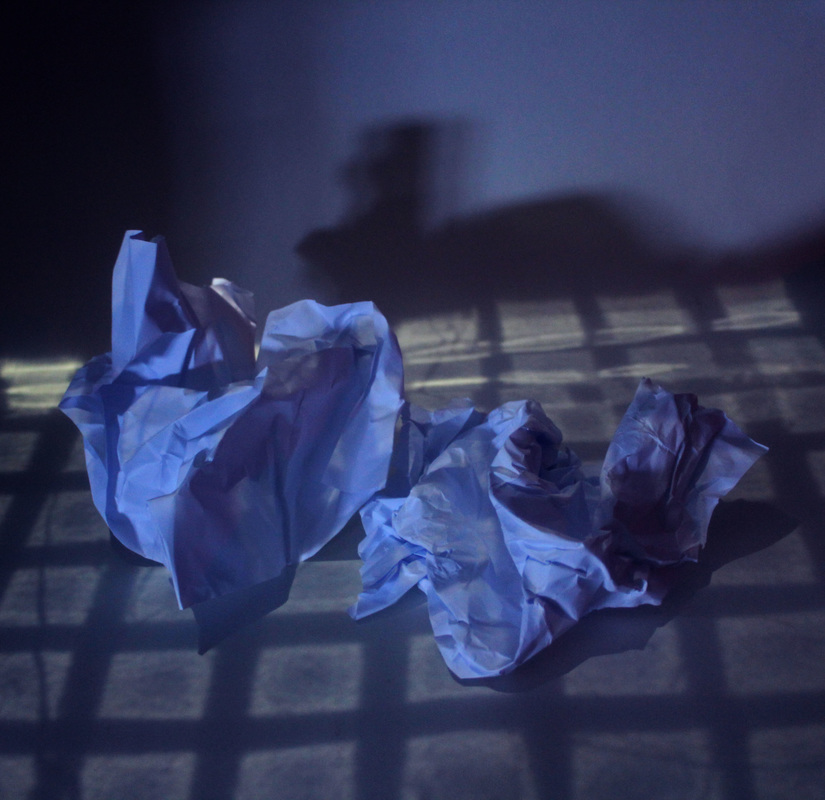
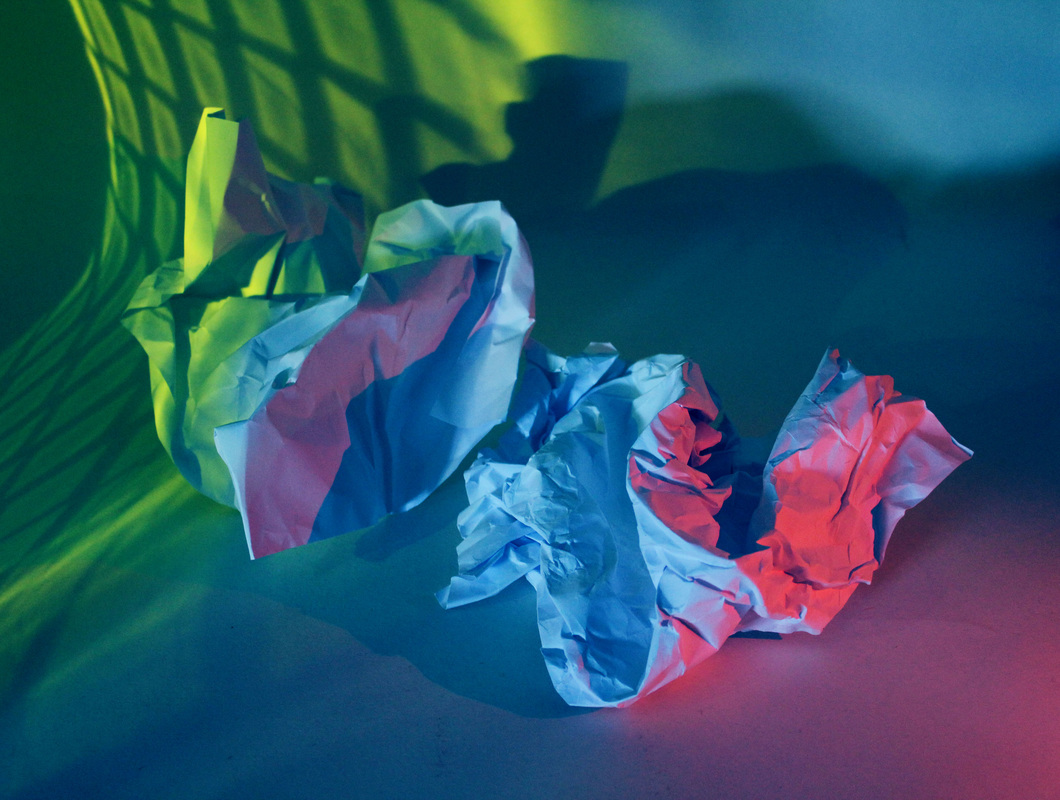
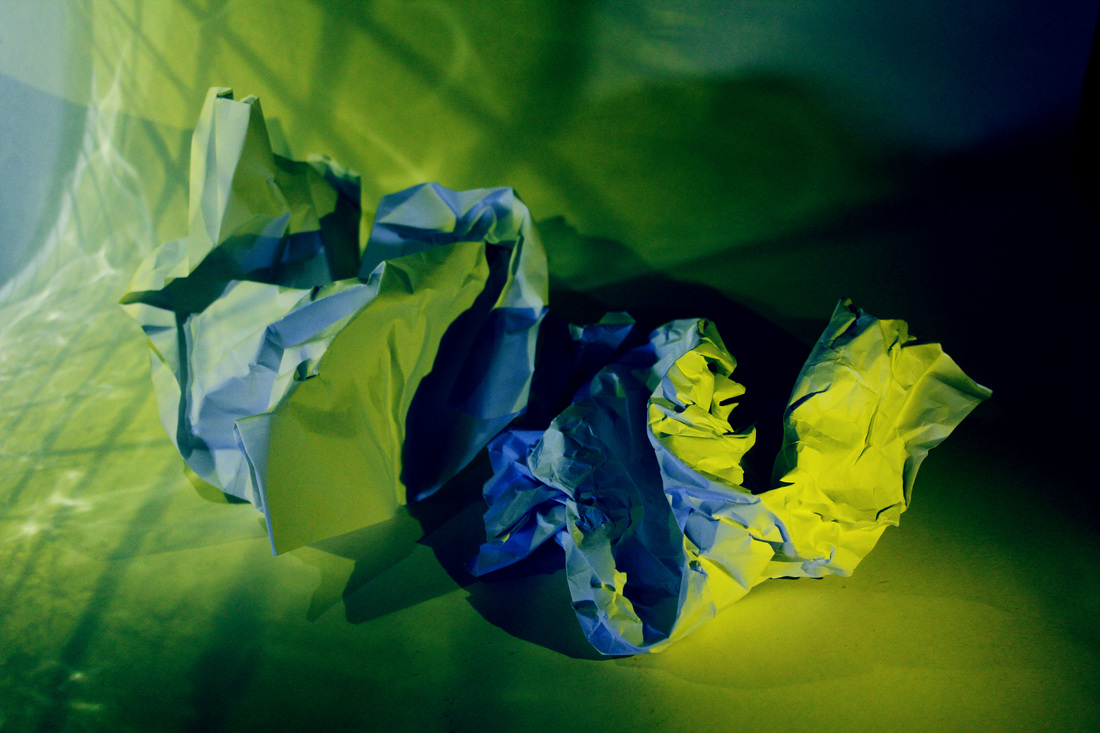
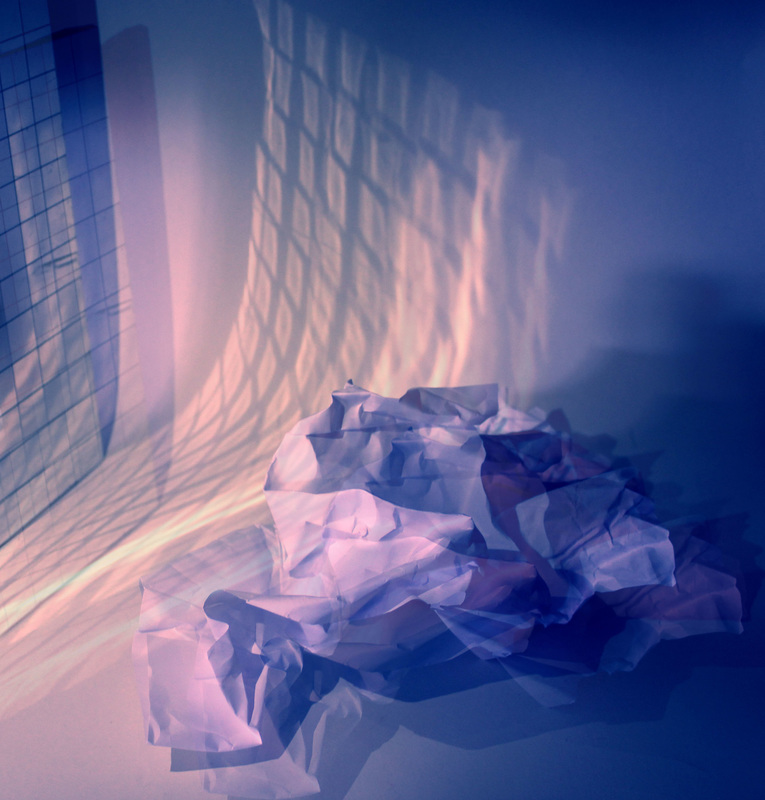
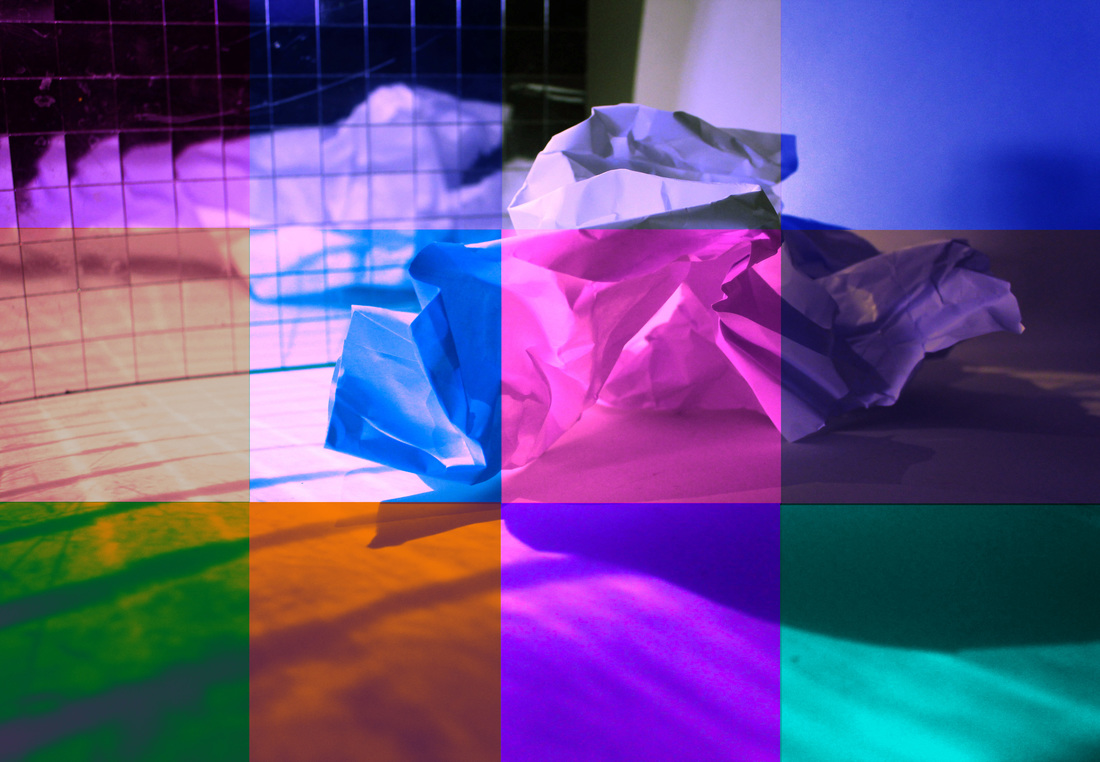
Task 1 - The White Paper Test
For this task, I had to make twenty-four photographs of one piece of white paper. We weren't allowed to cut or tear the paper, however, we could fold it, roll it and crumple it. I shot these photographs onto a white background in the stuidio with spotlights and soft light. I decided to use colour filters on the spotlights in some photos to add more of a contrast within the image. I also liked to mess around with the lighting and change the settings to create different effects, e.g.shadows.
|
|
|
|
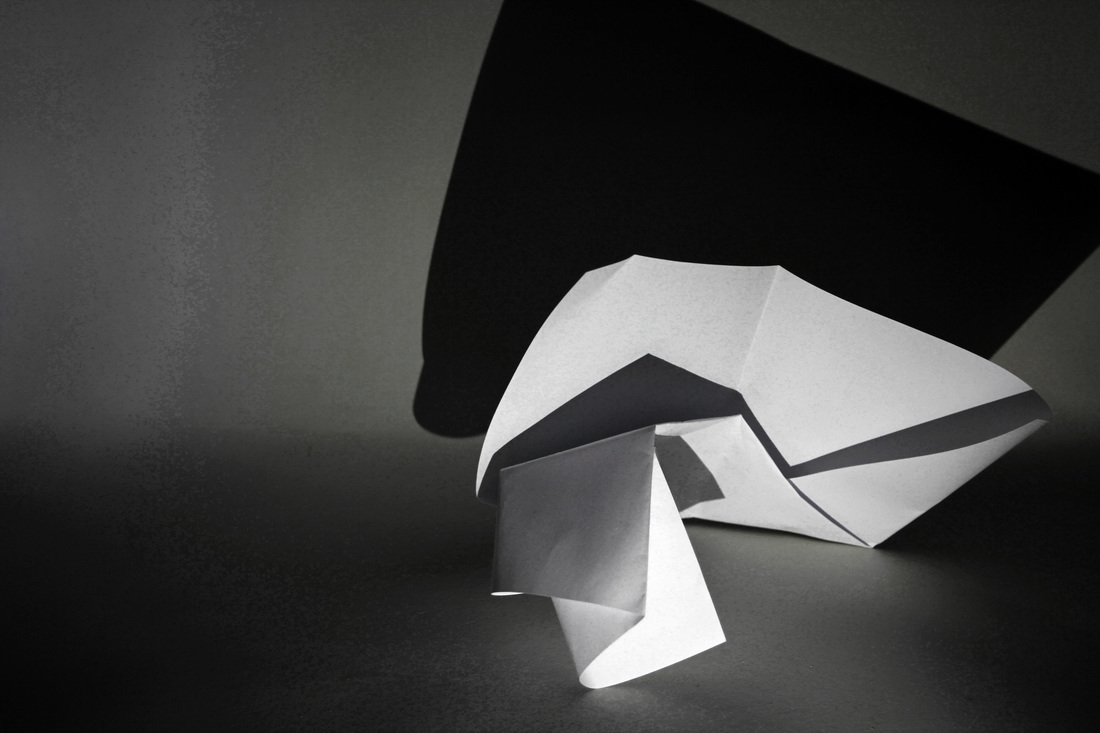
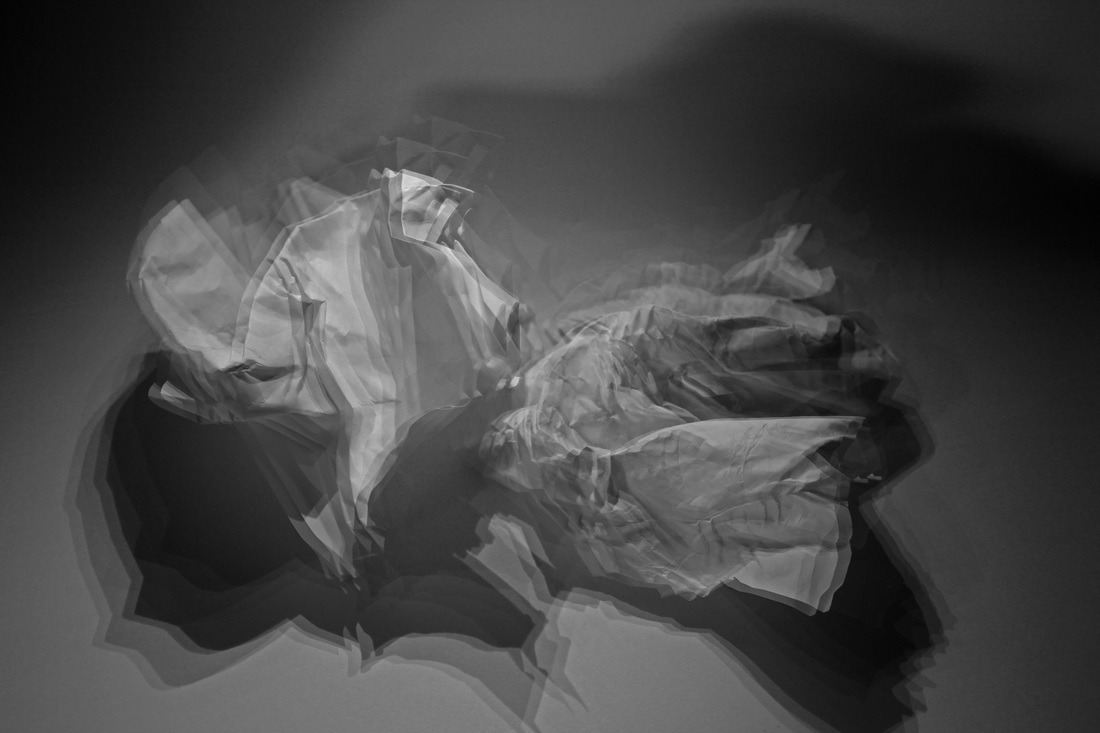
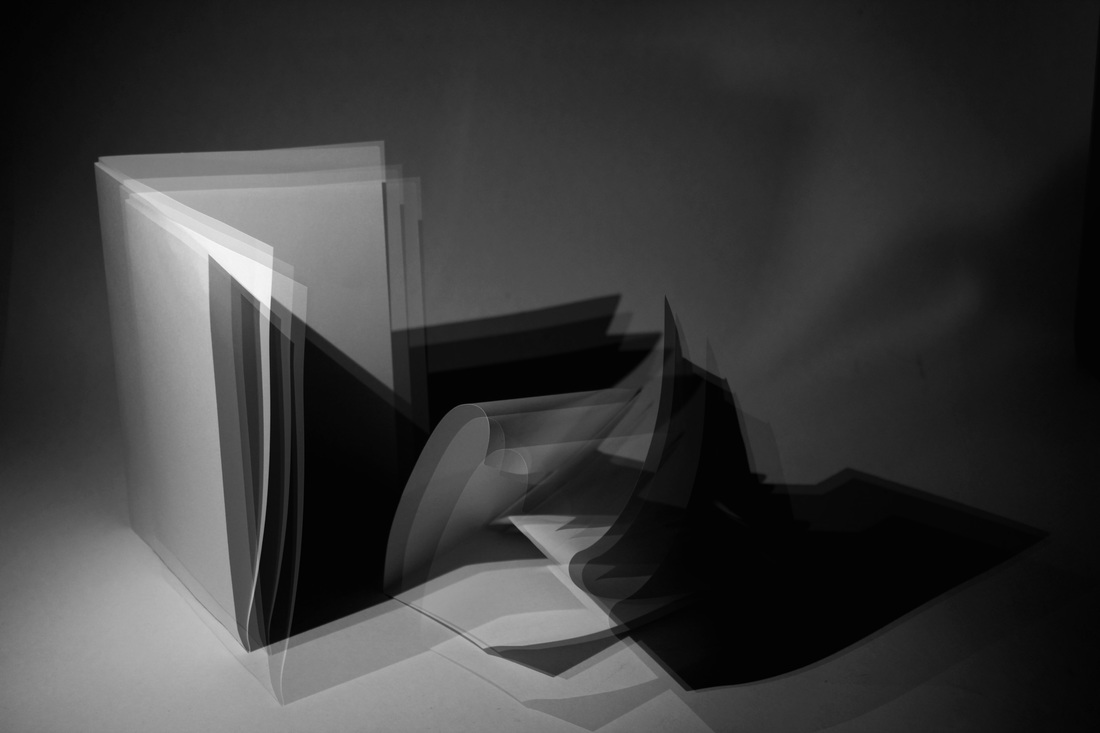
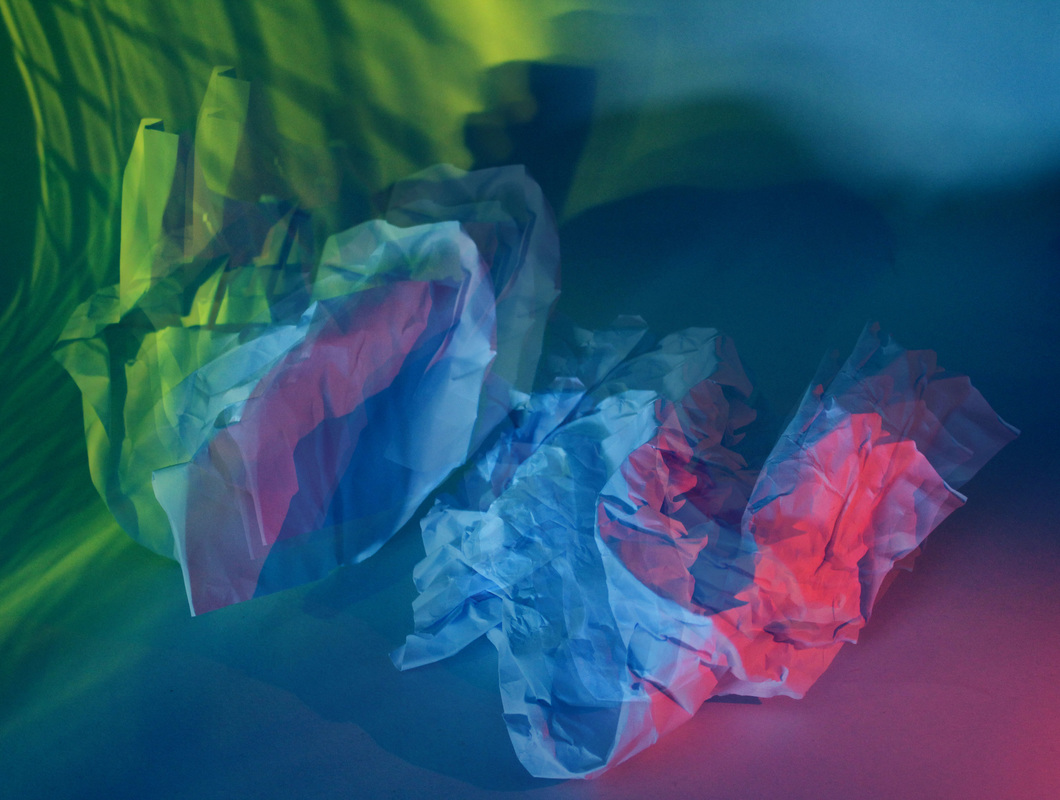
Further Development
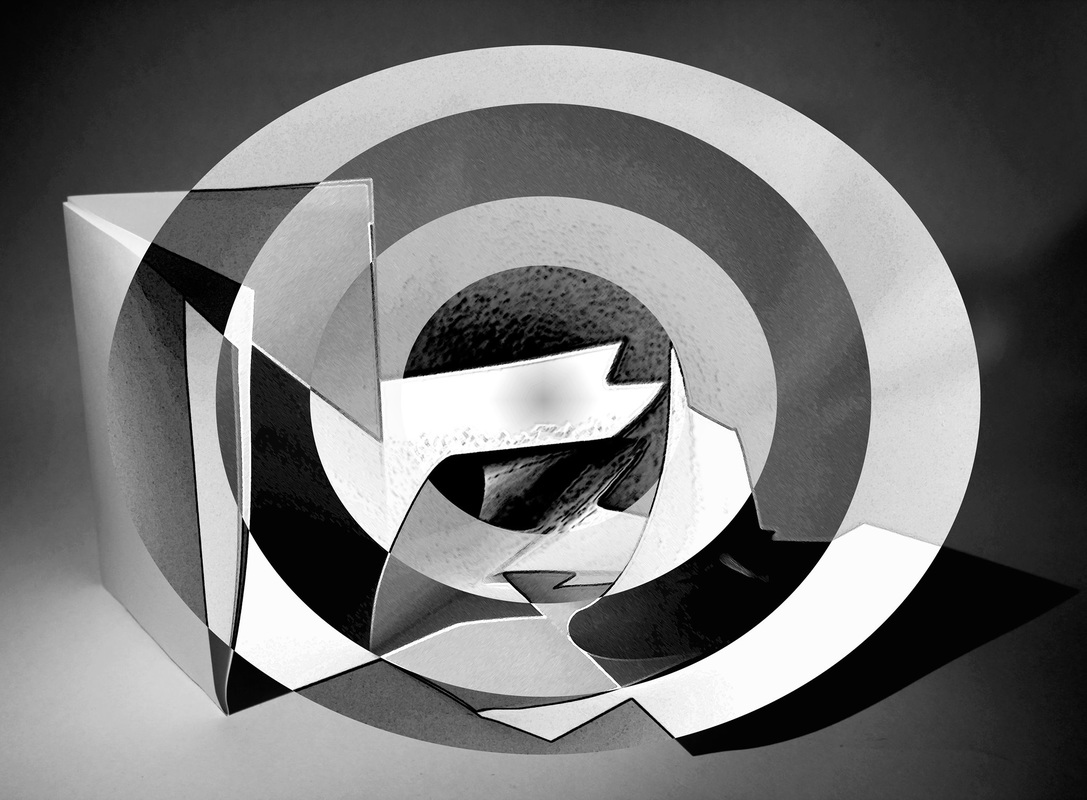
For my Further Development, I chose four of my favourite images from the above task and opened up Photoshop and decided to create a multiple exposure look and also mess around with the shapes and sizes of the paper as I felt that it would be an interesting look seeing as the photographs are in black and white.
|
|
Task 2 - Abstract Development
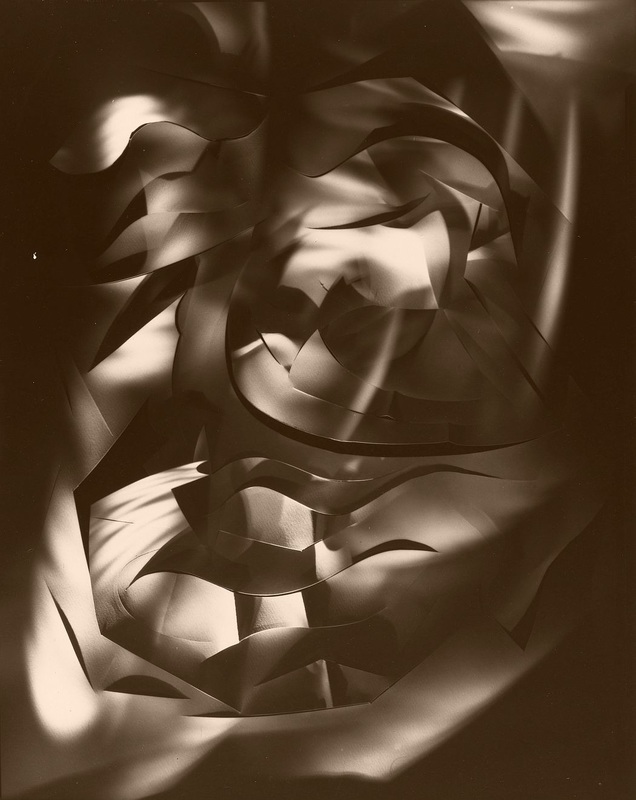
For this task, I researched many artists that Photograph Abstraction and have similar photos to the ones above. I then chose 2 of my favourite artists and tried to respond to their work. The two artists that I chose to respond to are Jaroslav Rossler and Francis Bruguiere.
Joraslav Rossler
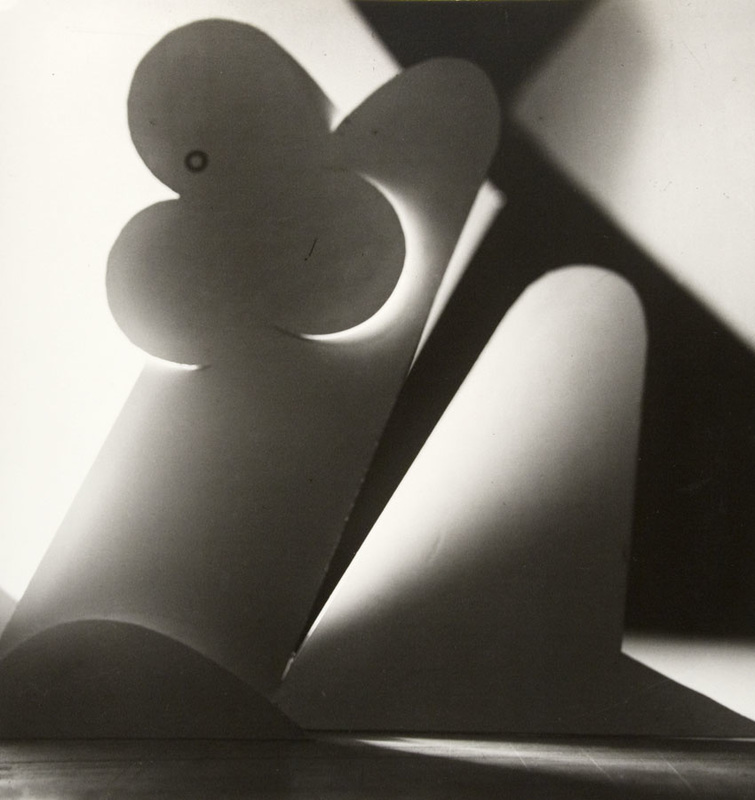
Jaroslav Rossler was a Czech avant-garde photographer who became known for connecting different approaches of modern photography such as futurism, cubism, new objectivity and abstraction. His images usually decreased photos to fundamental shapes and lines, analysing the contrast of light and shade. Rossler experimented with a broad variety of techniques and processes including double exposures and photograms. Below are some examples of Rossler's work.
Joraslav Rossler
Jaroslav Rossler was a Czech avant-garde photographer who became known for connecting different approaches of modern photography such as futurism, cubism, new objectivity and abstraction. His images usually decreased photos to fundamental shapes and lines, analysing the contrast of light and shade. Rossler experimented with a broad variety of techniques and processes including double exposures and photograms. Below are some examples of Rossler's work.
|
|
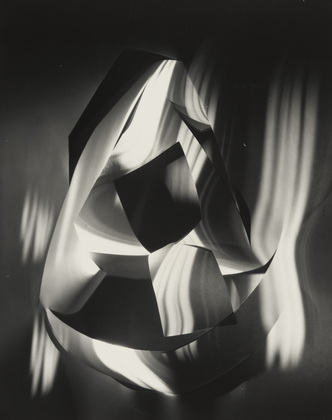
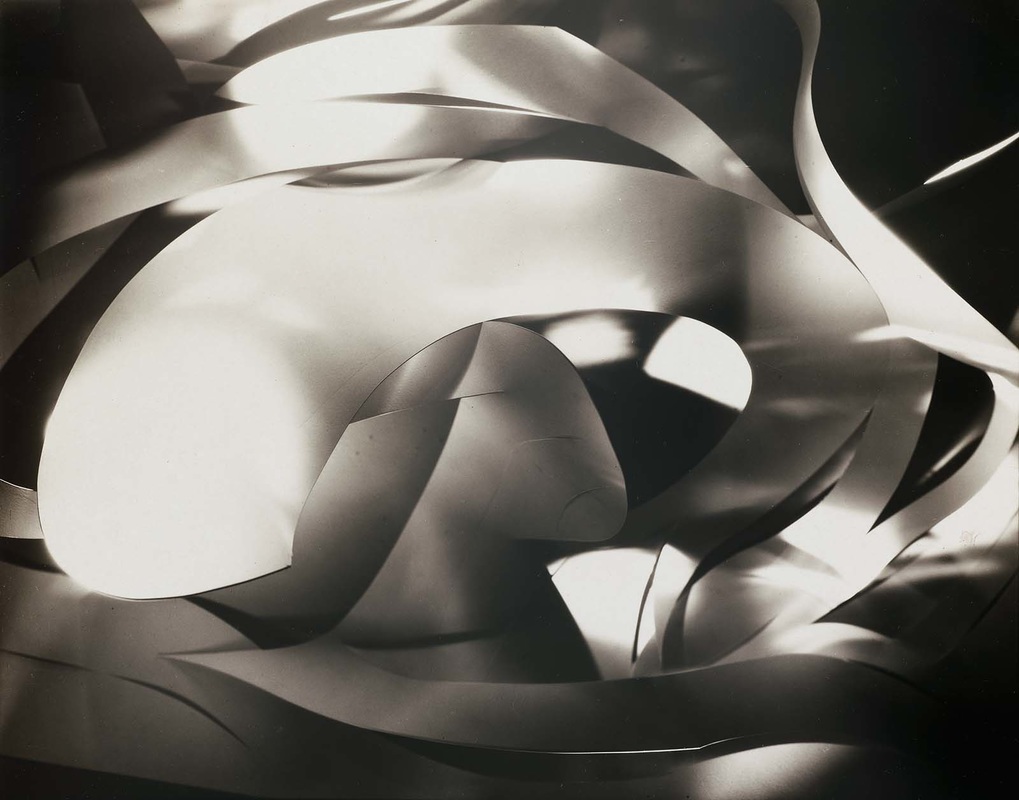
Francis Bruguiere
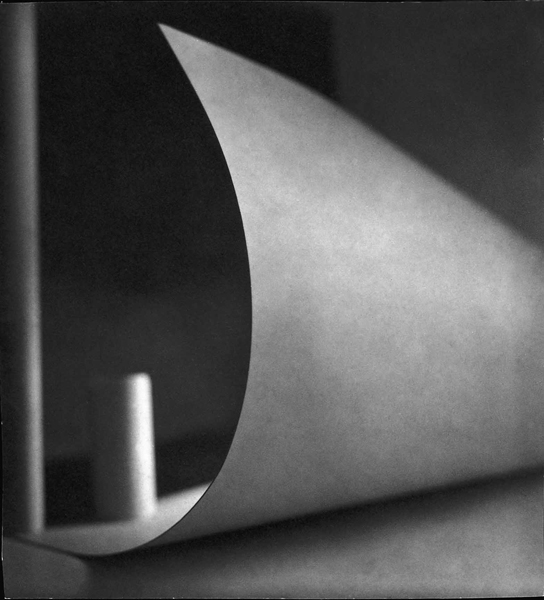
Francis Bruguiere was an American Photographer who moved to London in 1928 where he then began to experiment with non-representational photography. Bruguiere exploits the endlessly faint qualities of paper and light, manipulating both of these in order to conceive complicated patterning of texture and form. Below are some examples of Bruguiere's work.
|
|
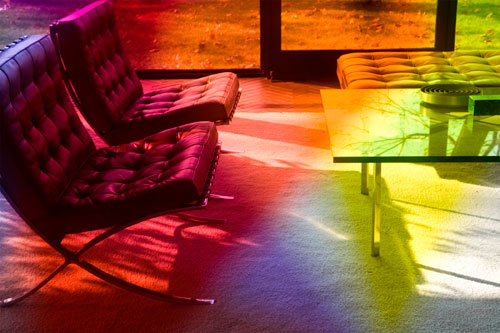
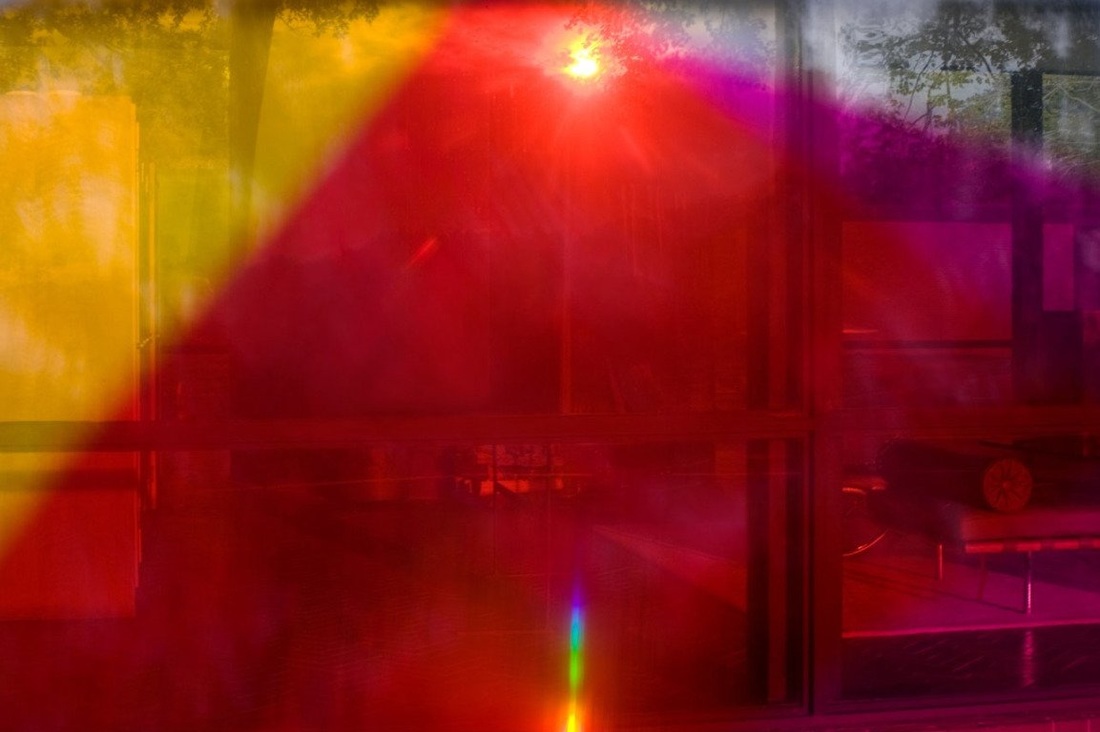
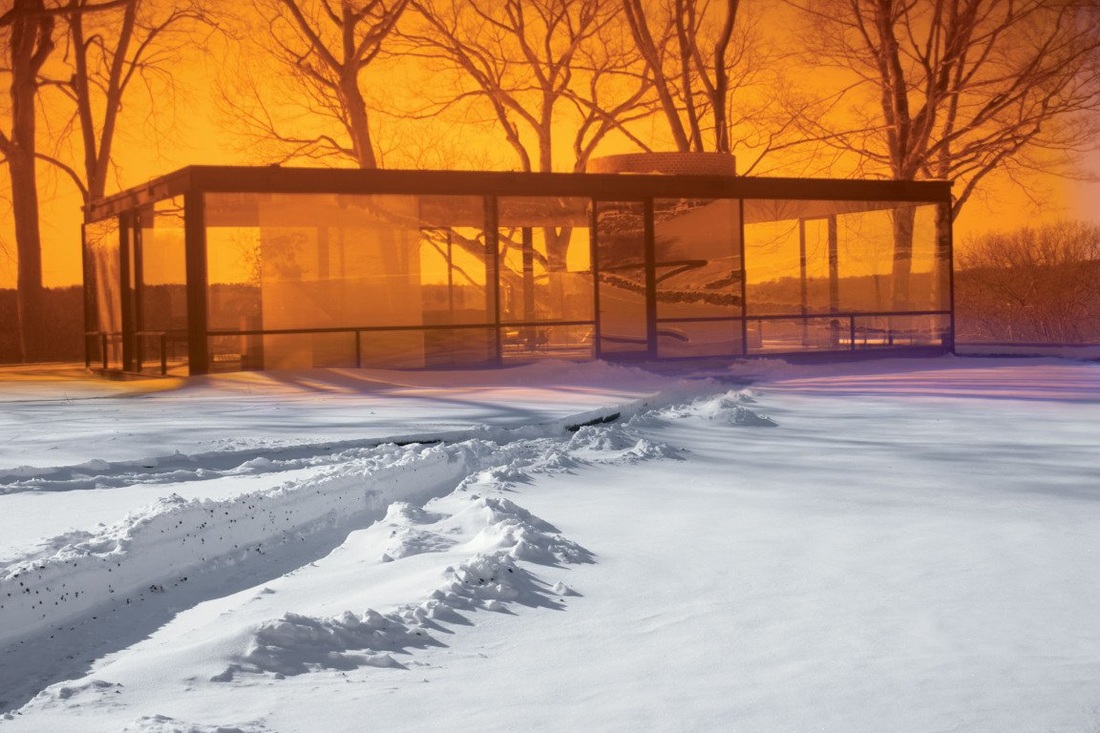
My Response
For my response, I wanted have as few objects as possible to create a very strong effect in my images. So, I got a couple coloured gels and a glass mirror and then experimented with these two types of things.
|
|
|
|
Further Development
For my Further Development, I decided to take three of my favourite images from this task and open up photoshop and experiment with different tools to give my images more of an individual and unique look.
Abstract Experiment
Using the film that I had taken, I experimented with different techniques with the target of producing a one off individual, unique outcome. I chose two pictures that I had previously taken (2nd and 3rd image) and then one image that was already developed that we could choose from. (1st image).
The techniques that I used were-
1) Printing out my digital pictures then photocopying it on to accetate and then taking them into the darkroom to be used as a negative.
2) Using different developing techniques for example painting and splashing bleach on my prints or negatives.
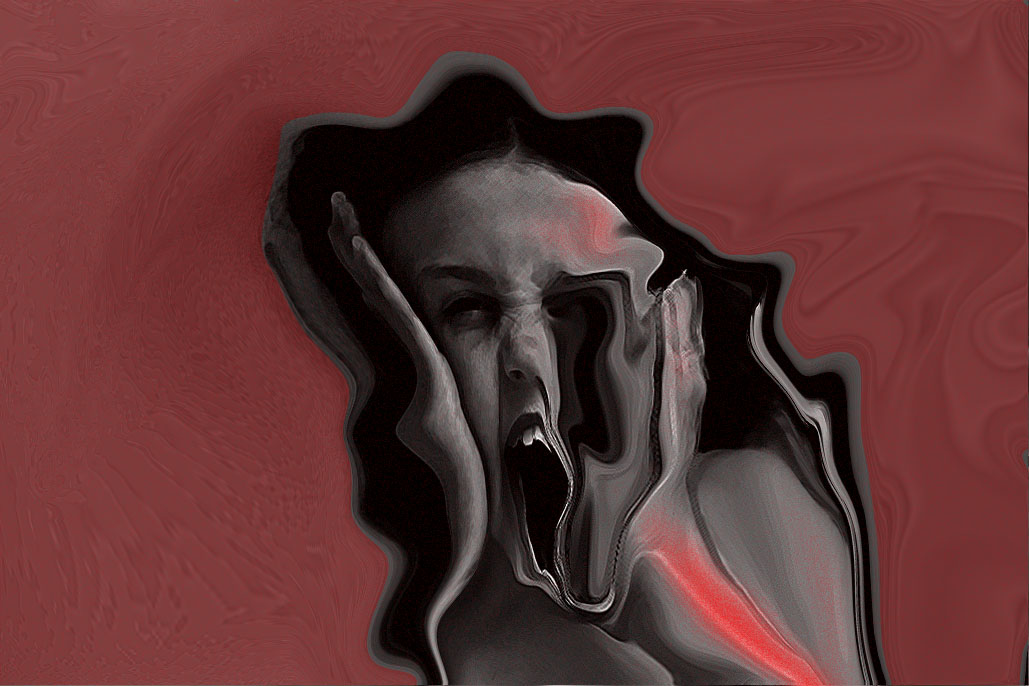
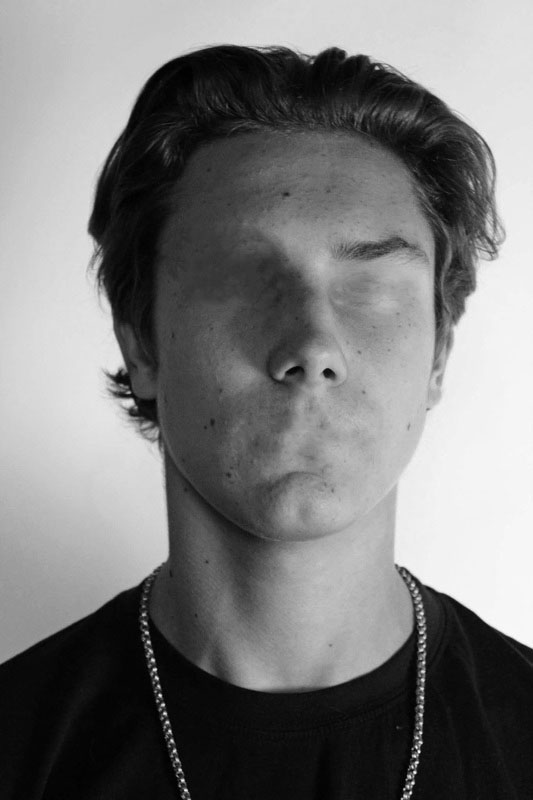
Liquify (Photoshop)
The techniques that I used were-
1) Printing out my digital pictures then photocopying it on to accetate and then taking them into the darkroom to be used as a negative.
2) Using different developing techniques for example painting and splashing bleach on my prints or negatives.
Liquify (Photoshop)
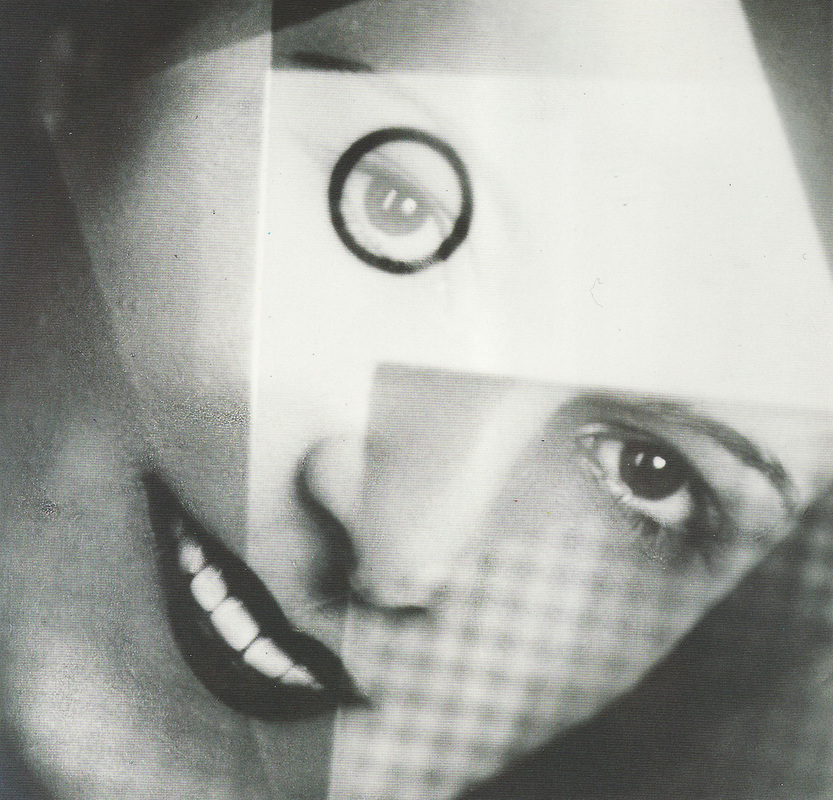
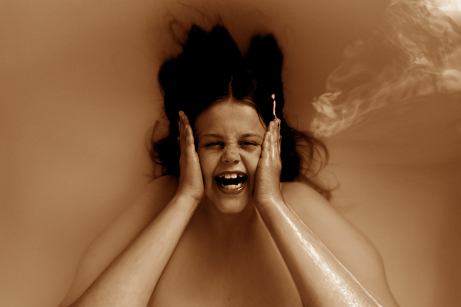
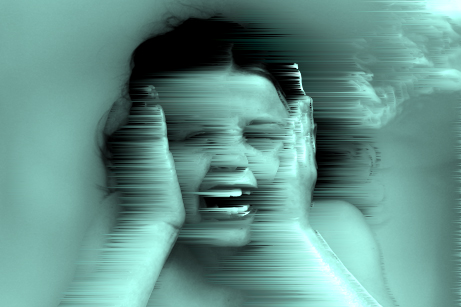
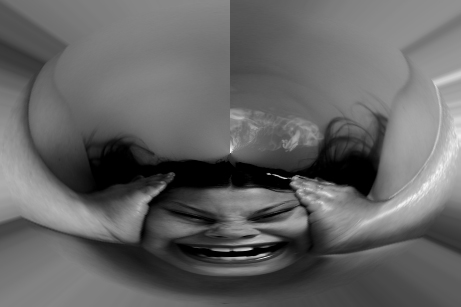
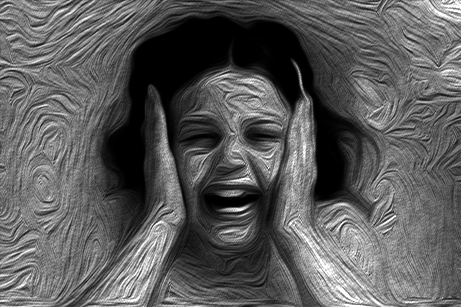
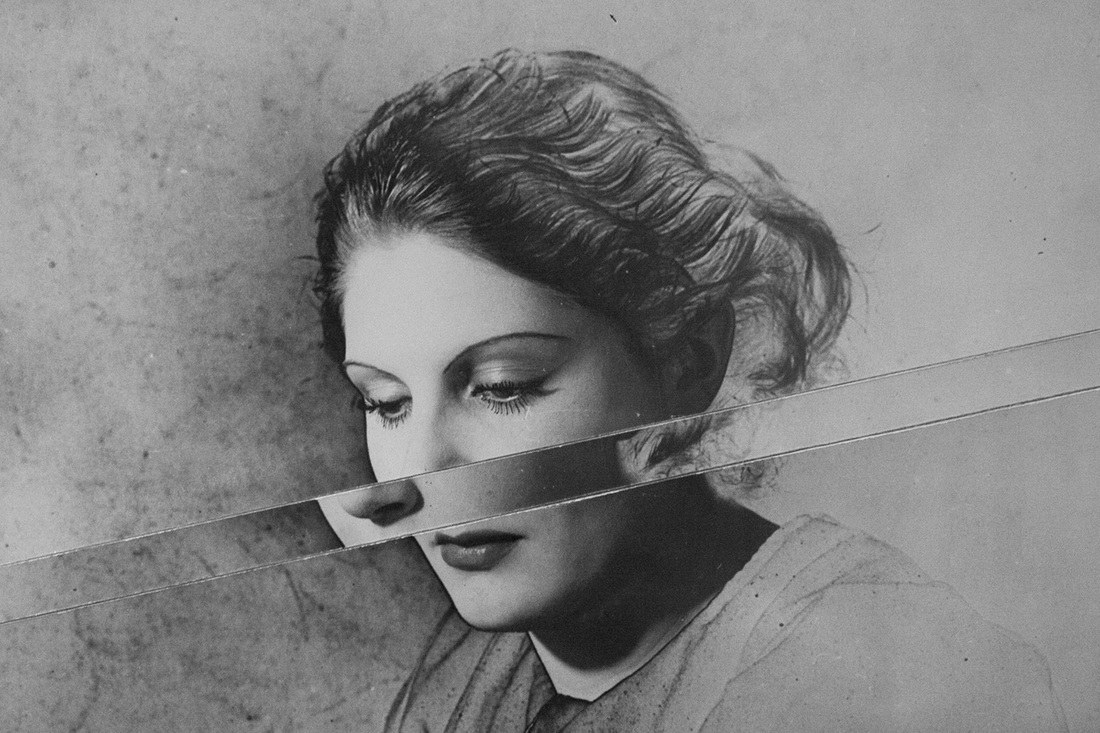
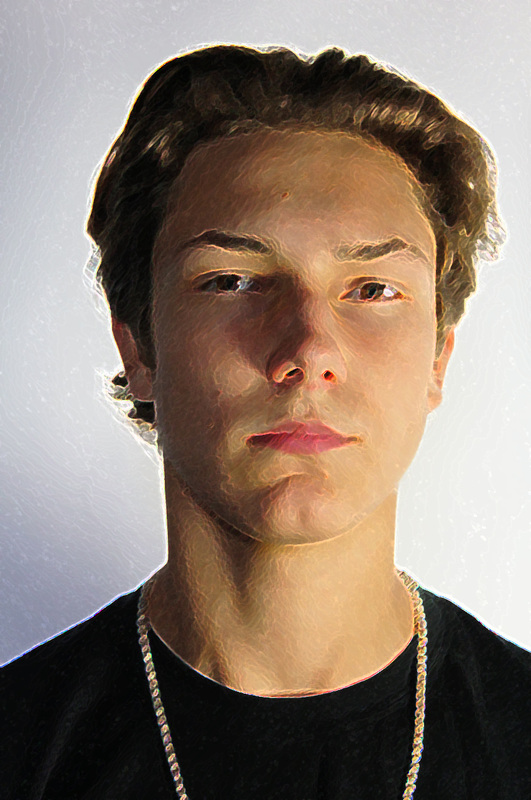
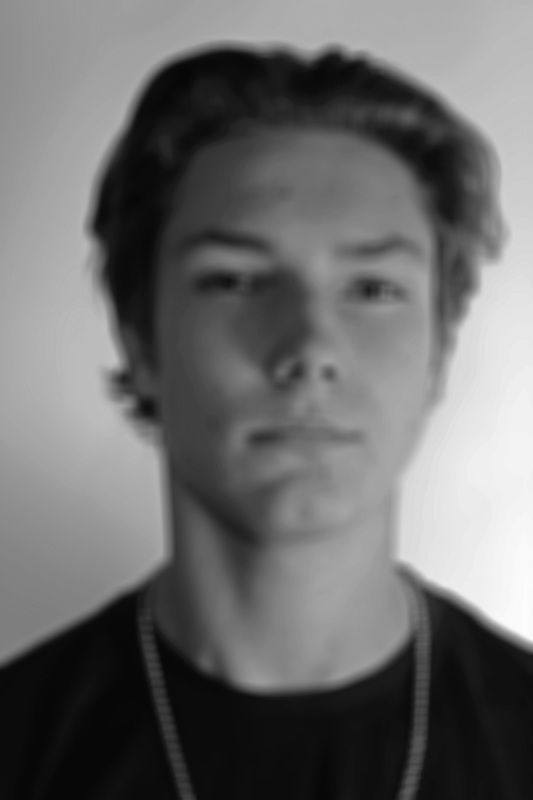
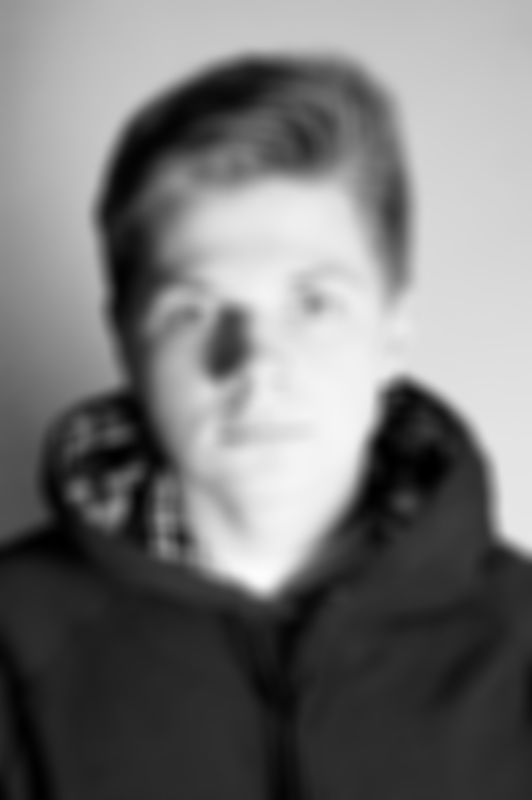
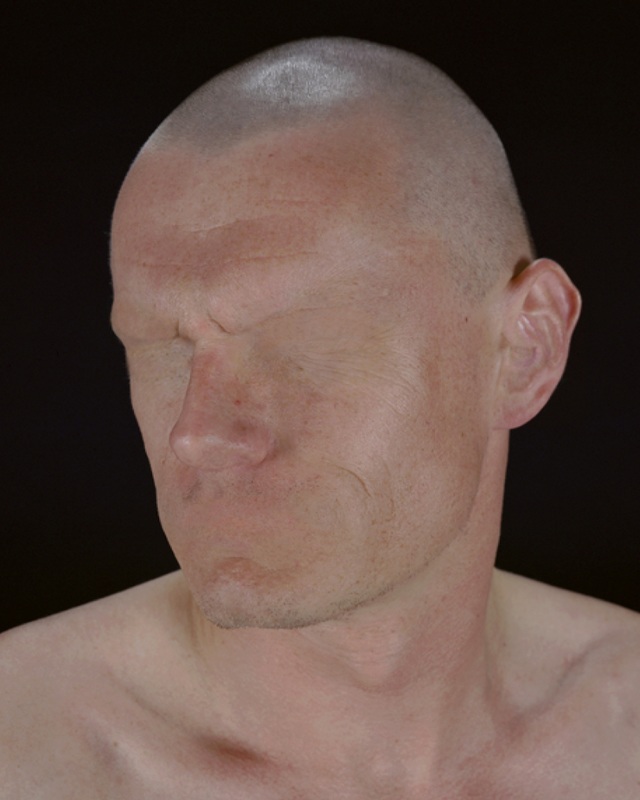
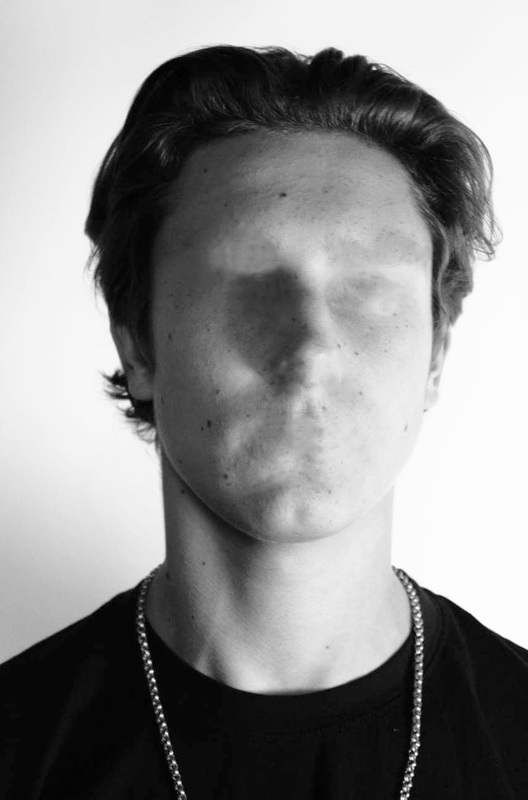
For this response, I decided to only use the Liquify tool and drag parts of the image to create an abnormal effect. I decided to leave the image in black and white as I thought that the background around the face would be white and then the central part of the image with the face in would be darkened out and you wouldn't be able to see an identity of the girl in the picture.
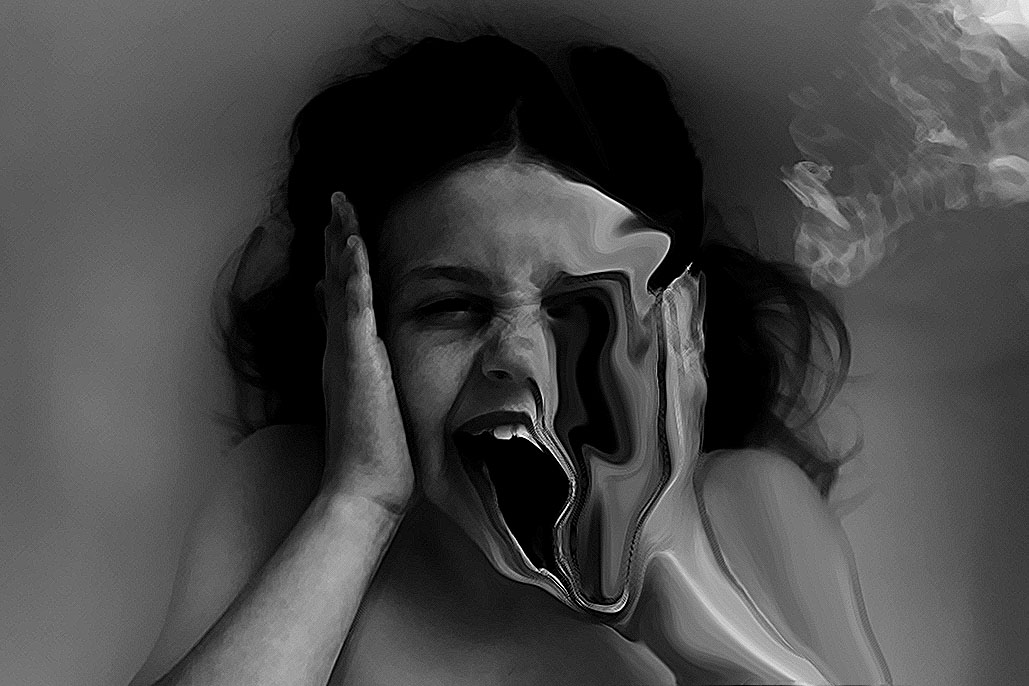
Original Image :

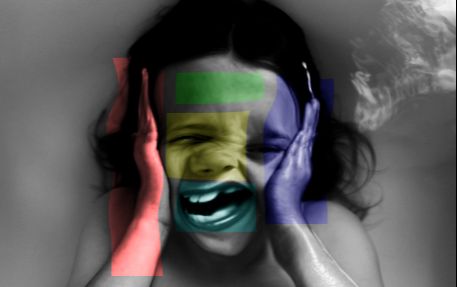
Edited Images :
|
|
|

|
|
|
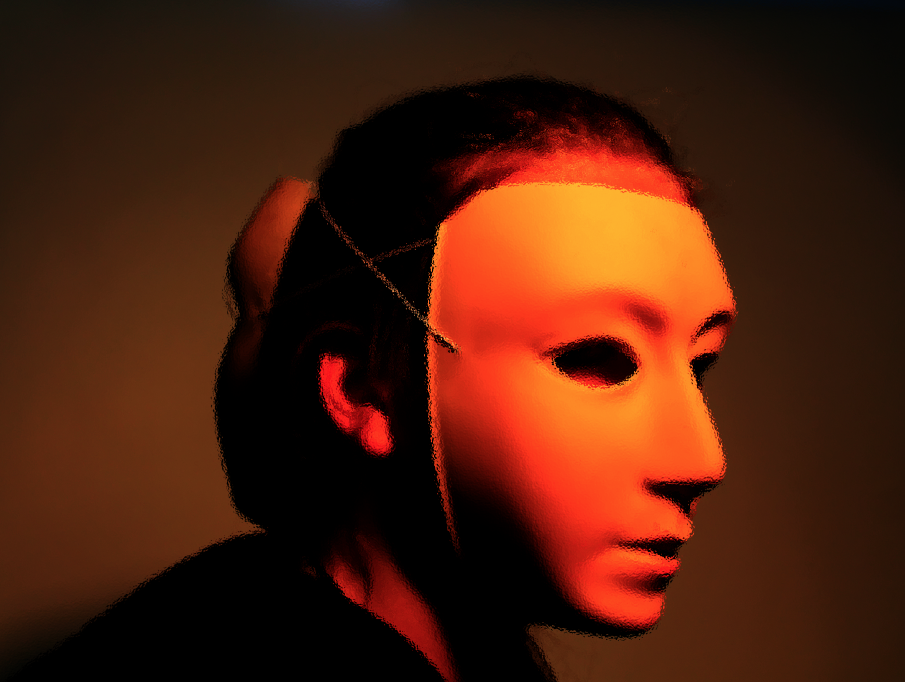
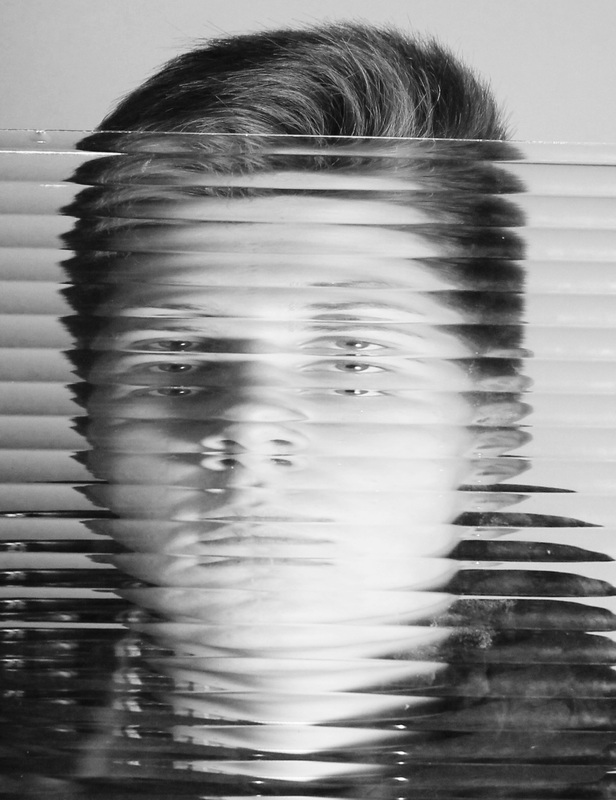
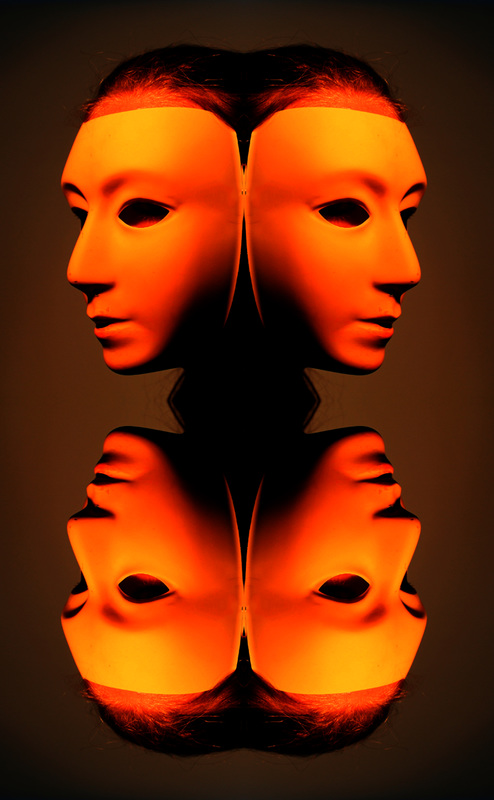
Studio Abstract Portrait
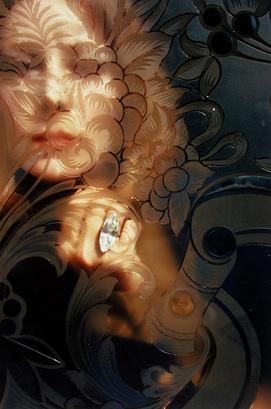
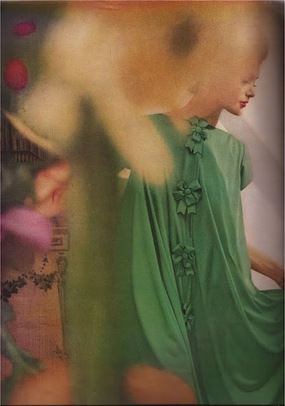
Two photographers that are extremely amazing at Abstract Portraits are Erwin Blumenfeld and Bill Jacobson. For this task, I used those two photographers as inspiration and then created a number of different abstract portraits. I also used glass pains and different coloured gels to create the digital portraits. I also decided to film some clips to capture a moving portrait.
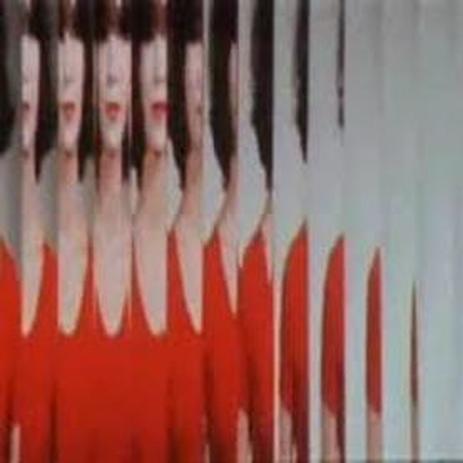
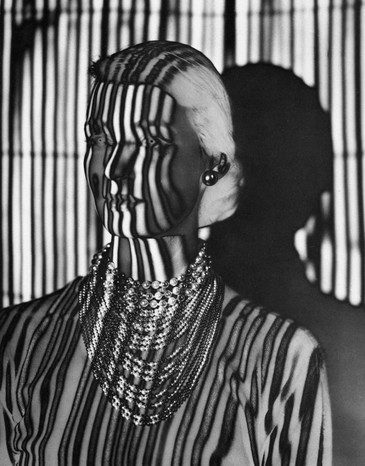
Example of Erwin Blumenfeld's work :
Erwin Blumenfeld was an artist and photographer born in Germany. He was best known for his fashion photography that was published in Vogue and Hamper's Bazaar in the 1940's and 1950's. In addition to fashion photography, he produced an extensive body of celebrity portraiture, fine-art photography, drawings and Dada collages. He made photos while a resident of Germany, France, the Netherlands and the US and he has been identified as 'one of the most innovative and influential photographers of the 20th Century.
|
|
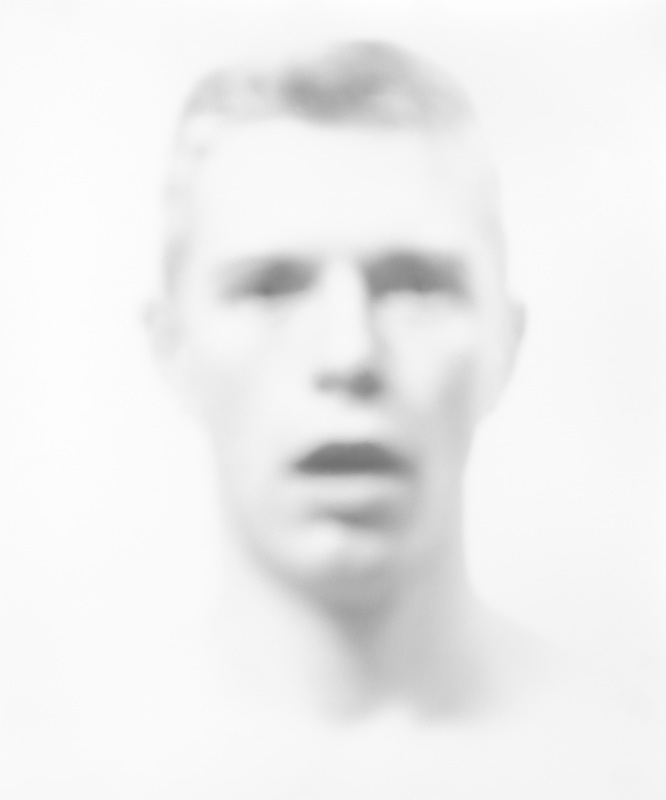
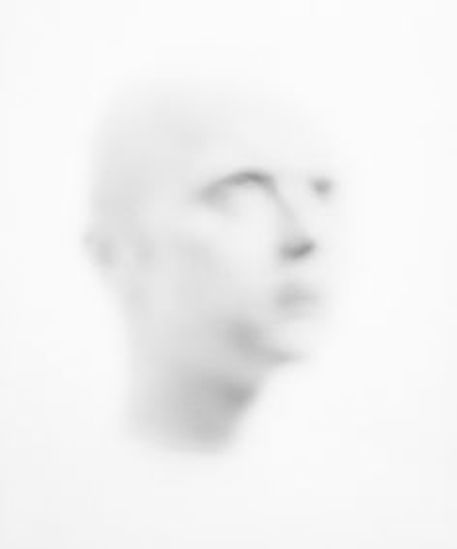
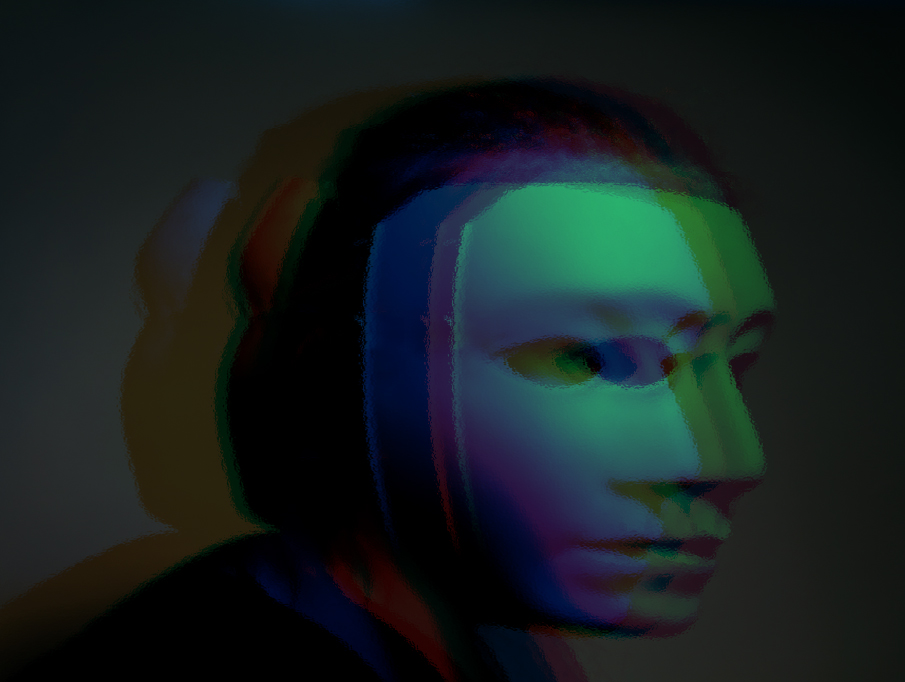
Example of Bill Jacobson's work :
Bill Jacobson was mainly known for his out of focus photos of both the landscape and the figure. He began his signature, indistinct images in 1989 and since then he has been exhibiting in galleries and museums throughout Europe and the US. These Interim Portraits feature shadowy, pale figures that evoke the loss experienced by many during the height of the AIDS Epidemic. The blurred subjects underline the emptiness of capturing a true human likeness in both memory and portraiture.
|
|
|
My Response
My Edwin Blumenfeld Response :

|
|
Further Development + Editing Process :
Other Edits :
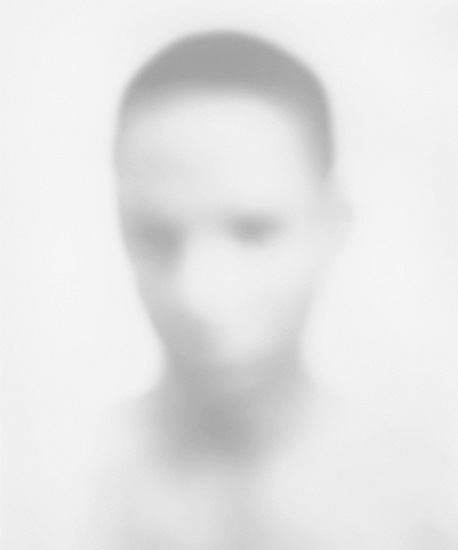
My Bill Jacobson Response :
|
|
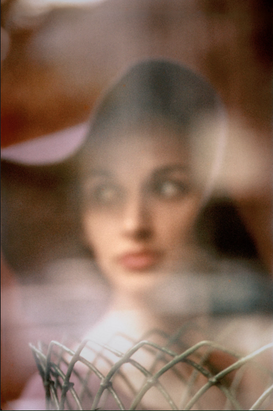
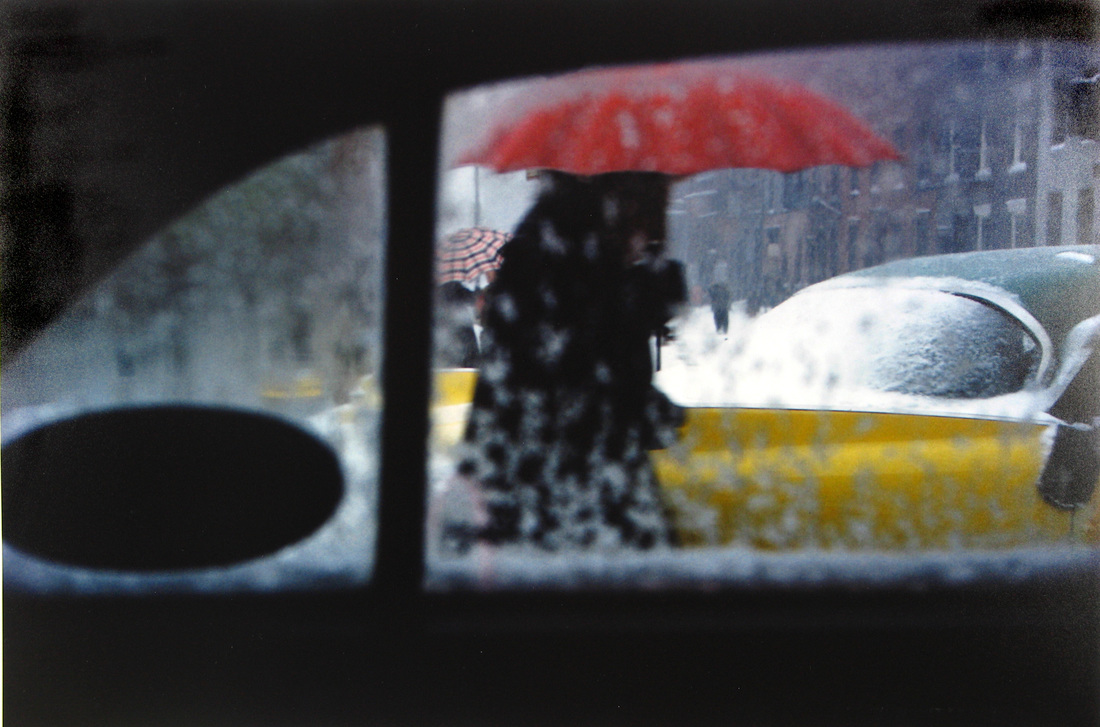
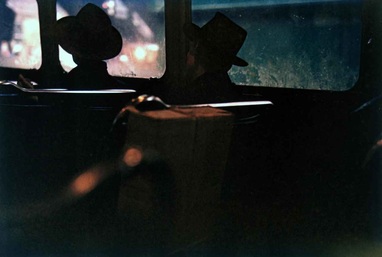
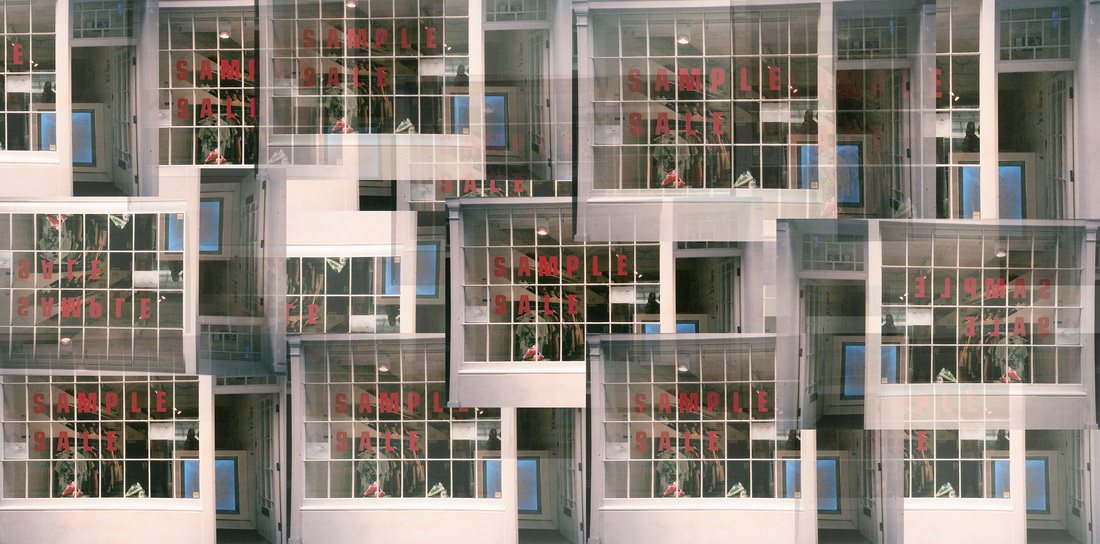
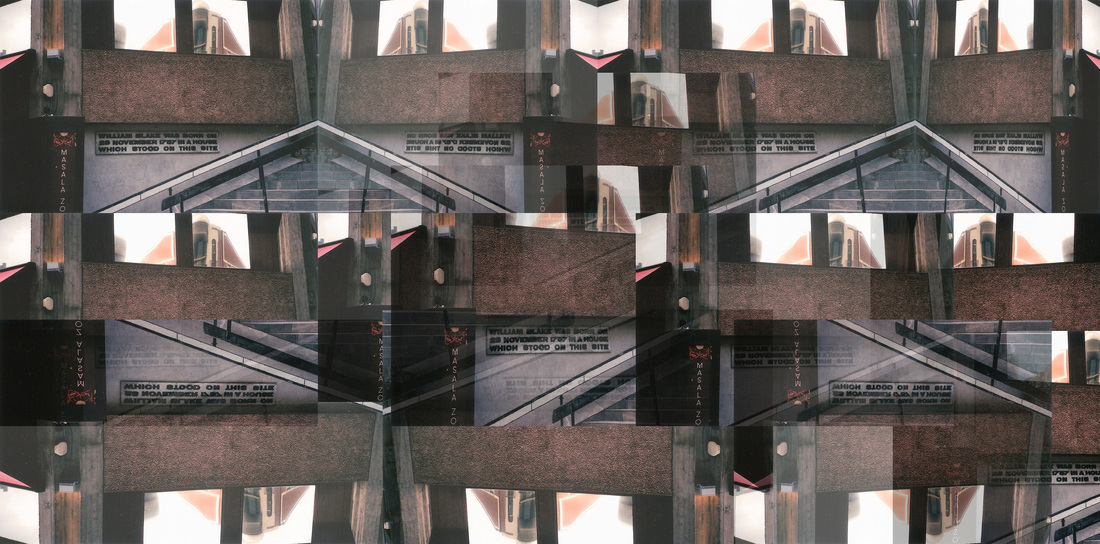
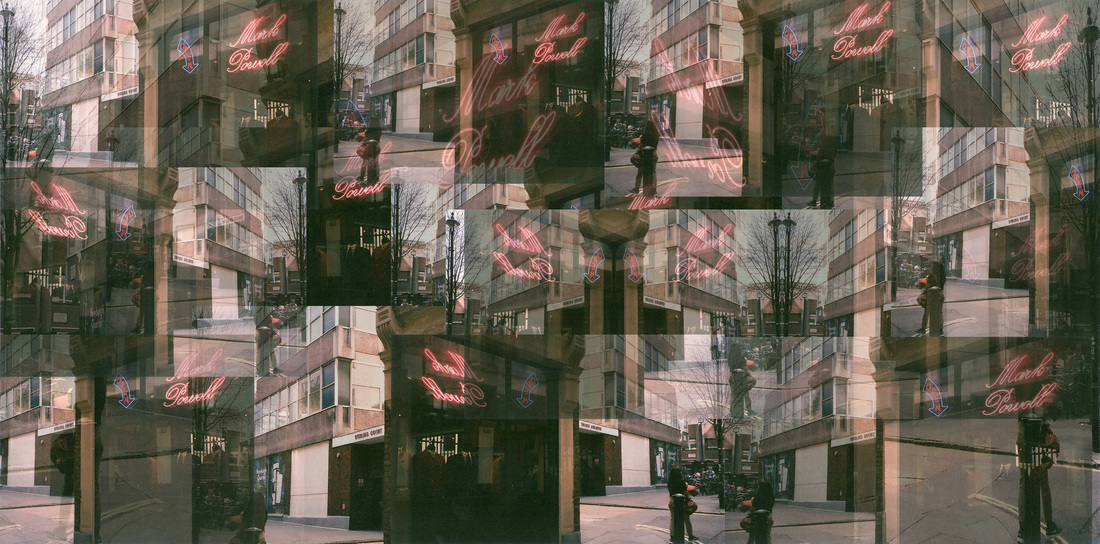
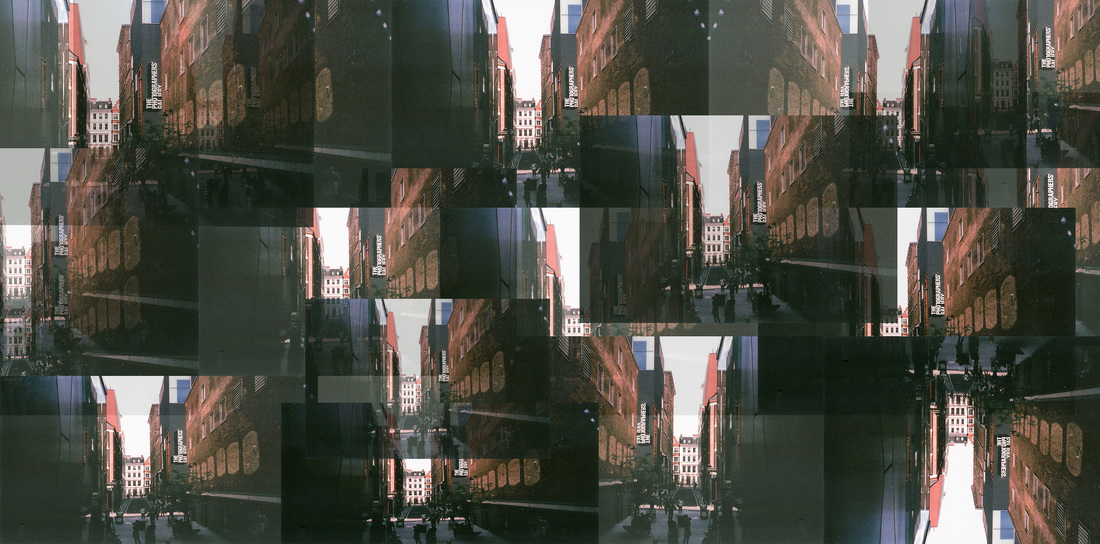
Saul Leiter
Saul Leiter was an American photographer and painter whose early work in the 1940s and 1950s was an important contribution to what came to be recognised as the New York School of Photography.
|
|
|
|
|
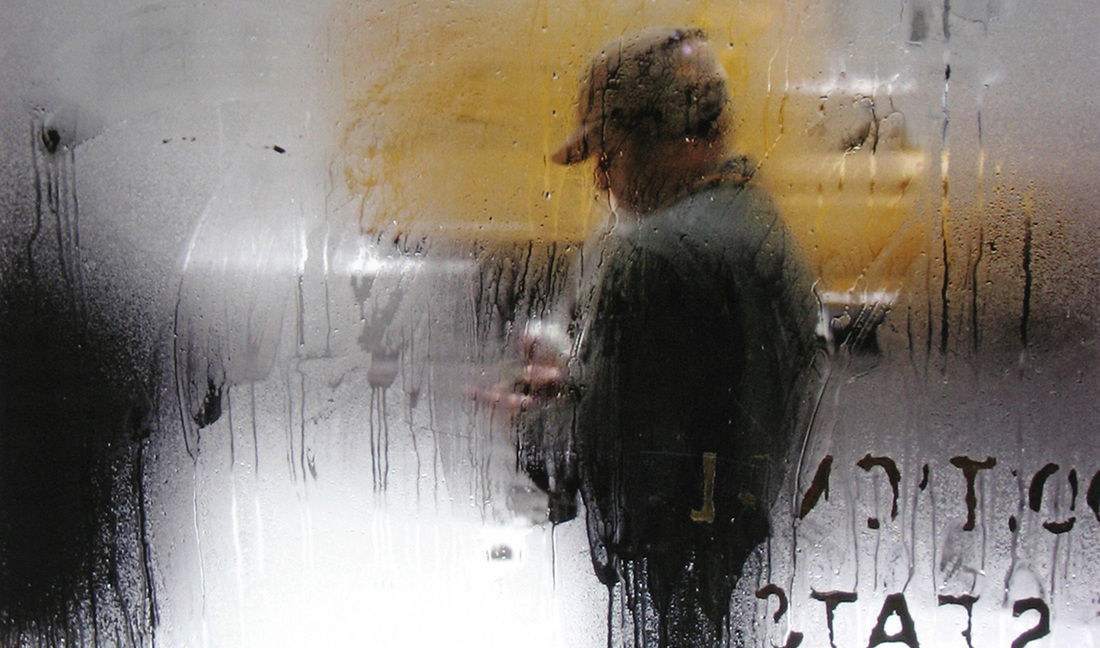
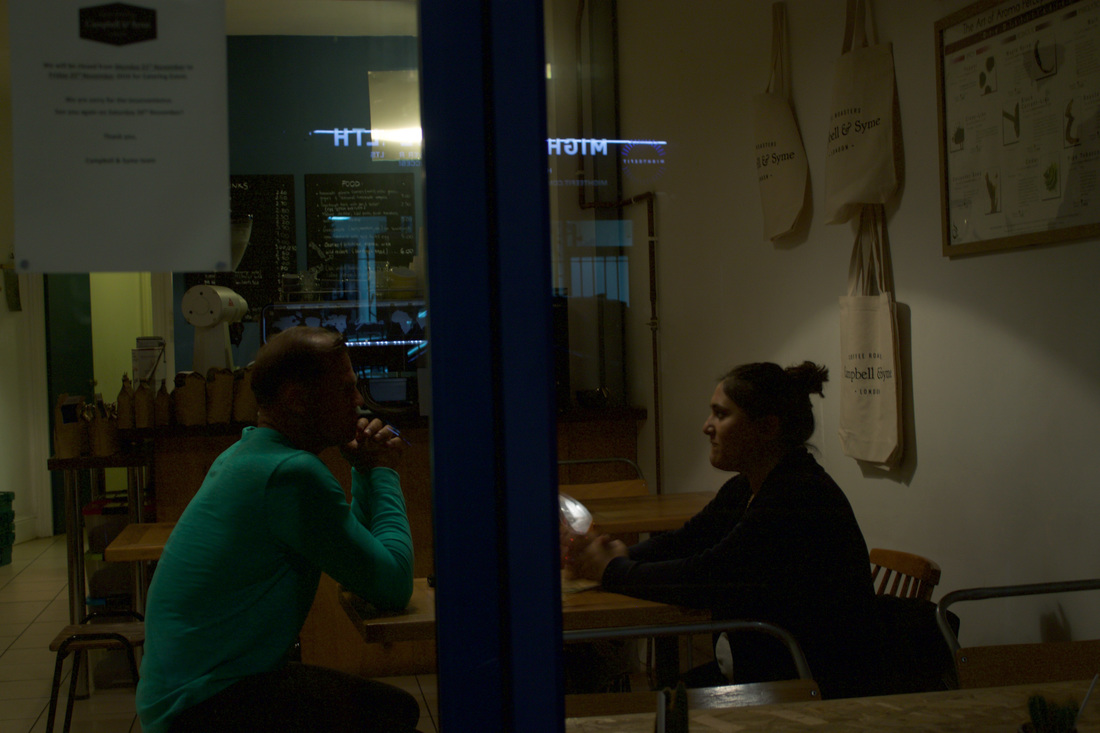
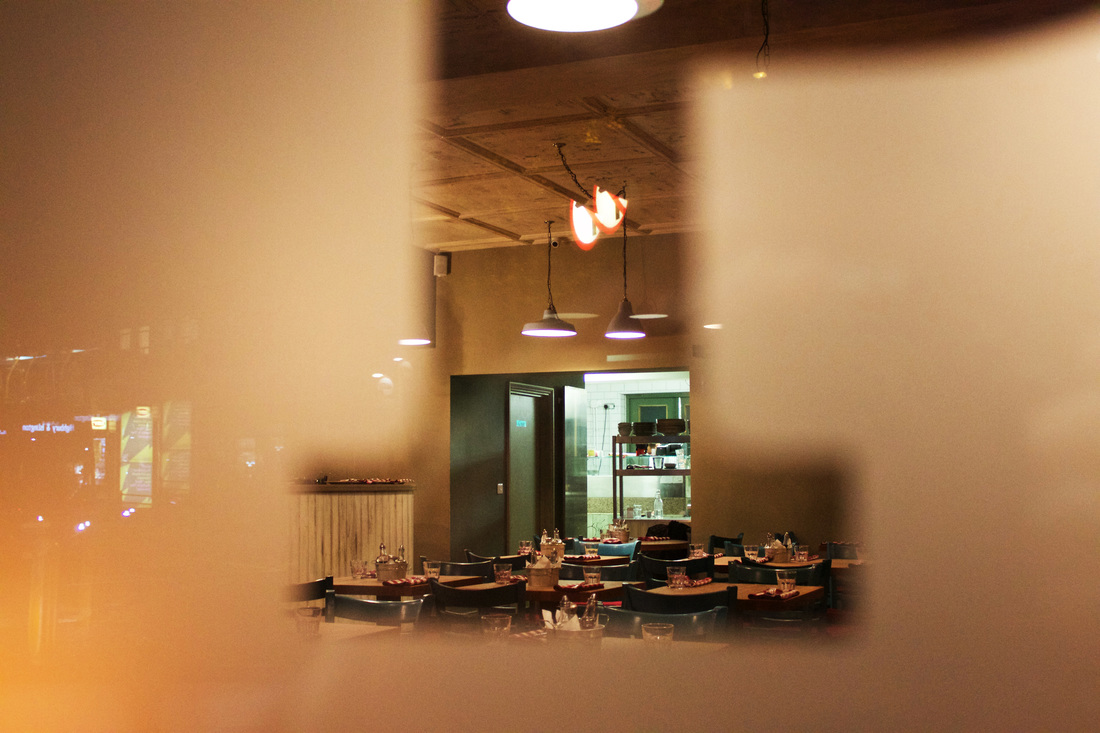
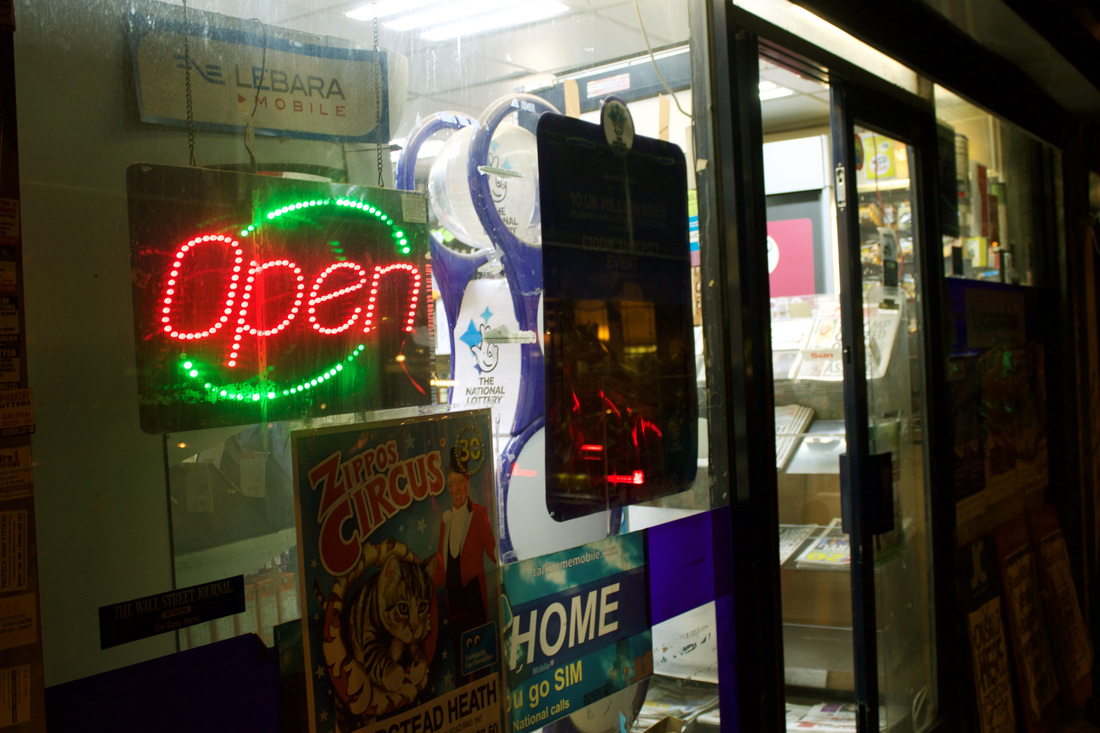
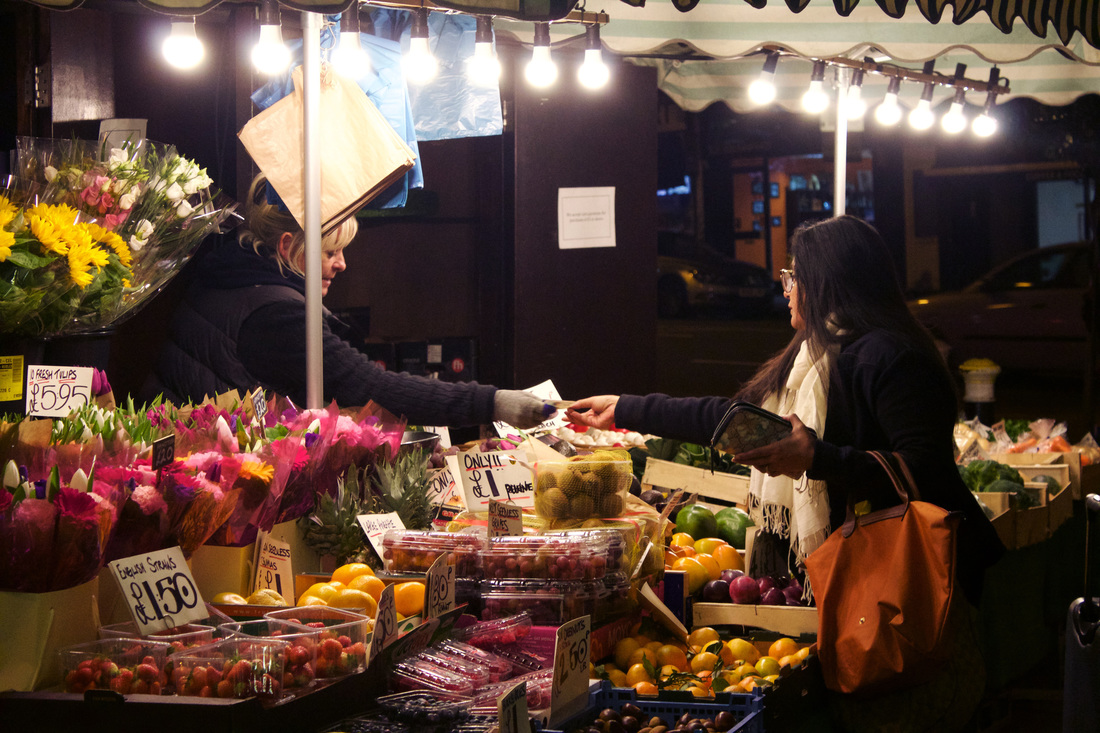
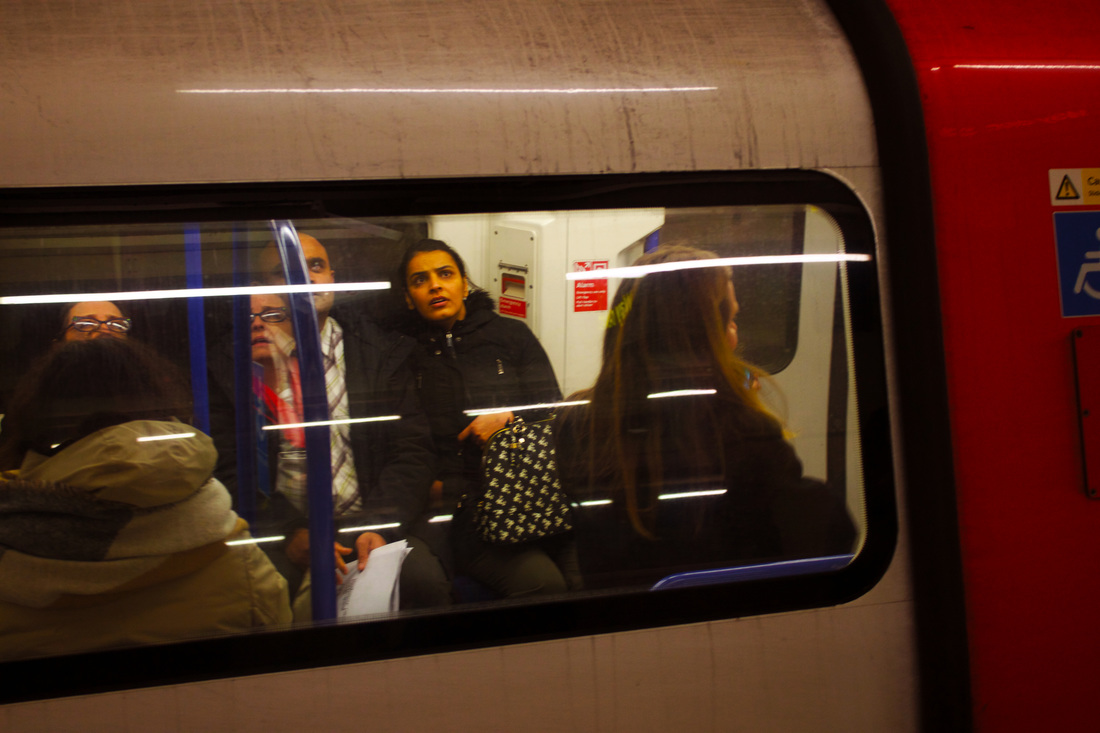
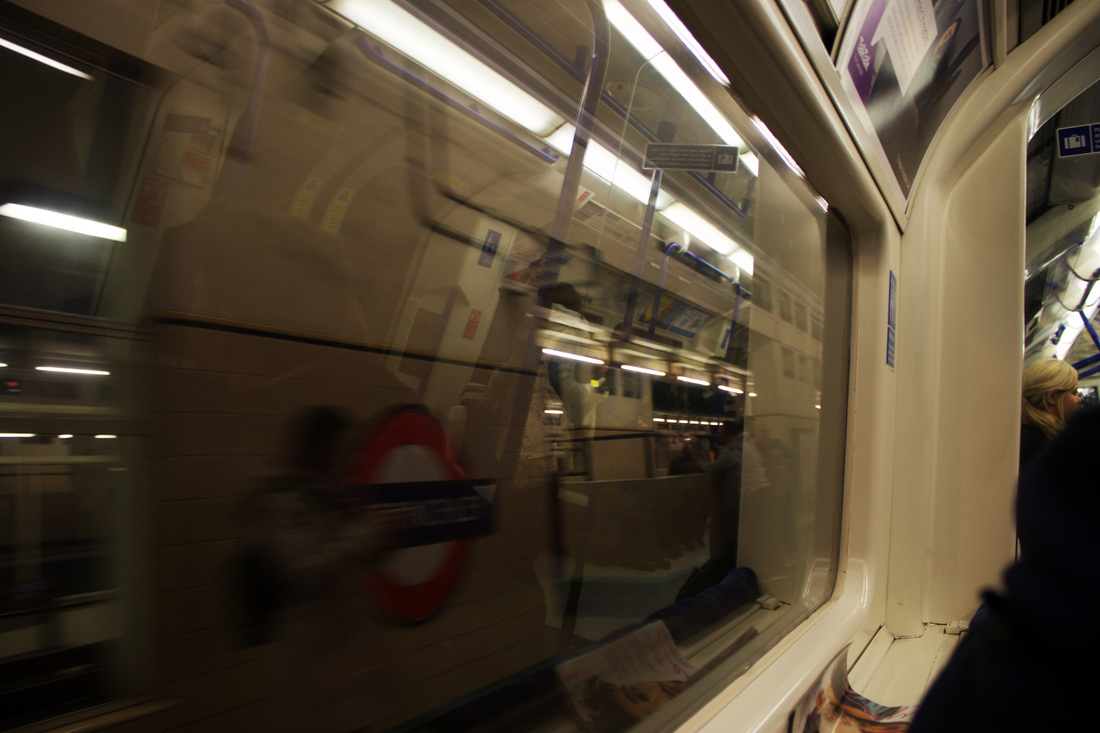
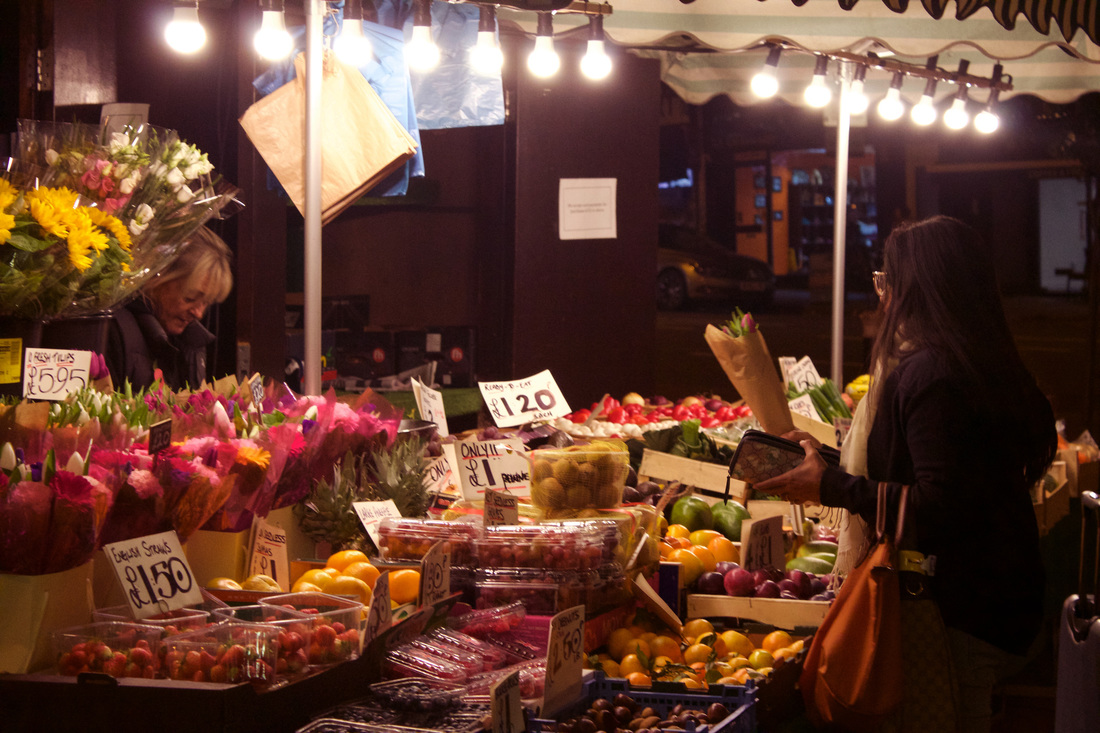
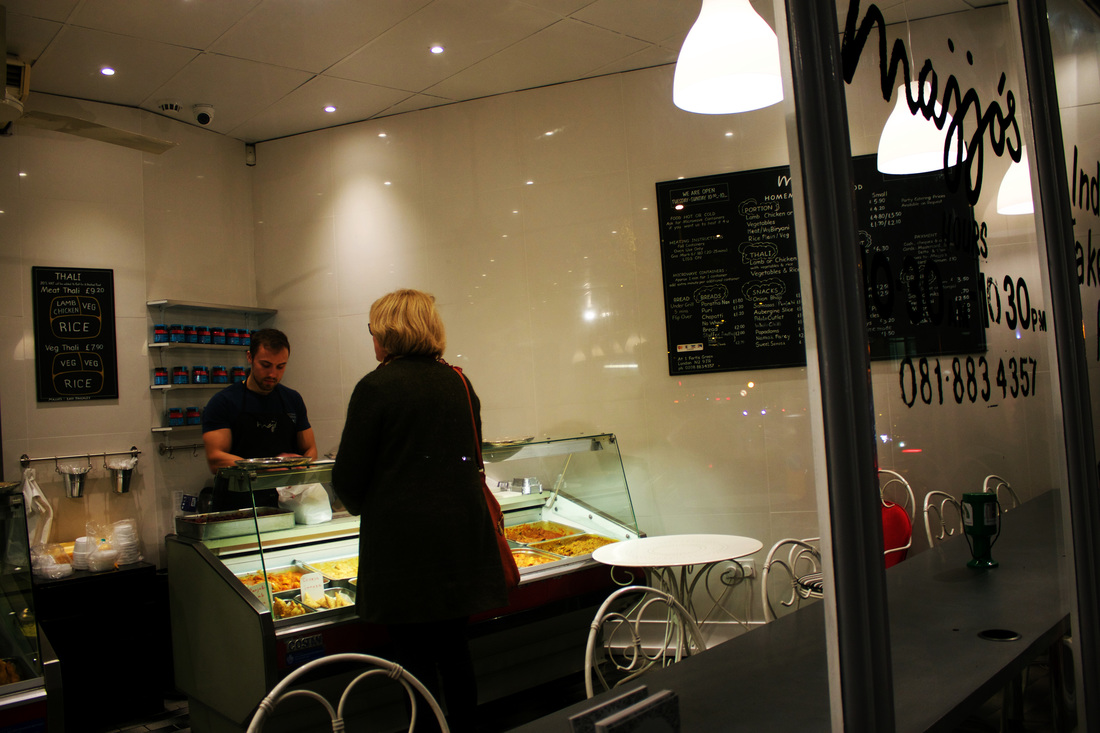
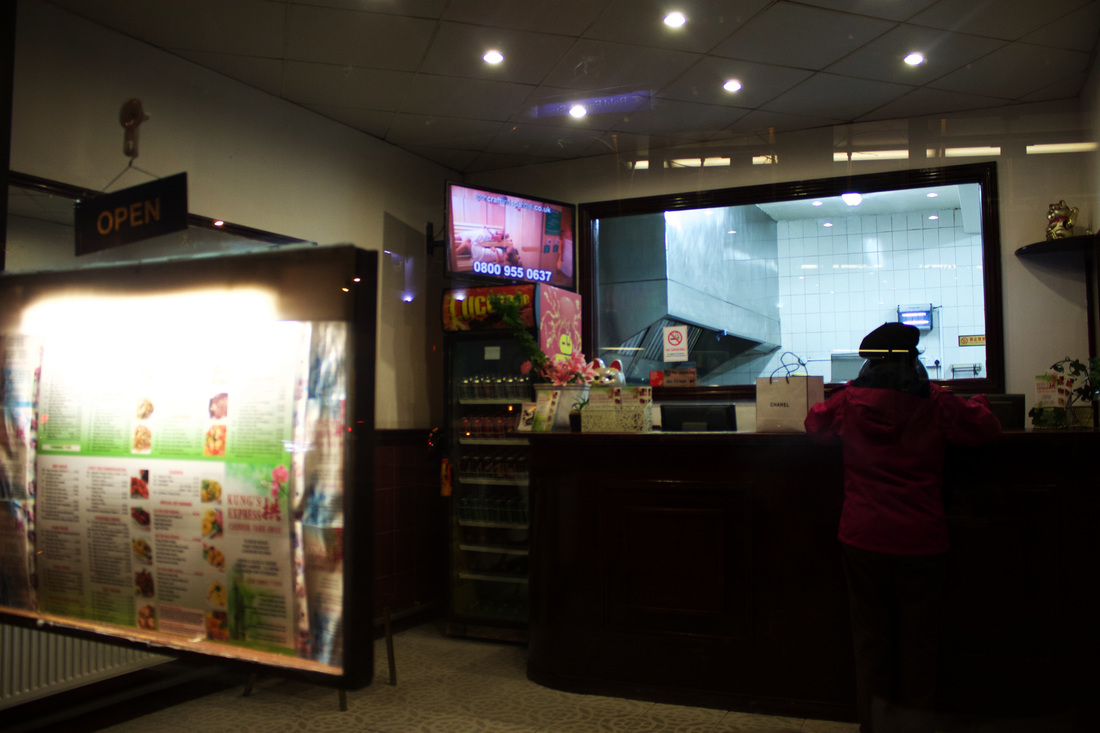
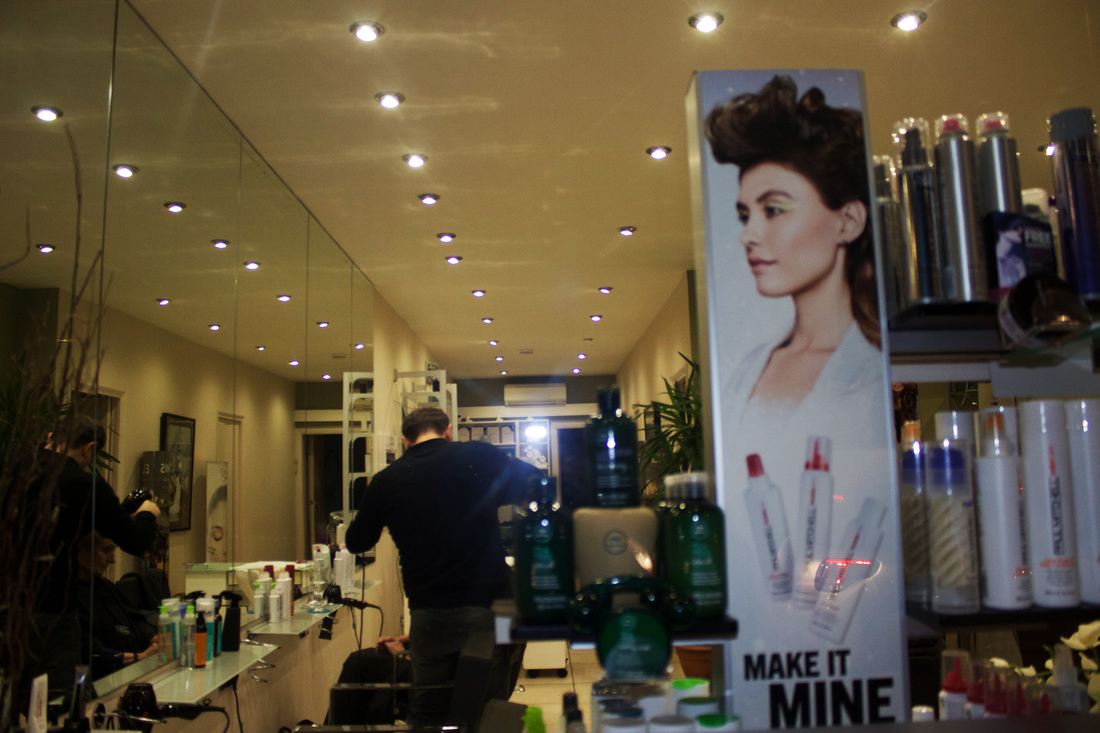
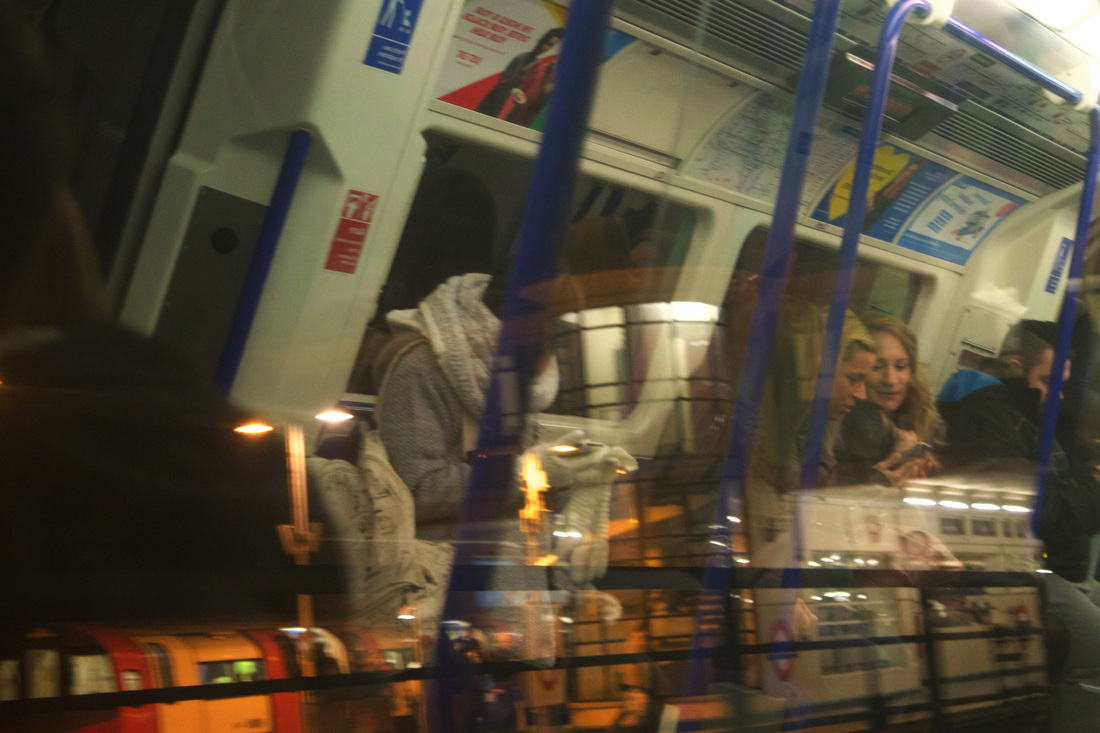
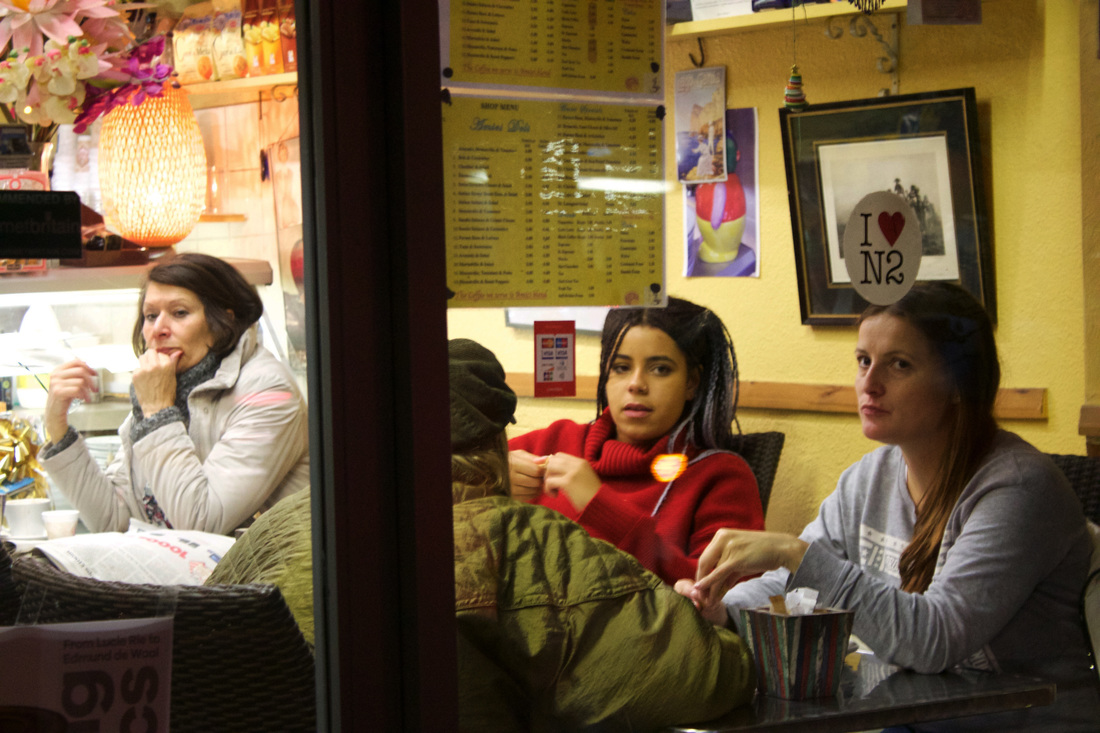
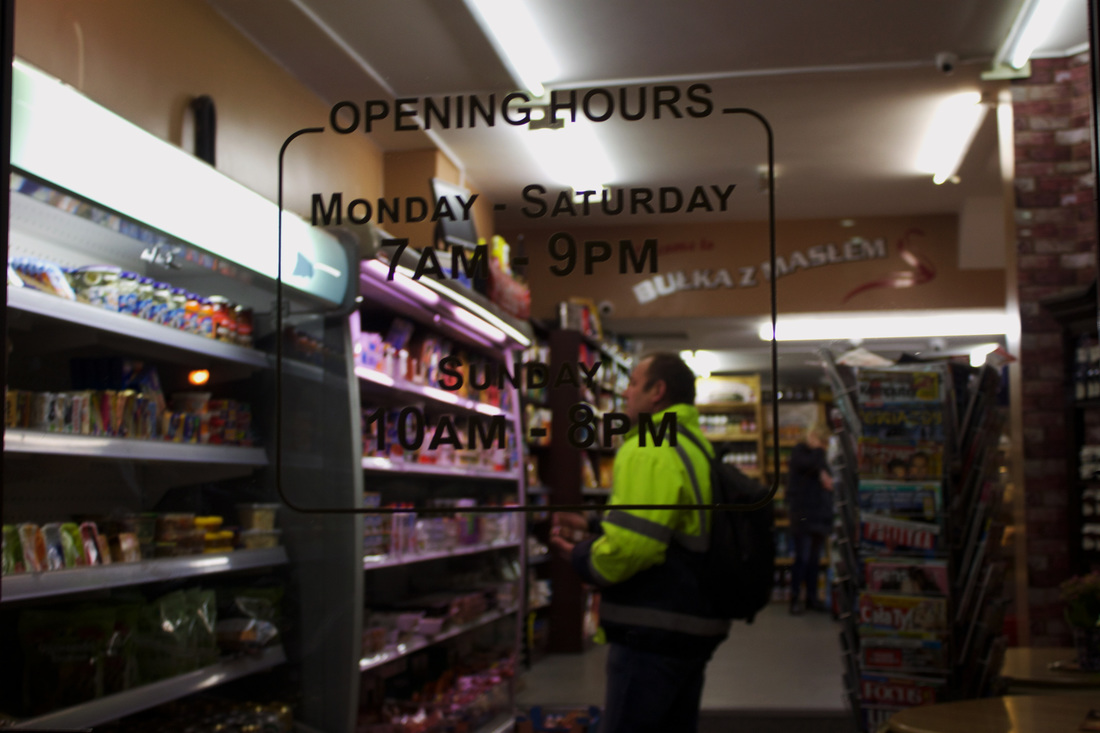
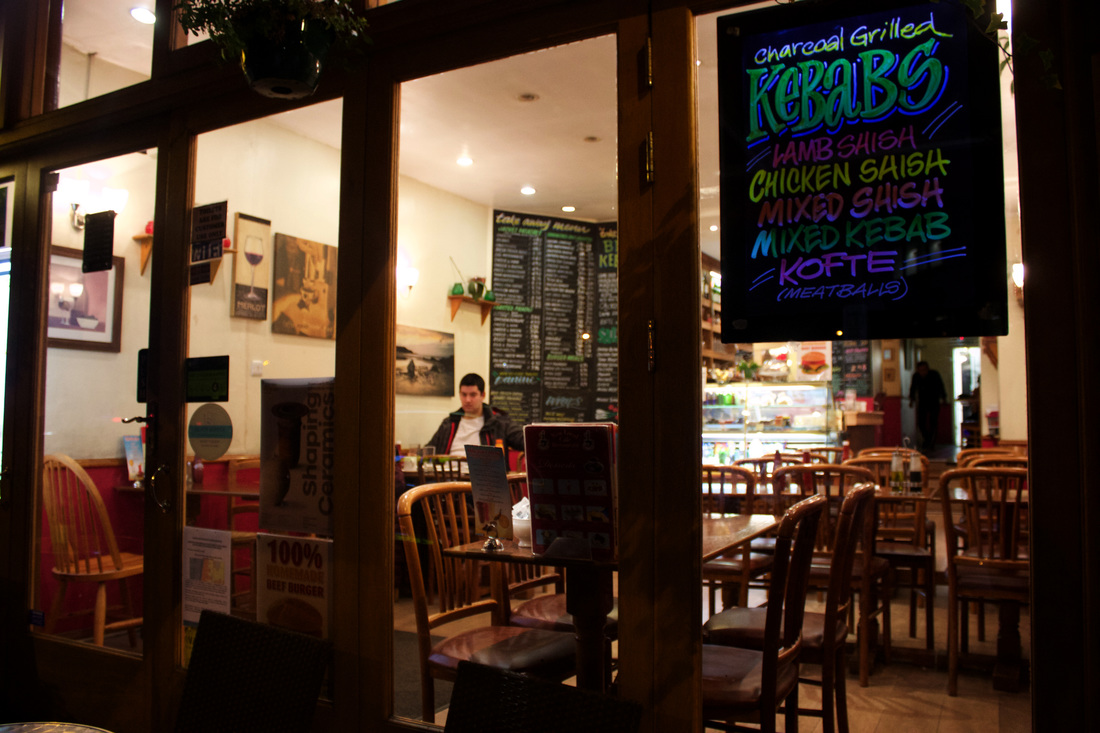
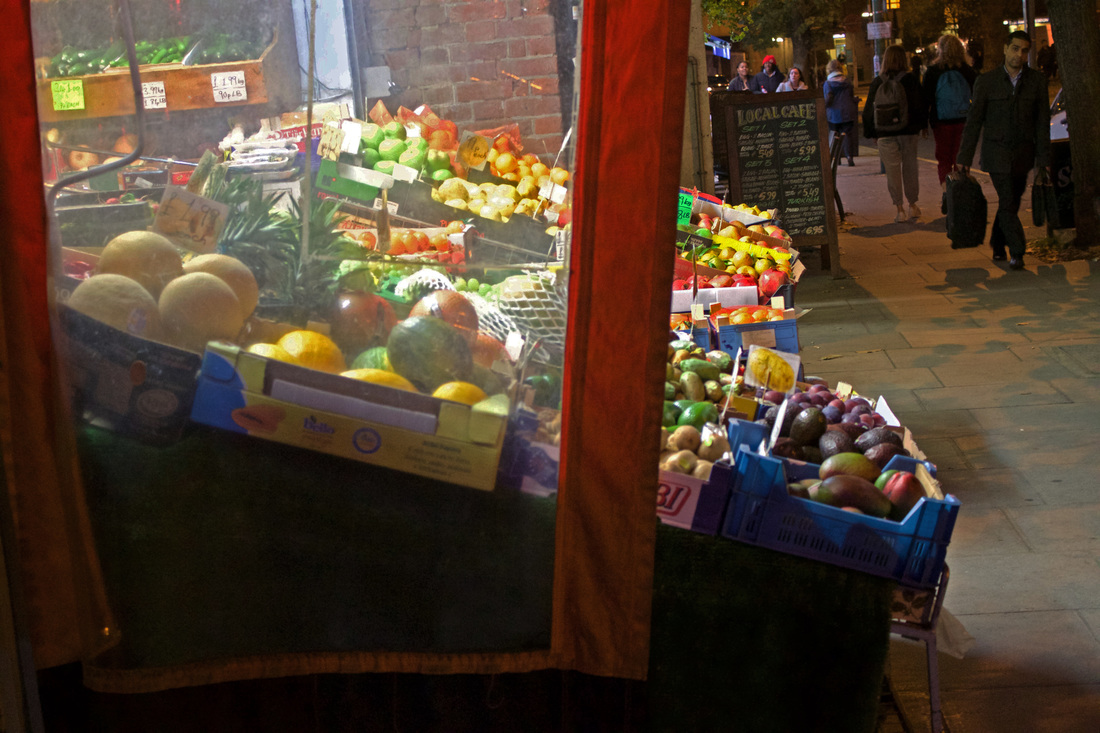
Saul Leiter Response
For this response, I took a series of photographs in the style of Saul Leiter use the city as a means of creating abstract portraits shoot portraits through doors car windows windows. The images can be set up or people that you dont know in a documentary style.
|
|
|
|

|
|
|
|
|
|
|
|
|
|
|
|
|
|
|
|
|
|

|
|
|
|
|
|
Edit Process
Strand Responses
For my strand responses, I researched photographers and picked out my favourite pieces of work by my favourite photographers that I had come across and then narrowed them all down to 4/5 and created my own interpretations of each of their work. Once I had completed each Strand, I had to choose a Strand that I would develop further and make it into a final piece.
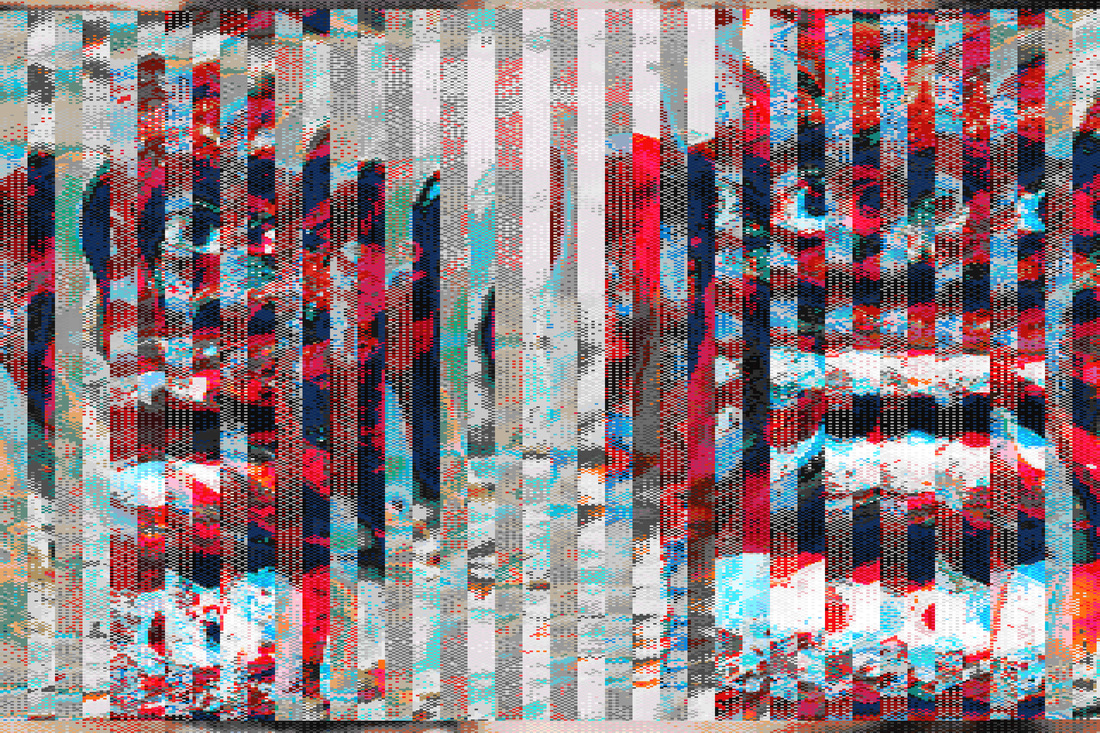
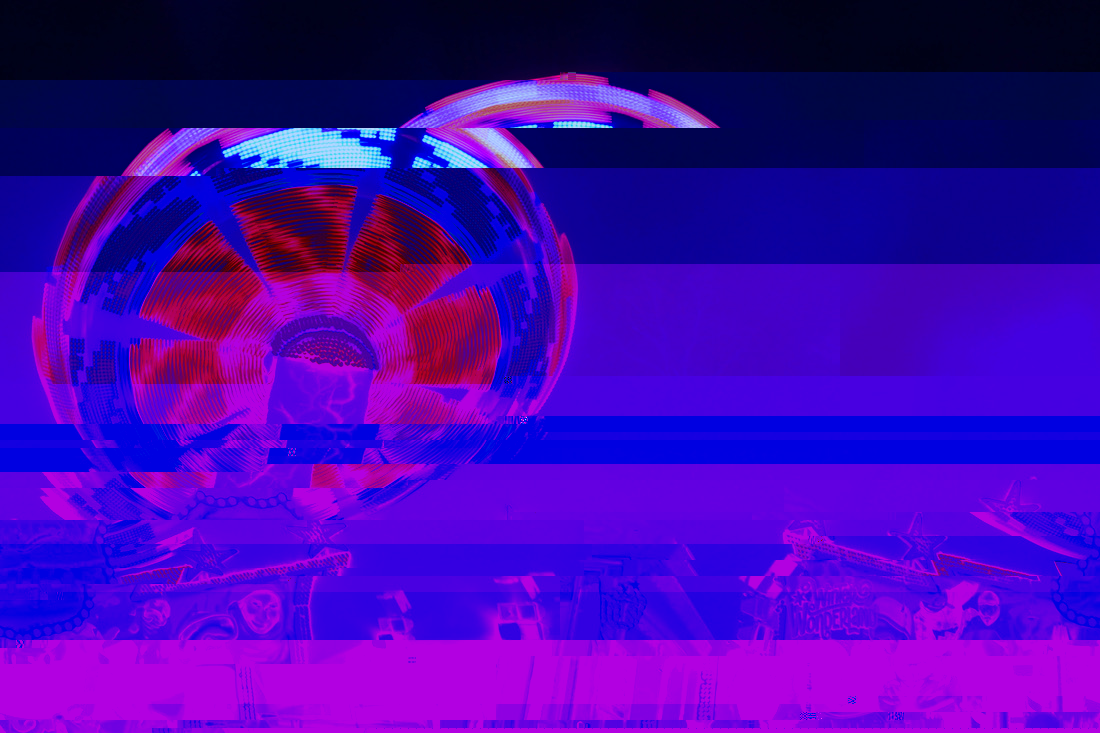
Strand 1 - Glitch
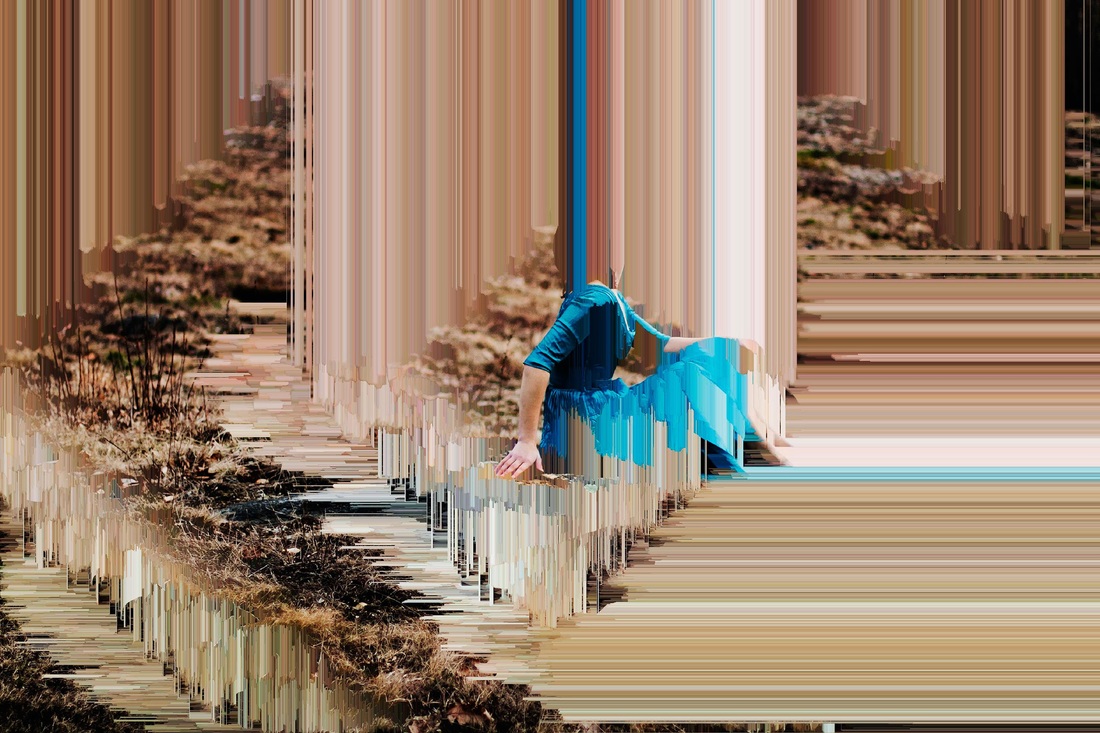
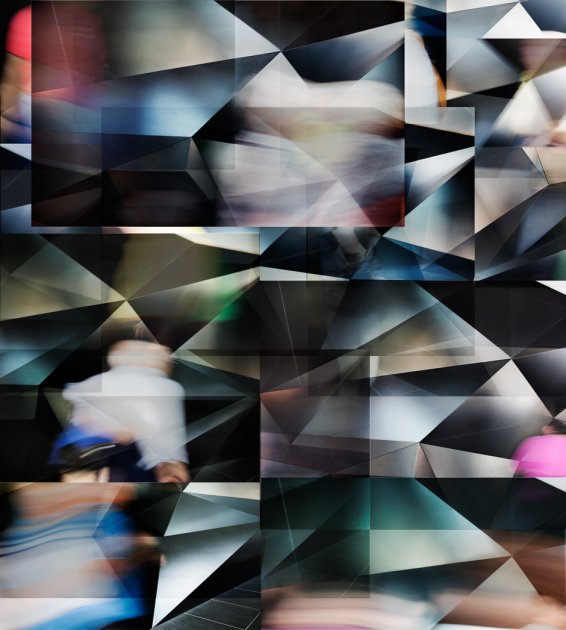
For this response, I was inspired by Sabato Visconti who creates glitch art photographs. To create this look I took loads of photographs in completely different locations to make the final outcome of the edits different and then loaded them into a program where I deleted some of the pictures format codes to create a glitched effect. I really like this look as the colours all changed and contrasted together naturally without having to edit each part of the photographs colours.
Example of Sabato Visconti's work:
Example of Sabato Visconti's work:
|
|
|
My Response:


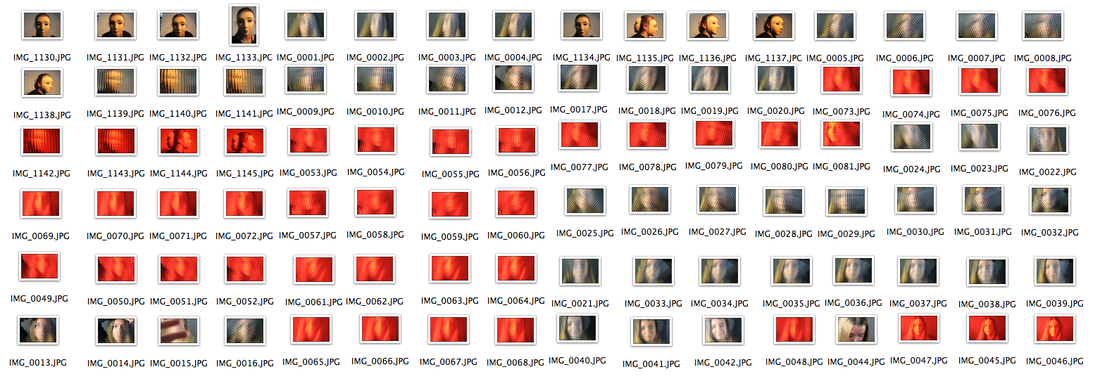
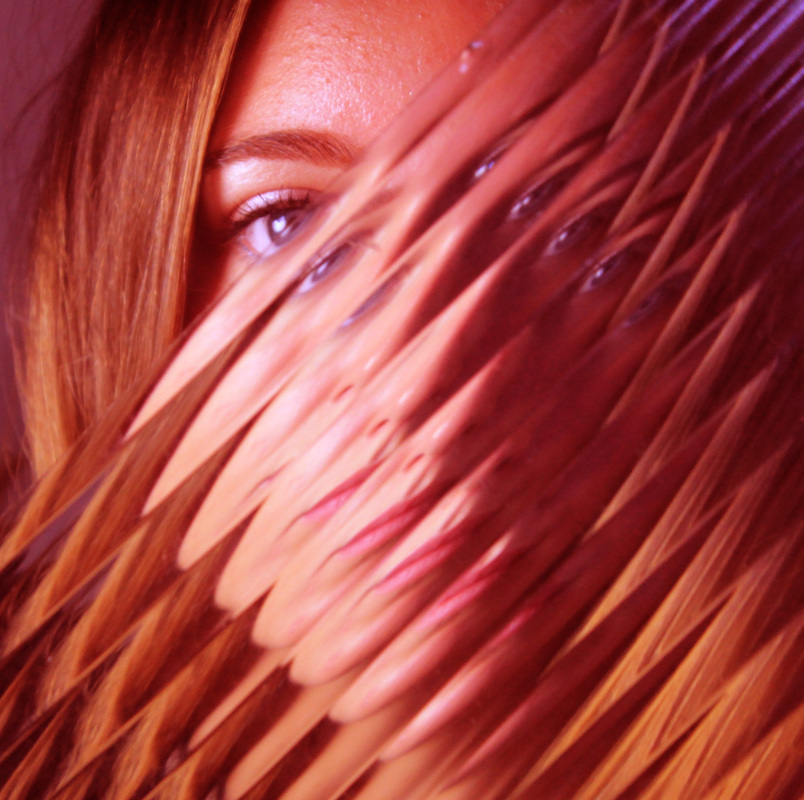
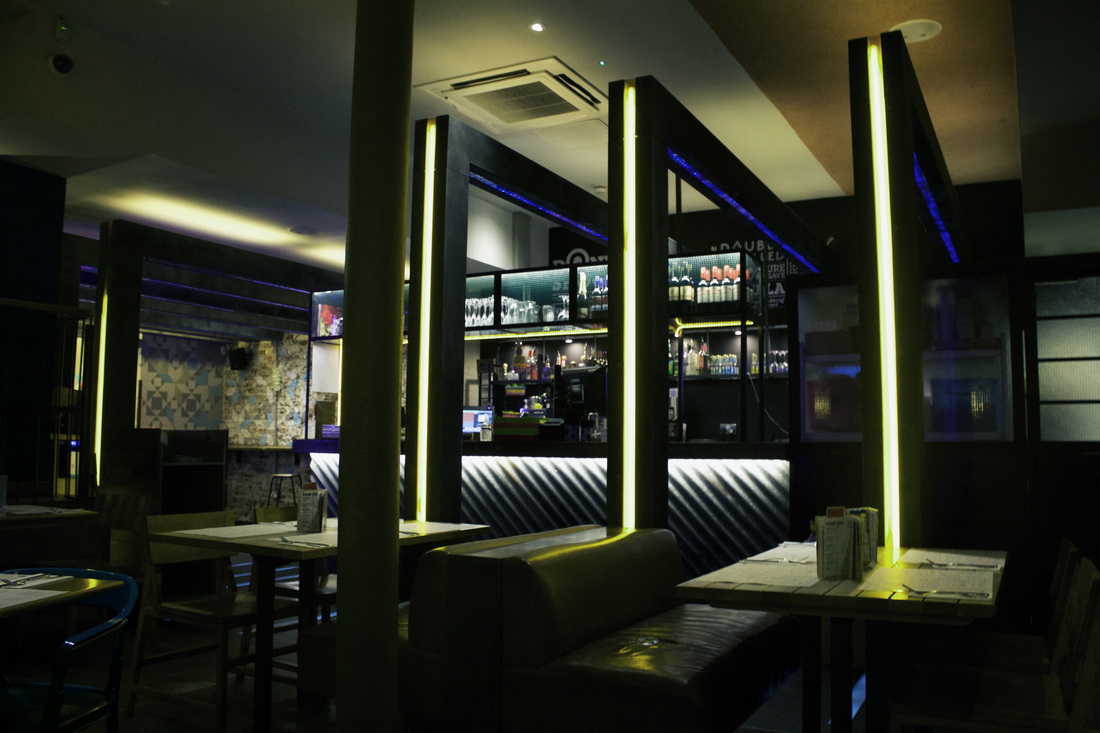
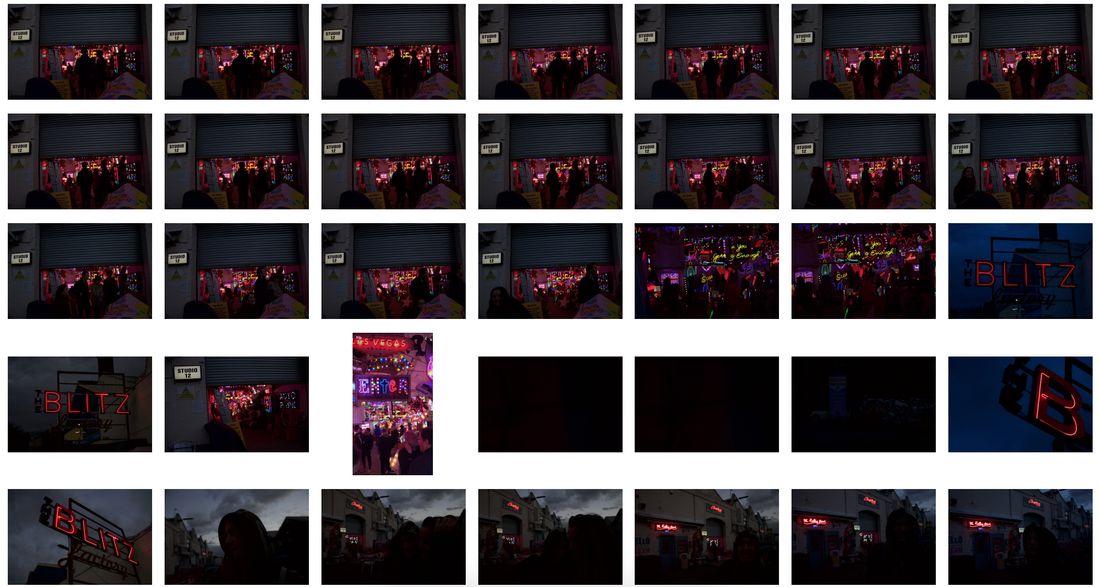
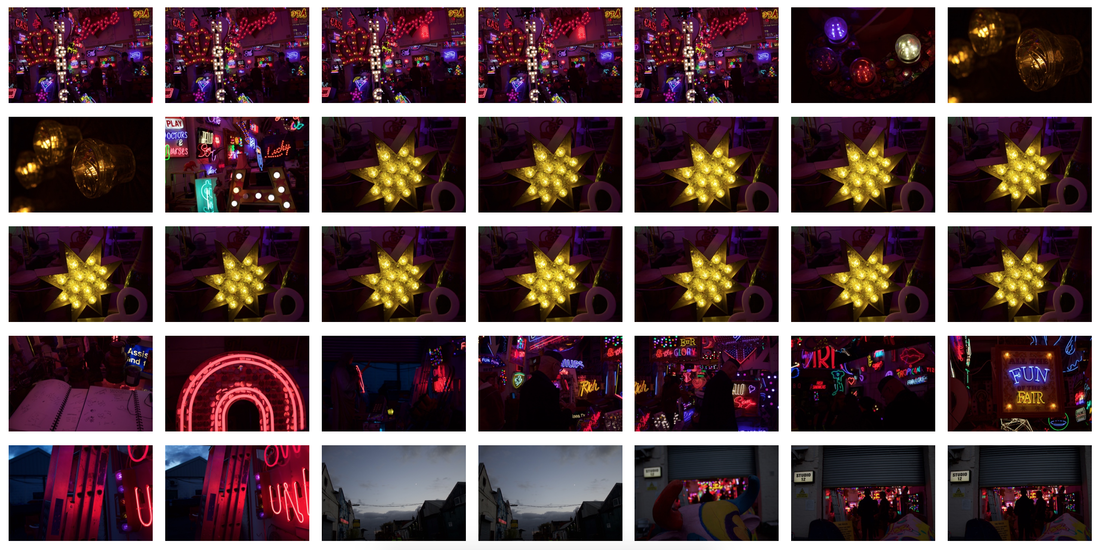
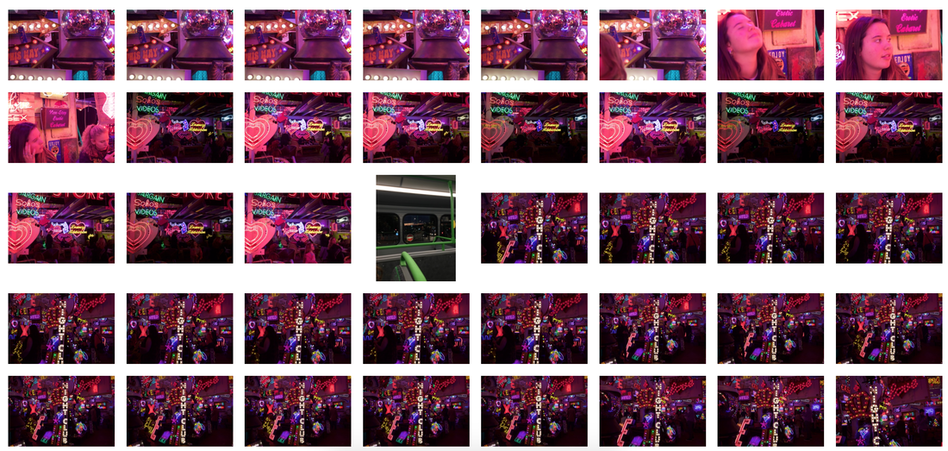
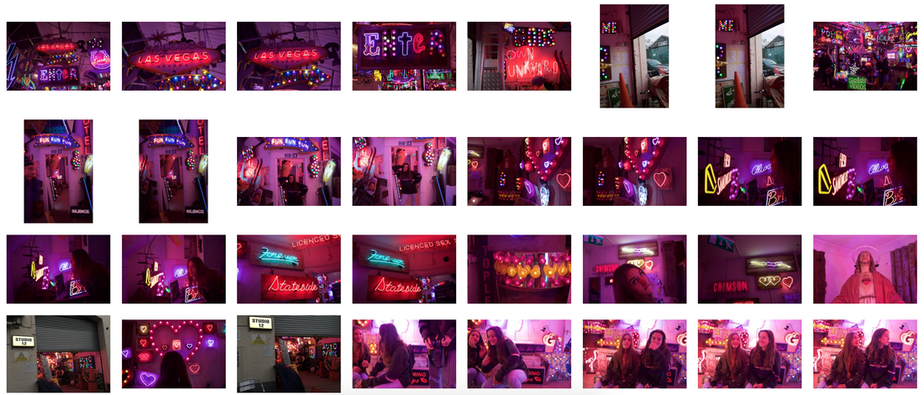
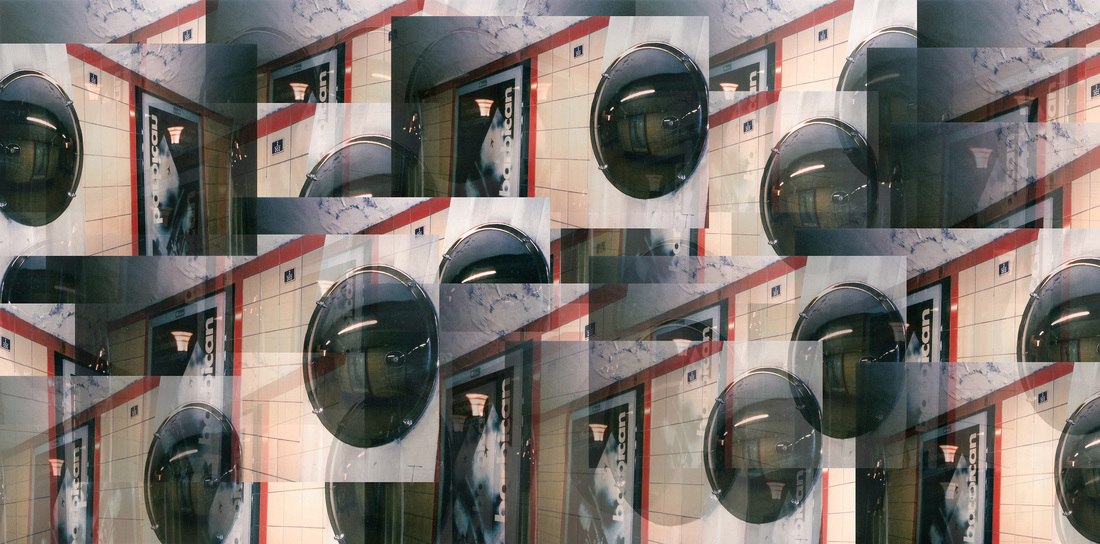
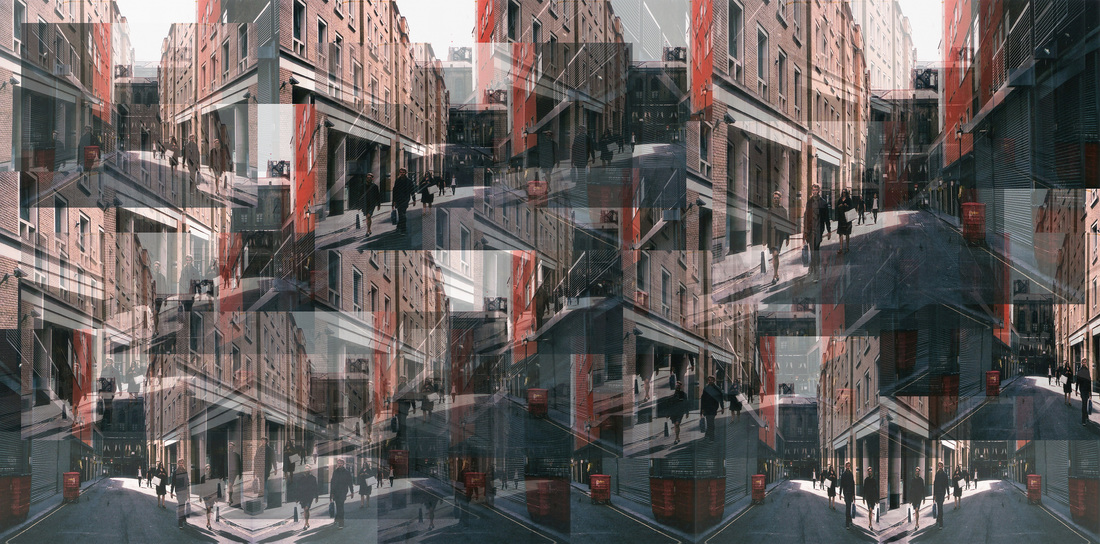
Strand 2 - Gifs
For this strand, I was inspired by James Welling. I liked Welling's type of photography as I liked the different colours that were within each picture. To create a different but similar at the same time response to Welling's work, I went to a junkyard full of neon lights instead of a wood, like Welling did and imported some of my favourite images into Photoshop and created a gif. Below displays screenshots of my contact sheets, six of my favourite gifs made and a step to step process of how I edited the gifs.
Examples of James Welling's work:
Examples of James Welling's work:
|
|
|
My Response:
|
|

|
|

Edit Process
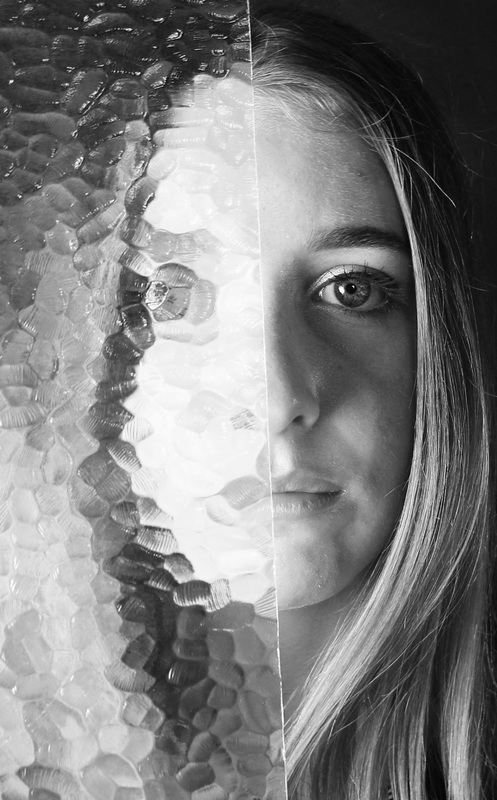
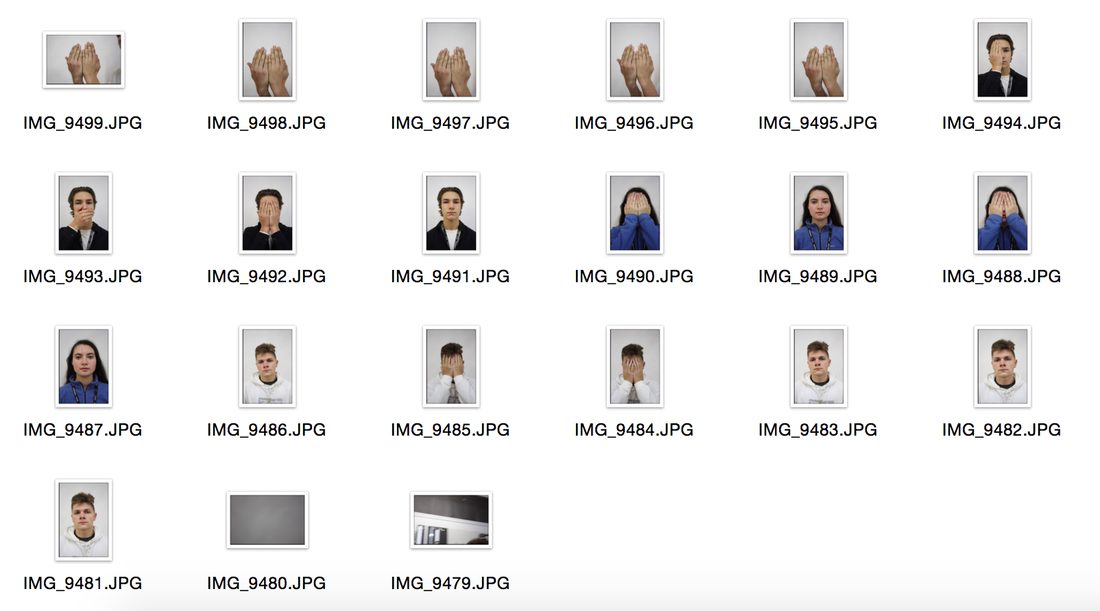
Strand 3- Inside Out.
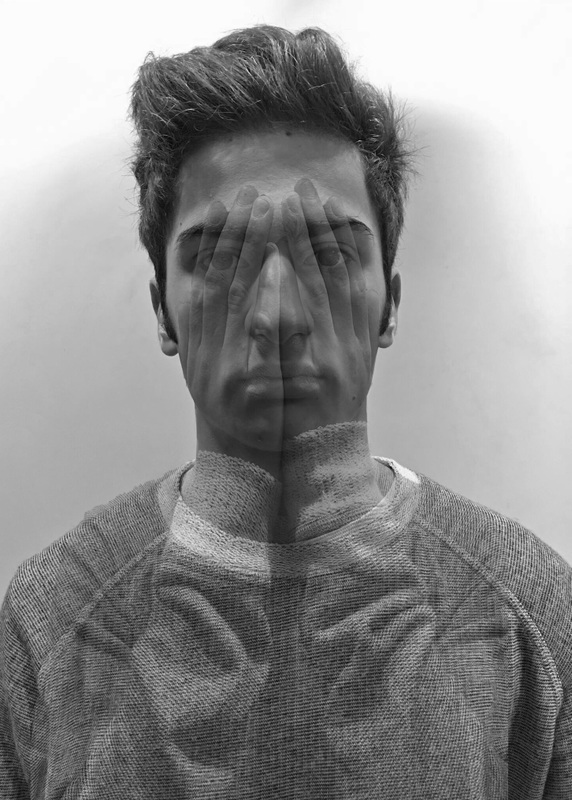
My strand 'Inside Out.' is going to consist of my ideas of showing whats in the underneath and how it can be brought onto the outside. I plan to create photos that are of parts of the body that are seen through barriers that are put up and in real life, would not be possible to see, to create an abstract and unusual effect.
First Response
For my development, I decided to take photos of models in the same positions with their hands up against their face and then another photo with them in the exact same position except without the hands in the frame meaning that when I edit the photos, the hands will be in the right line up for when the facial features get merged through the hands.
|
|
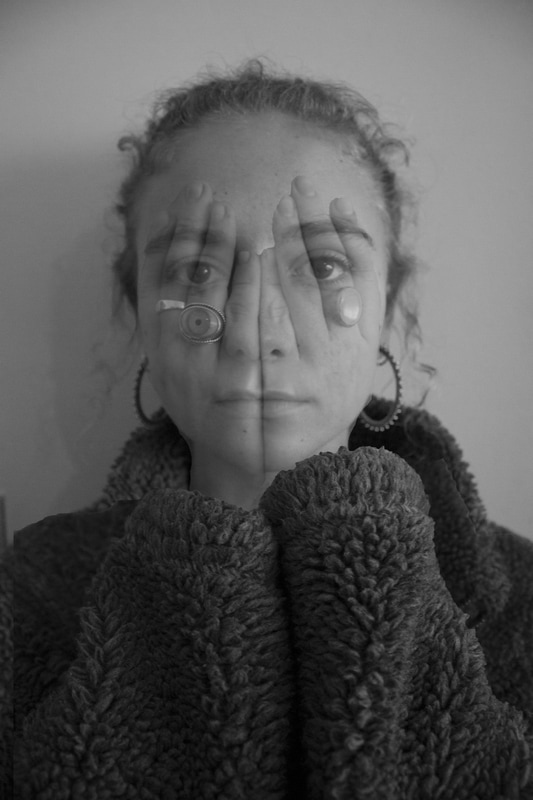
Second Response :
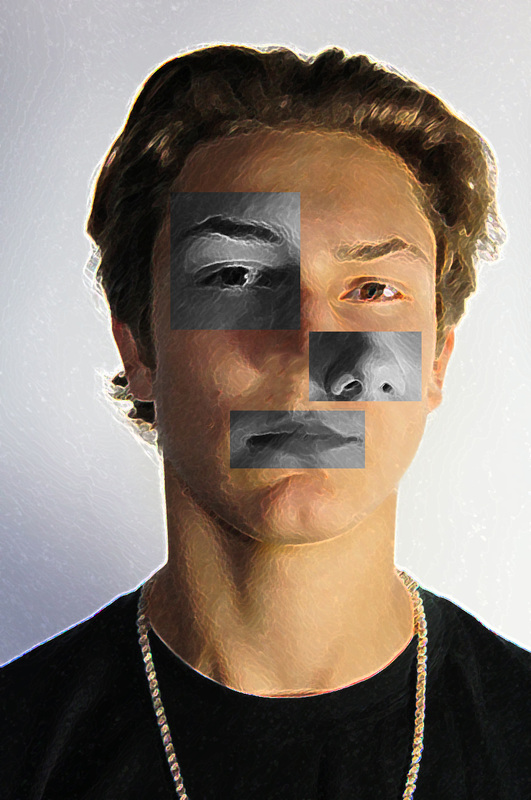
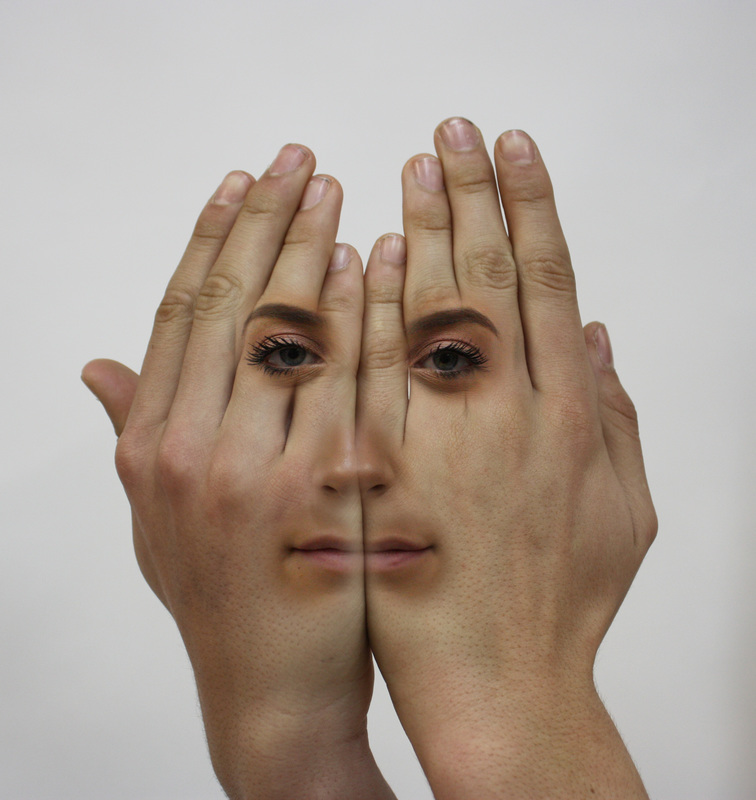
For my second response, I decided to take certain parts of the human face and merging them into another part of the body that would create an unusual and abstract effect to the picture. I took a picture of a pair of hands and then separate portraits all against a white background as it meant that when editing the photos in photoshop, it would be easy for me to cut around the certain parts of the body that would be used, creating a smooth effect for the overall outcome.
Second Response :
For my second response, I decided to take certain parts of the human face and merging them into another part of the body that would create an unusual and abstract effect to the picture. I took a picture of a pair of hands and then separate portraits all against a white background as it meant that when editing the photos in photoshop, it would be easy for me to cut around the certain parts of the body that would be used, creating a smooth effect for the overall outcome.

|

|
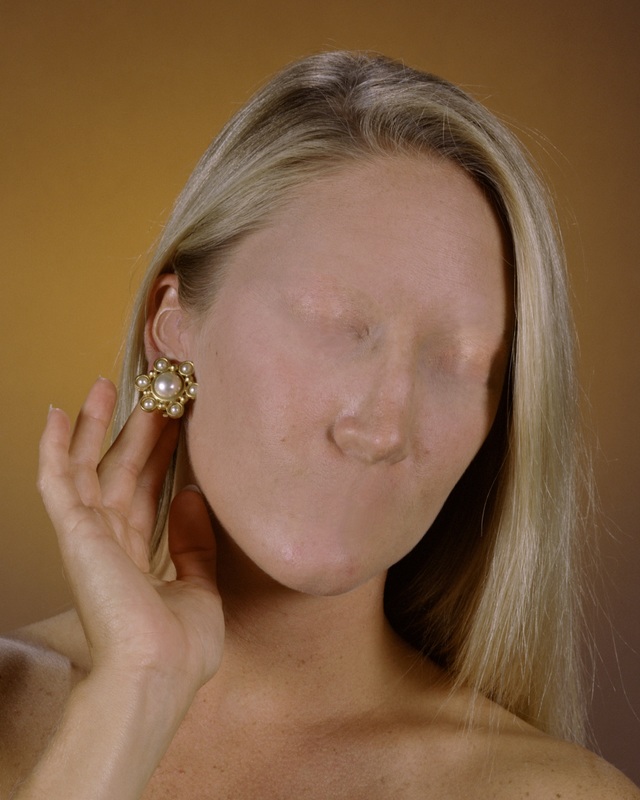
Strand 4 : Hidden Features
For this strand, I was inspired by Aziz and Cucher. This is because I really liked the way the images looked once edited and I liked how strongly they linked to this unit, Abstraction.
Examples of Aziz and Cucher's work:
Examples of Aziz and Cucher's work:
|
|
|
My Response:
|
|
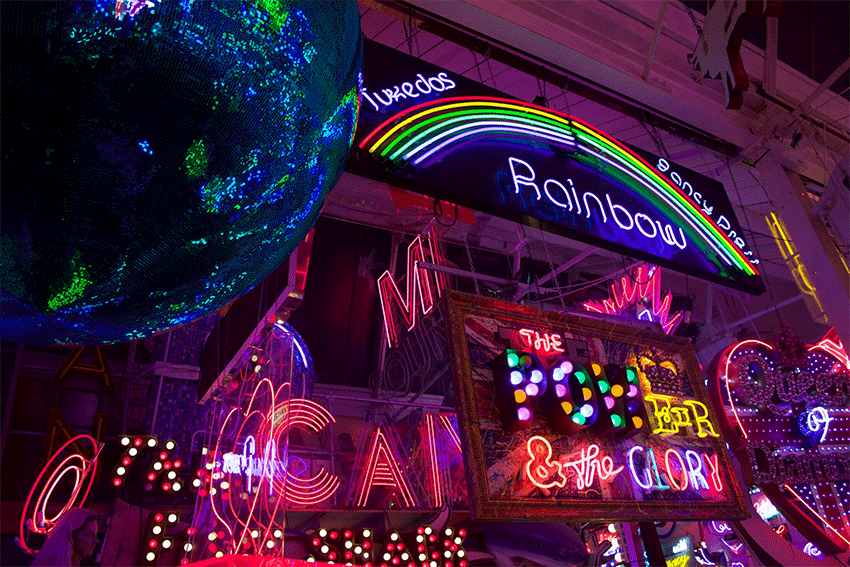
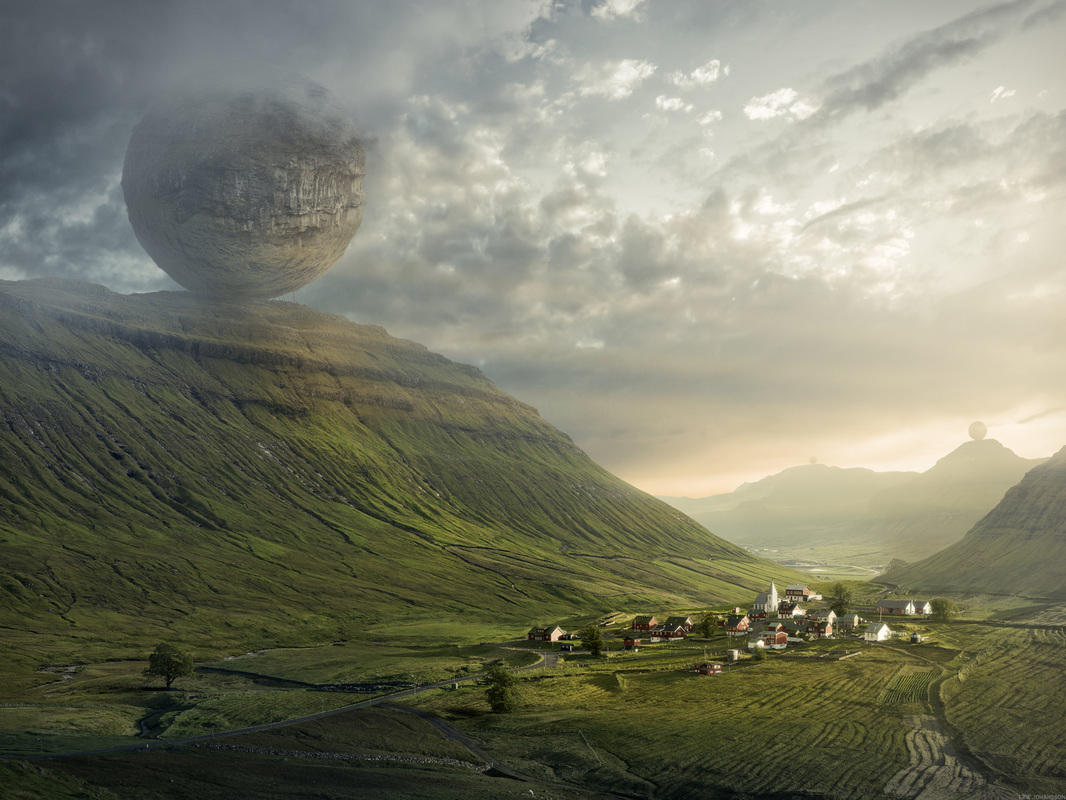
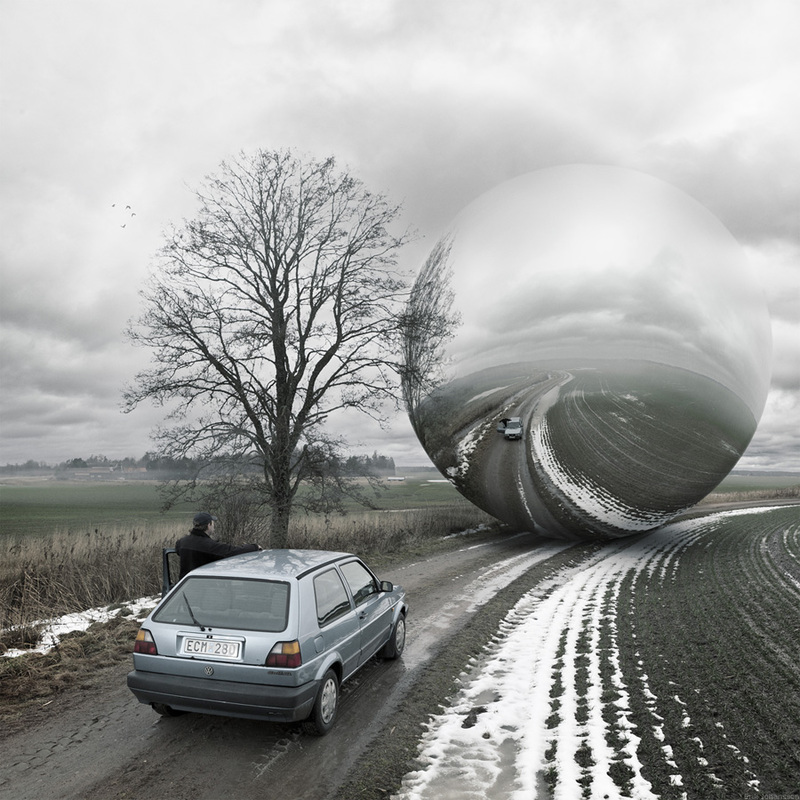
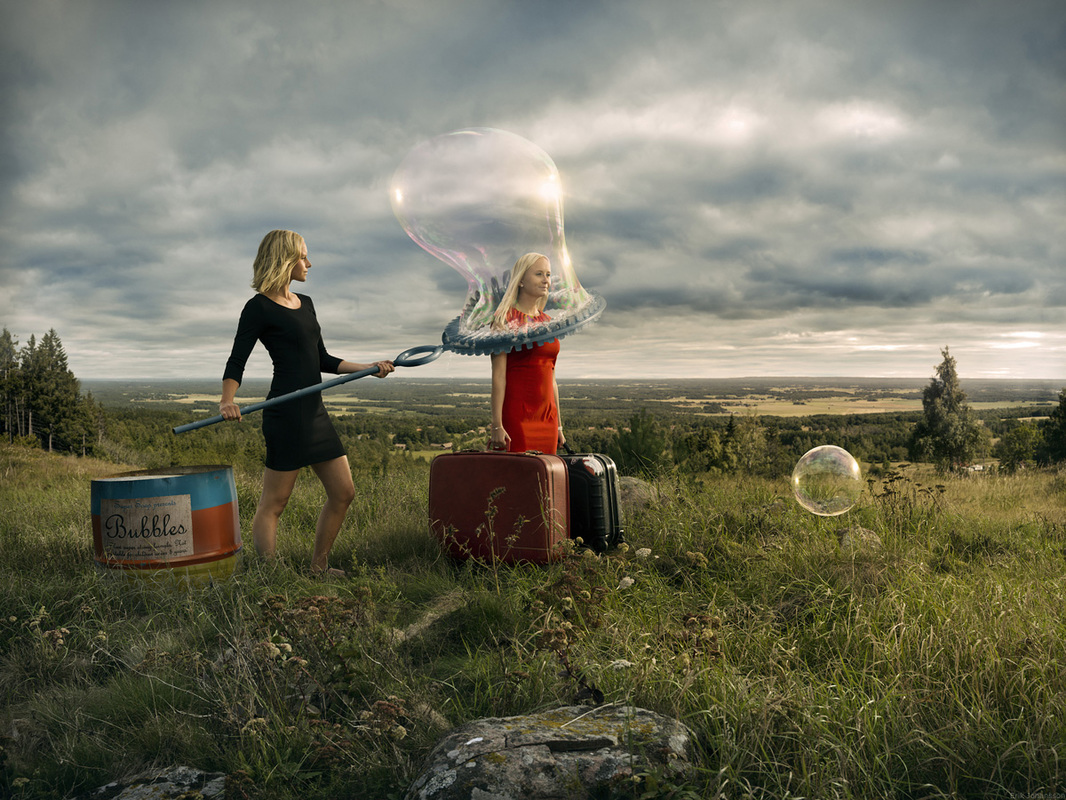
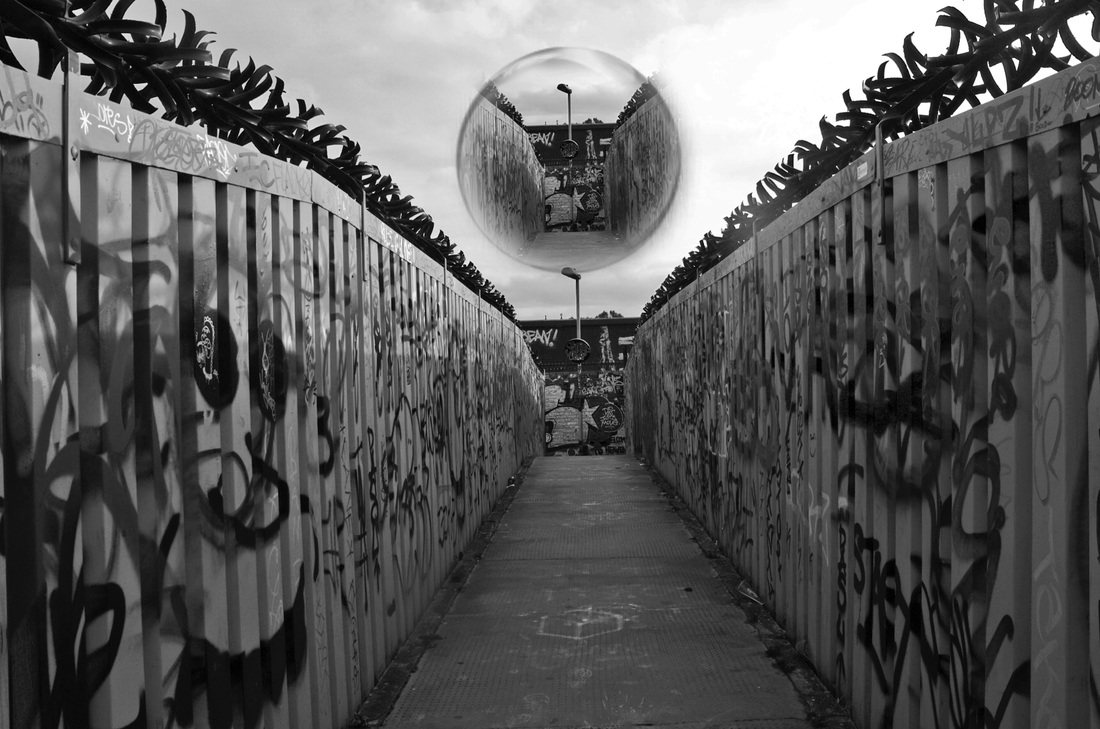
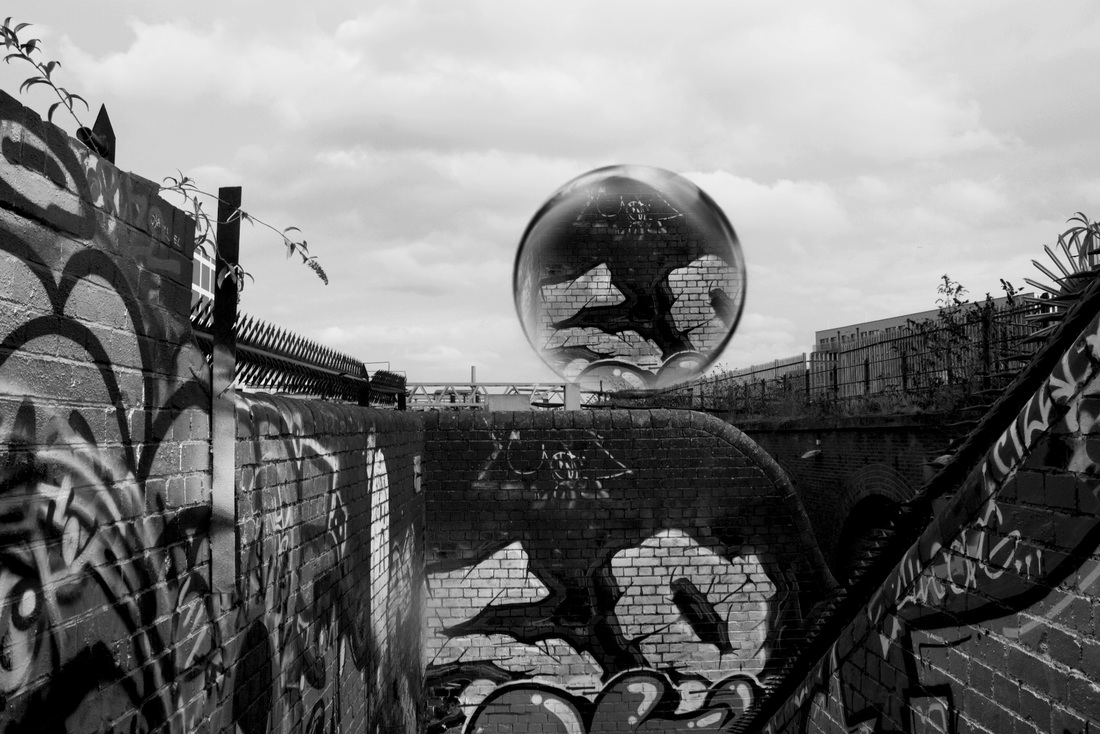
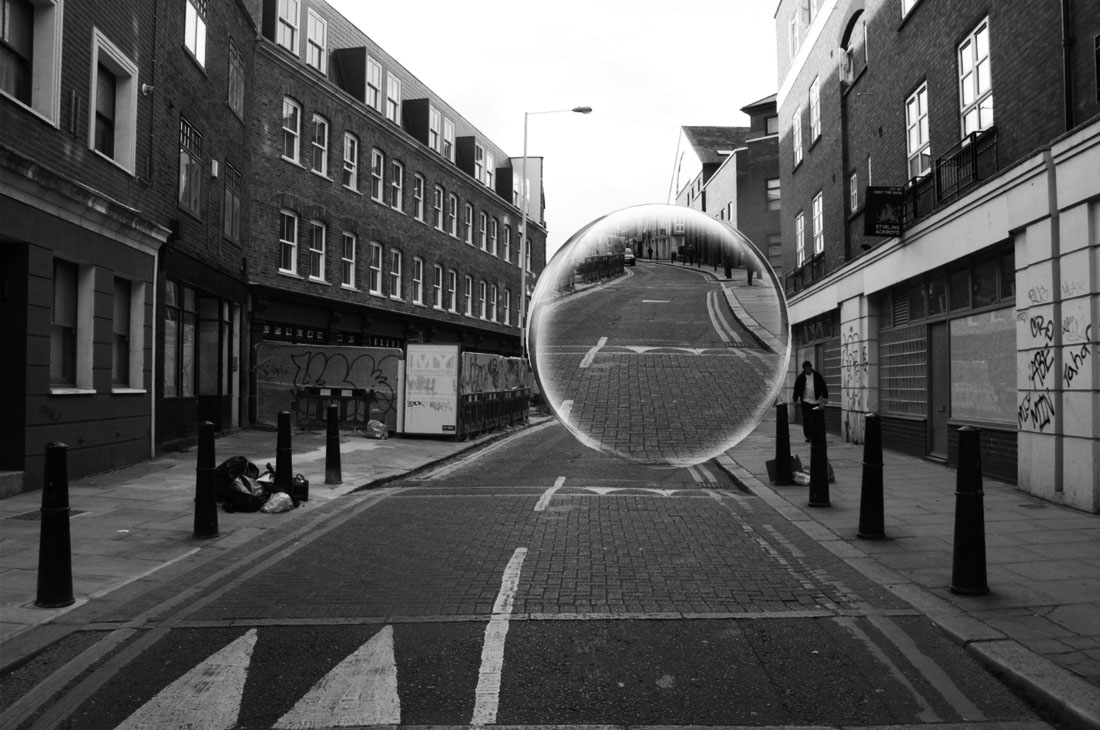
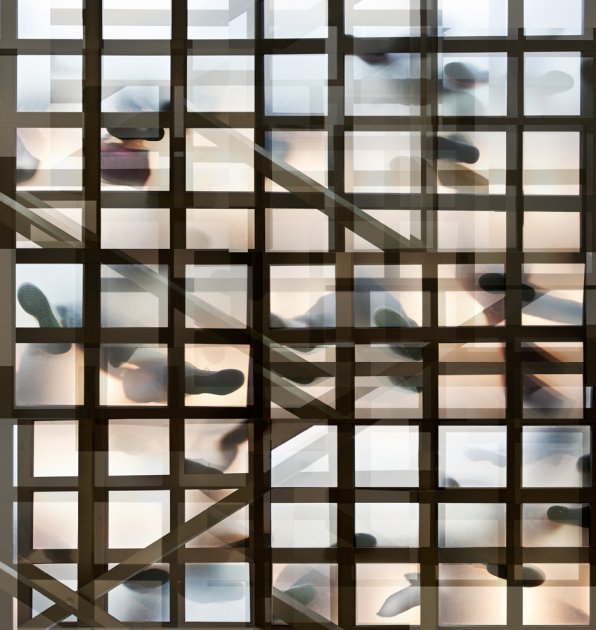
Strand 5 : Magnification
For this strand response, I was inspired by Erik Johansson due to his creativity skills and the way that his images projected a certain part of an image. I liked this type of photography as the viewer could see two different aspects of the same picture as you get a long wide shot of a particular location and then you get a magnified, zoomed in, close up view of that same location but only part of it.
Examples of Erik Johansson's work:
Examples of Erik Johansson's work:
|
|
|
My Response:
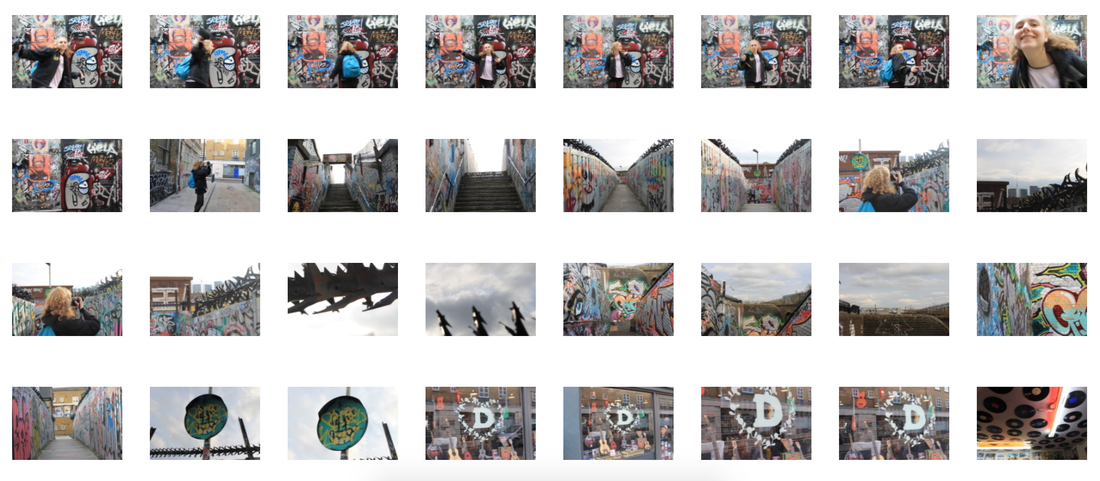
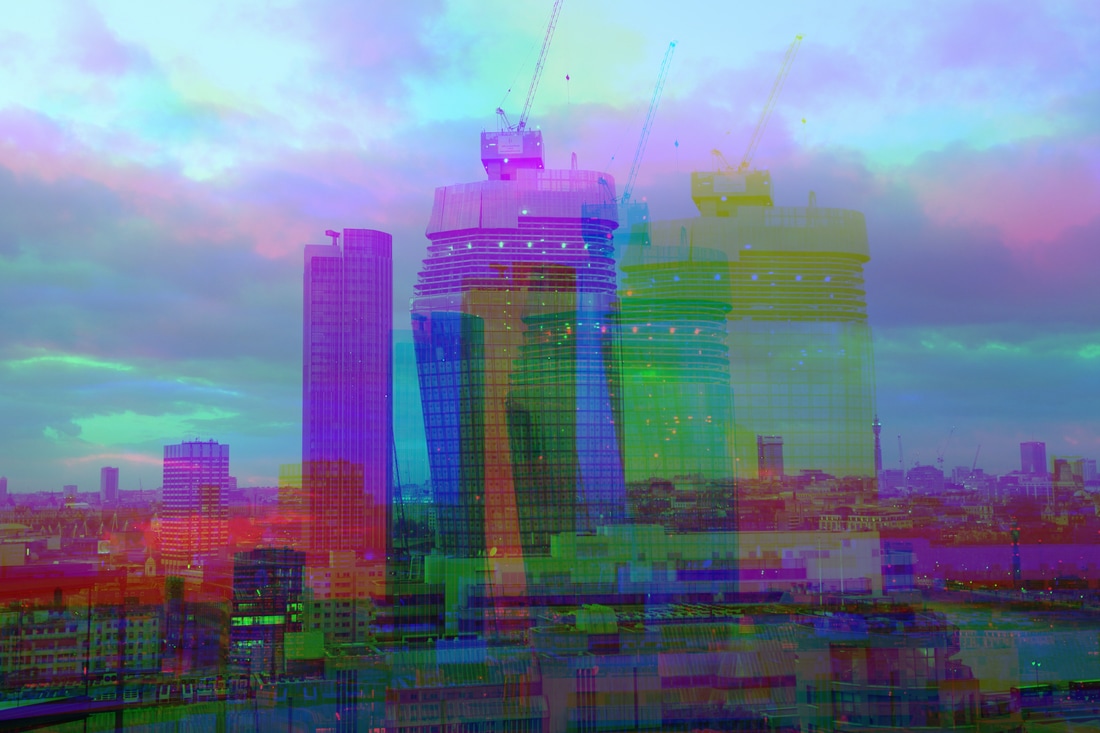
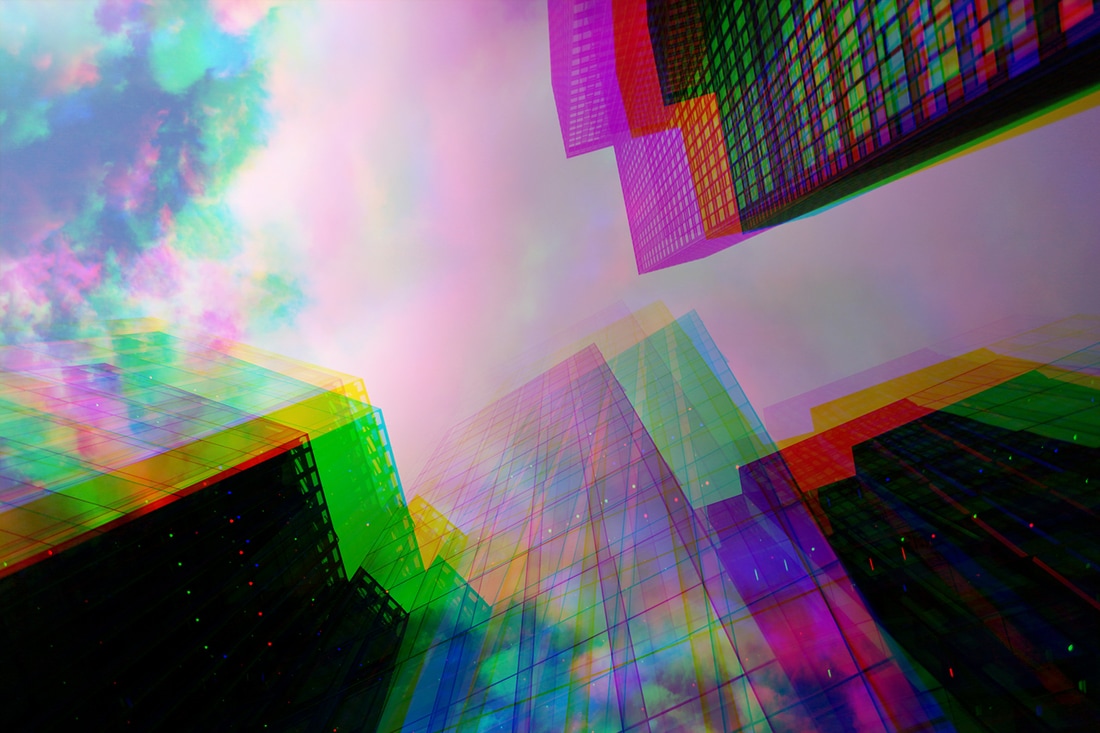
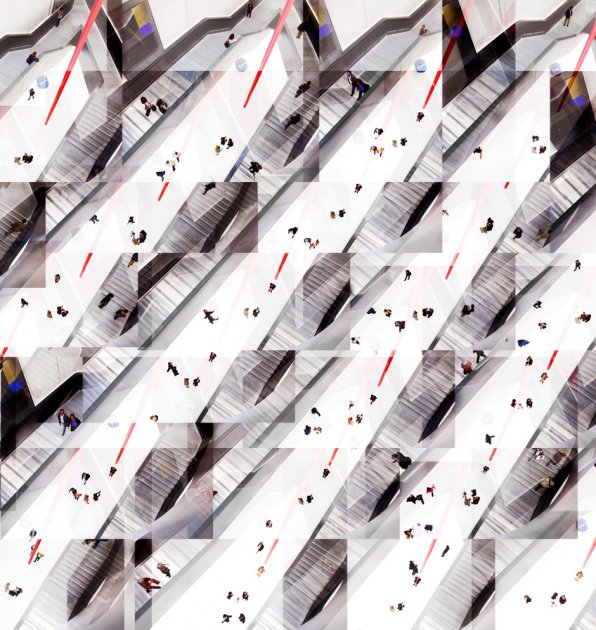
Strand 6 - Layers
For this strands second response, an idea came into my head to create a multiple exposure look as in my first response for this strand, I had multiple buildings captured in one photo which gave me an idea to overlay each of them and create a multiple exposure look using photoshop. When I researched this kind of photo edits and photo types, I came across an artist that I was inspired by called Mario Rossi who photographs using long exposure, as he says that 'just one photograph isn't enough' as he is very intrigued by layers and exposures in photographs. To create a response for this artist I photographed a certain setting on a film camera, got the film developed, scanned them into my computer and then uploaded each photo into photoshop and duplicated the layers, overlapping each picture whilst changing the opacity of each duplicated layers making some faded and some in complete focus.
Examples of Mario Rossi's work:
|
|
|
My Response:
Edit Process
Developed Strand : Inside Out.
For my development strand, I wanted to take a more advanced and stronger approach to following the theme of 'Inside Out'. I came across photographers such as Nick Veasey and Massimiliano Caria who both have a series of images where parts of the body are shown with an X-Ray effect and show the insides of the body and objects.
First Development
Artist Inspiration:
Nick Veasey was an artist that I came across when I was researching X-Ray Photography. I really liked his work as he displayed a variety of objects displayed within the photos for example he photographed people, animals, cameras and vehicles etc.
Examples of Nick Veasey's work:
|

|
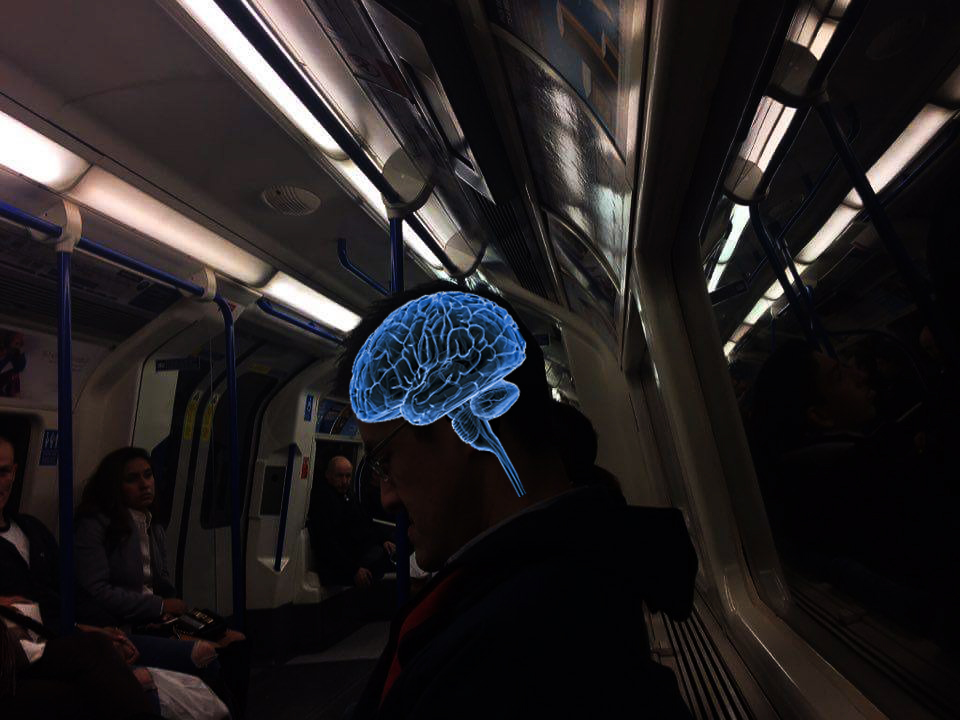
My Response
For my first response, I took a photo of someone against a plain white background and then imported it into photoshop. I then photographed a skeletons head and imported it into photoshop too. I then used the quick selection tool and selected the human, then copying and pasting it onto a new document on photoshop of a black background, doing the same with the skeletons head, onto the same background with the human on it too. I inverted the colours of both the skeleton and human and used the colouring tool to create a vibrant glowed up blue which was the closest look to a real life x-ray that I could do, without making it look too fake. I then positioned to skeleton on top of the human making it fit as close and accurately as I could to the human by changing the opacity of the skeletons layer which meant that I was then allowed to line up the eyes, mouth and nose. I then used the rubber tool to rub out any of the unwanted parts of the skeleton once it was fully lined up to the humans features.
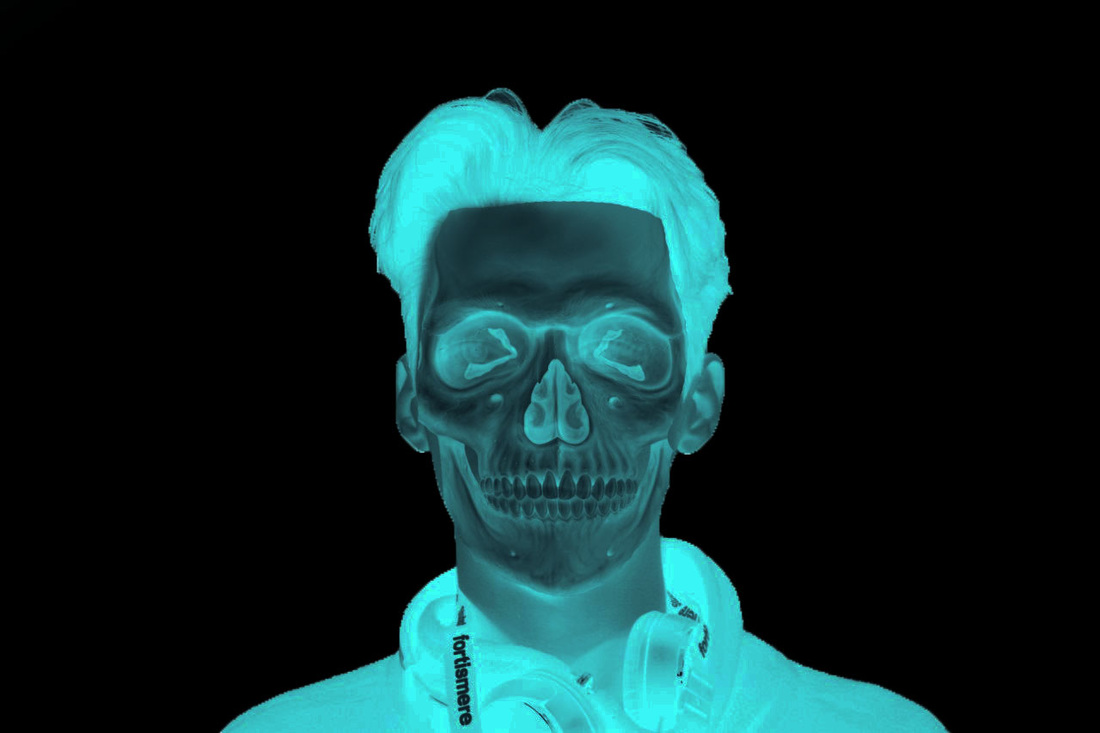
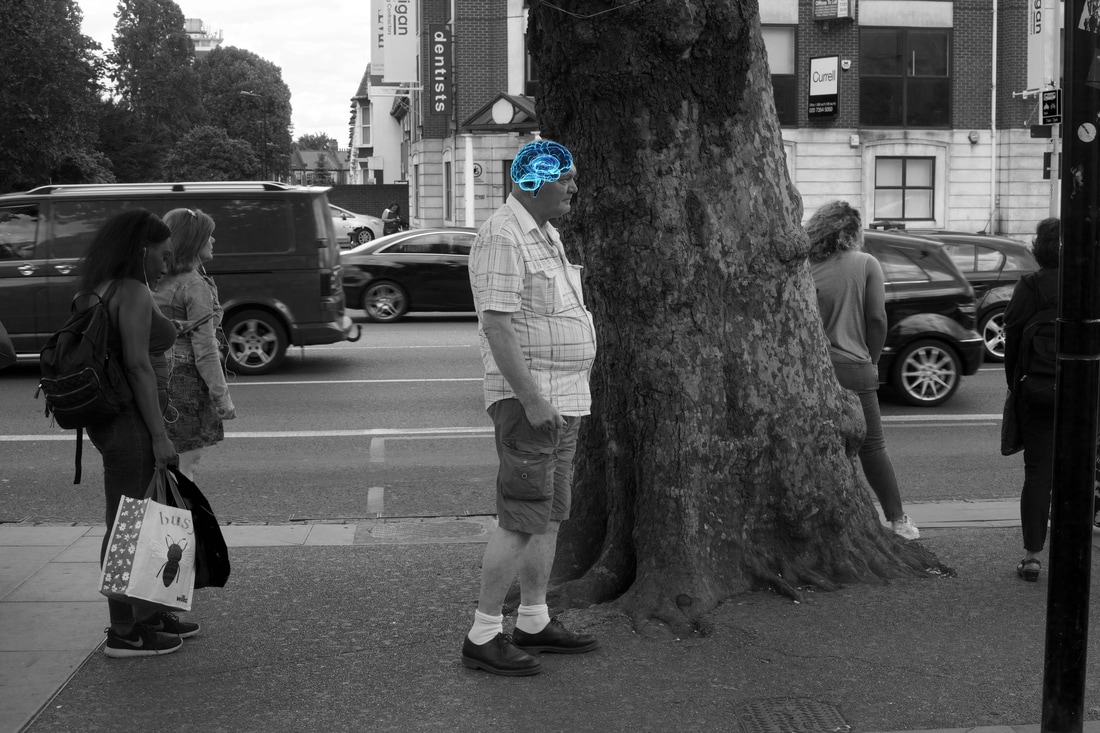
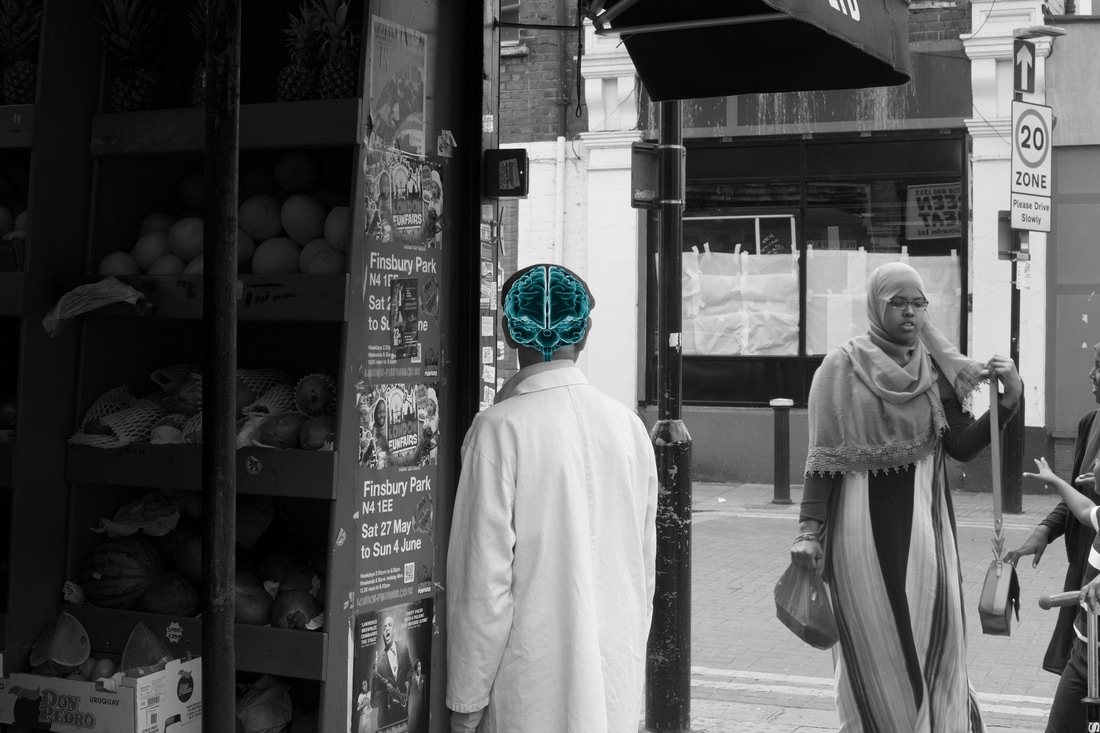
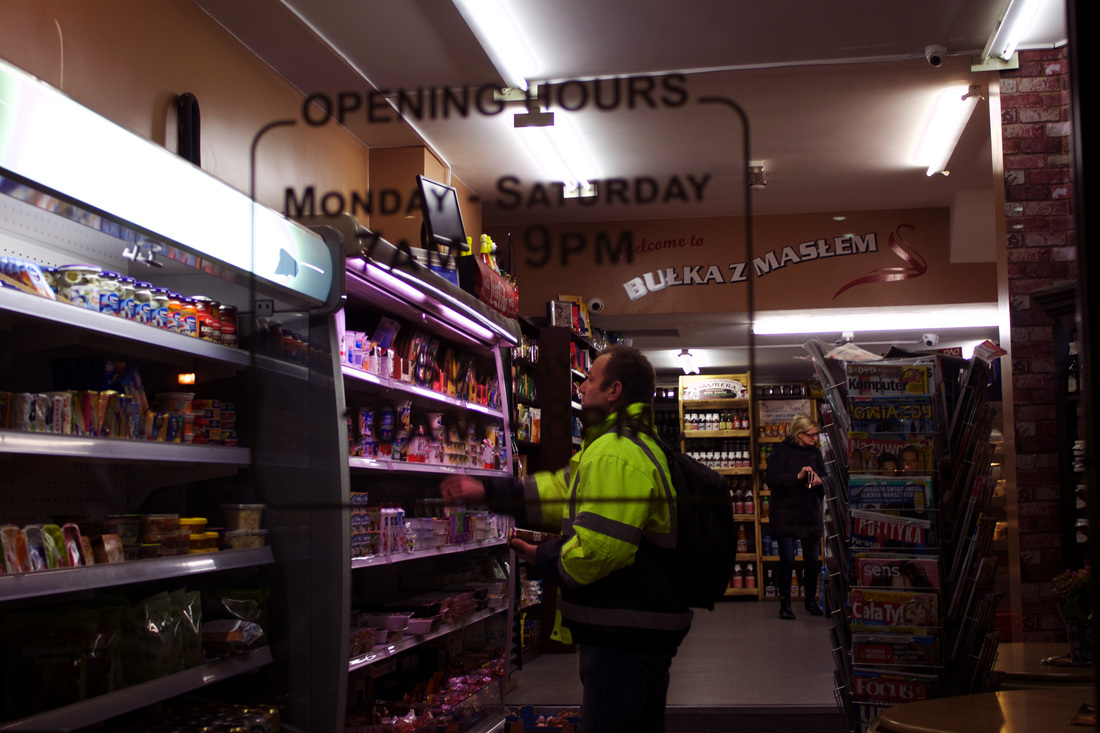
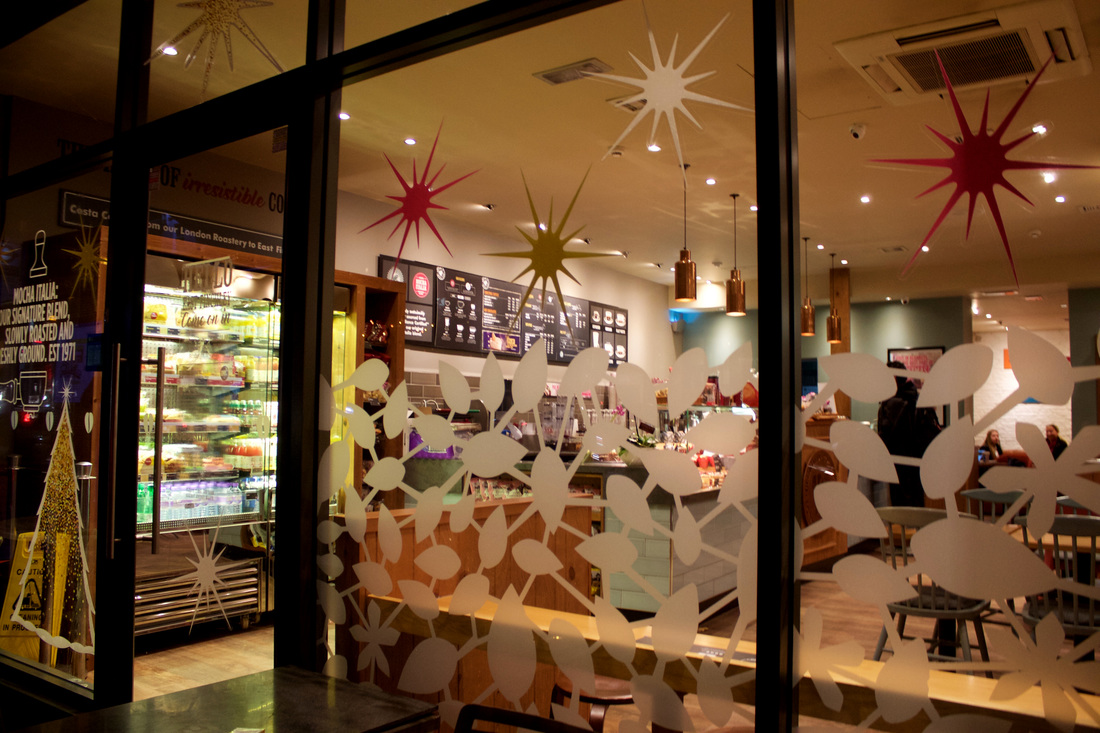
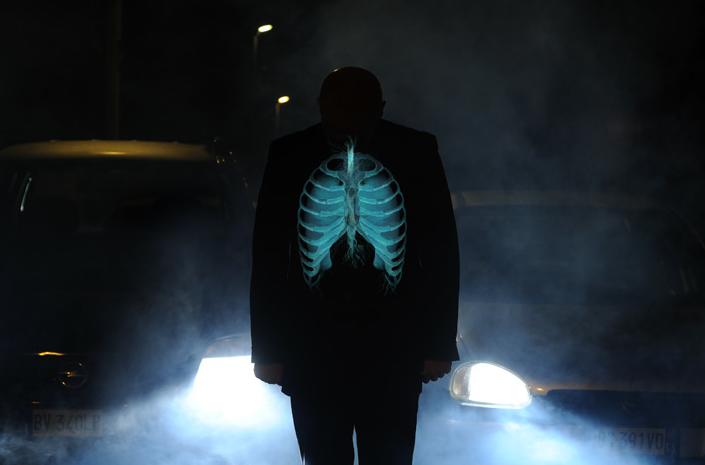
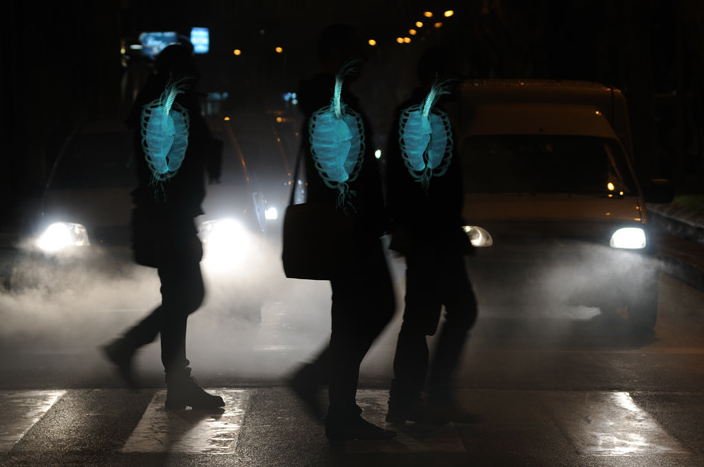
Final Piece Process
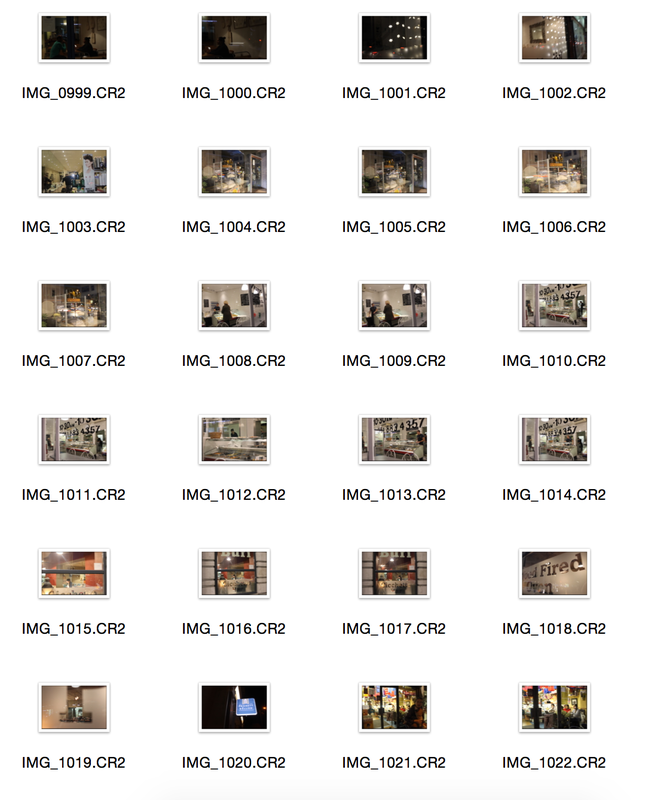
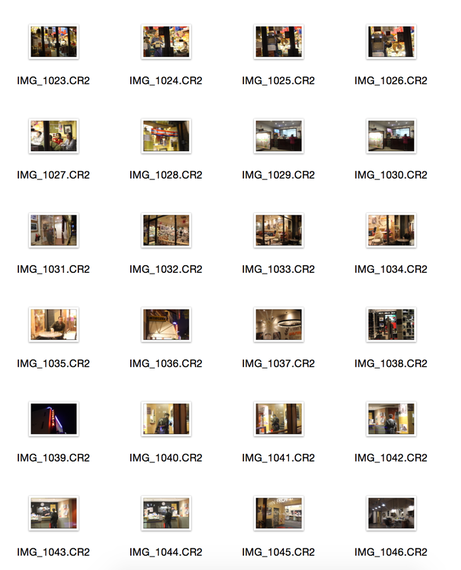
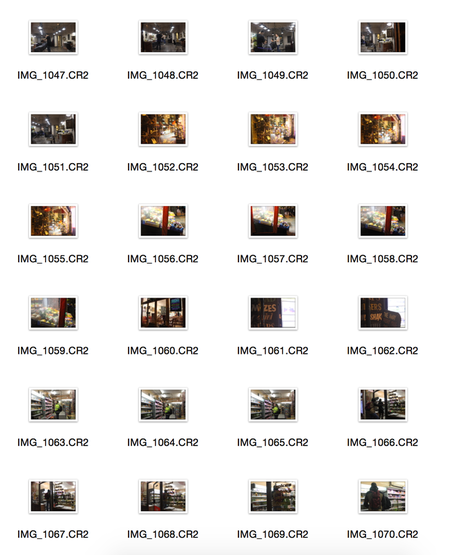
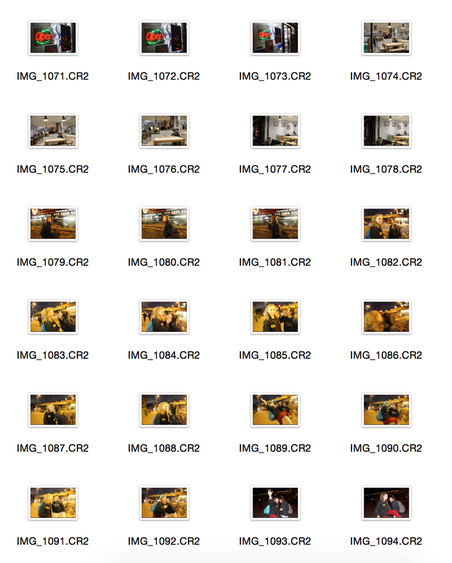
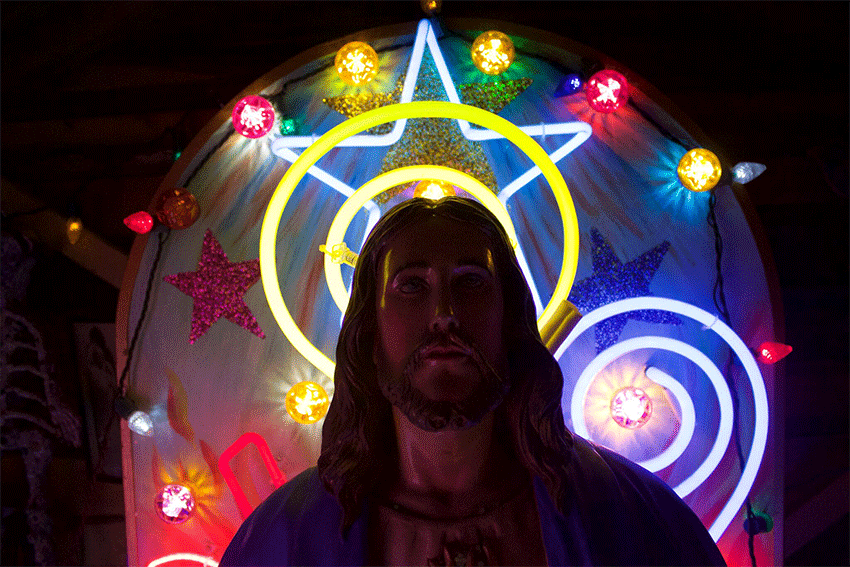
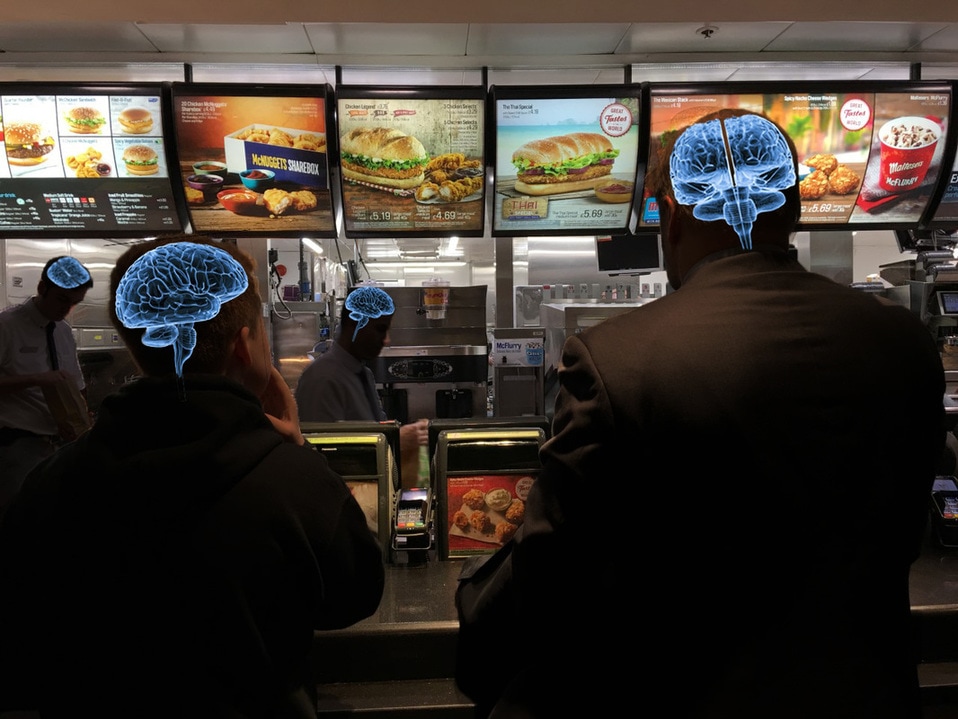
For my final piece, I was inspired by a photographer called Massimiliano Caria who photographed people and inserted an xray scan of a body part within a body. I really liked these type of photos that Caria had produced as it is an unusual style of photography and I thought that if I were to interpret it myself then it would create a unique and creative approach to Abstraction. To create these photos, I went to many different locations such as fast food places, exhibitions and my local supermarket and photographed certain people doing ordinary things. I then imported these photos into photoshop and using the quick selection tool, I selected the person/people in the photo and added contrast to them and lowered down the persons brightness, this was to make the person completely dark but at the same time not touching anything else around them so that the signs around them in the image stayed bright. To make the colours brighter - especially in the fast food restaurant, I again used the quick selection tool and highlighted those signs whilst bringing up the contrast, dragging the brightness down slightly to make the contrast stand out more and I also changed the colour balance of the sings to make them more illuminate. Once I had done this I got the xray scan of a certain part of the body making sure that it matched with the photos location and then placed it onto the persons body, whether it being the stomach, liver, lungs or brain.
Example of Massimiliano Caria's work:
Example of Massimiliano Caria's work:
|
|
My Interpretation:

|

|

|
|
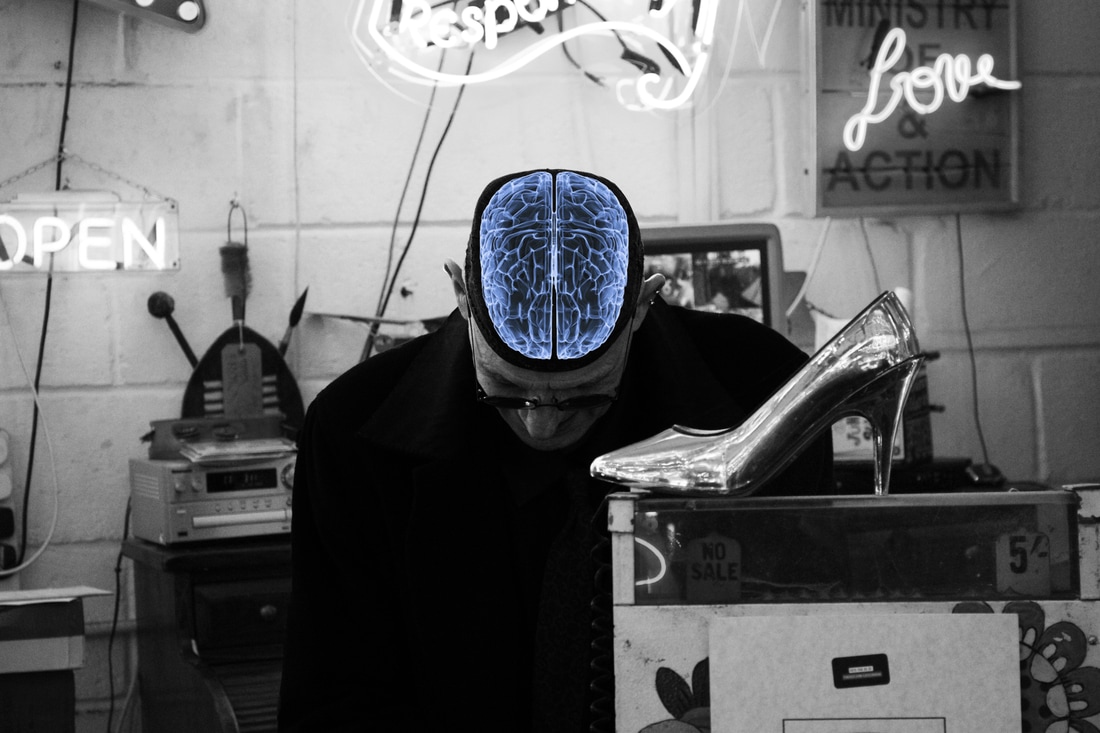
Creating my Final Piece:
( S T E P - B Y - S T E P E D I T P R O C E S S )
1 ) USING THE 'QUICK SELECTION' TOOL, I SELECTED THE PART OF THE BRAIN THAT I WANTED TO BE USED FOR
MY MAIN IMAGE.
2 ) I THEN COPIED THAT SELECTED PART OF THE BRAIN (COMMAND, C) AND PASTED IT (⌘ , V) ONTO MY MAIN
IMAGE.
3 ) I THEN RESIZED THE IMAGE (⌘, T) LINING ITUP WITH THE MODELS HEAD WHILST CHANGING THE OPACITY OF THE XRAY BRAIN LAYER SO THAT THE POSITION OF THE XRAY LINED UP ACCURATELY WITH THE HUMAN.
4 ) I THEN EDITED THE MAIN IMAGE IN BLACK AND WHITE BY PRESSING IMAGE > BLACK AND WHITE >
MAXIMUM BLACK AND WHITE - MEANING THAT THE PLAIN IMAGEWOULD CONTRAST WELL WITH THE COLOURED XRAY BRAIN
5 ) I THEN CHANGED THE CONTRAST OF THE XRAY (IMAGE > CONTRAST) SO THAT IT WAS VERY BRIGHT AND
ITS COLOUR WAS VIBRANT.
Final Piece Selects